
阅读量:1
Centos7下部署nginx
ngxin是什么
Nginx (engine x) 是一个高性能的HTTP和反向代理web服务器,
Nginx是一款轻量级的Web 服务器/反向代理服务器及电子邮件(IMAP/POP3)代理服务器,在BSD-like 协议下发行。其特点是占有内存少,并发能力强,事实上nginx的并发能力确实在同类型的网页服务器中表现较好,中国大陆使用nginx网站用户有:百度、京东、新浪、网易、腾讯、淘宝等。
nginx的作用
反向代理、负载均衡
正向代理和反向代理的区别
正向代理是客户端和其他所有服务器的代理者,而反向代理是客户端和所要代理的服务器之间的代理
正向代理:一般是像科学上网,任何可以连接到该代理服务器的软件,就可以通过代理访问任何的其他服务器,然后把数据返回给客户端,这里代理服务器只对客户端负责
反向代理:客户端是无感知代理服务器的存在的,访问者者并不知道自己访问的是一个代理。因为客户端不需要任何配置就可以访问。例如我们访问百度,百度不止一个服务器,在多个地方都有服务器,而我们都是通过www.baidu.com这个域名去访问的。
安装部署
安装环境
系统:centos7 内存:4G
网络类型:NAT模式 硬盘大小:80G
最小化安装 语言:英语
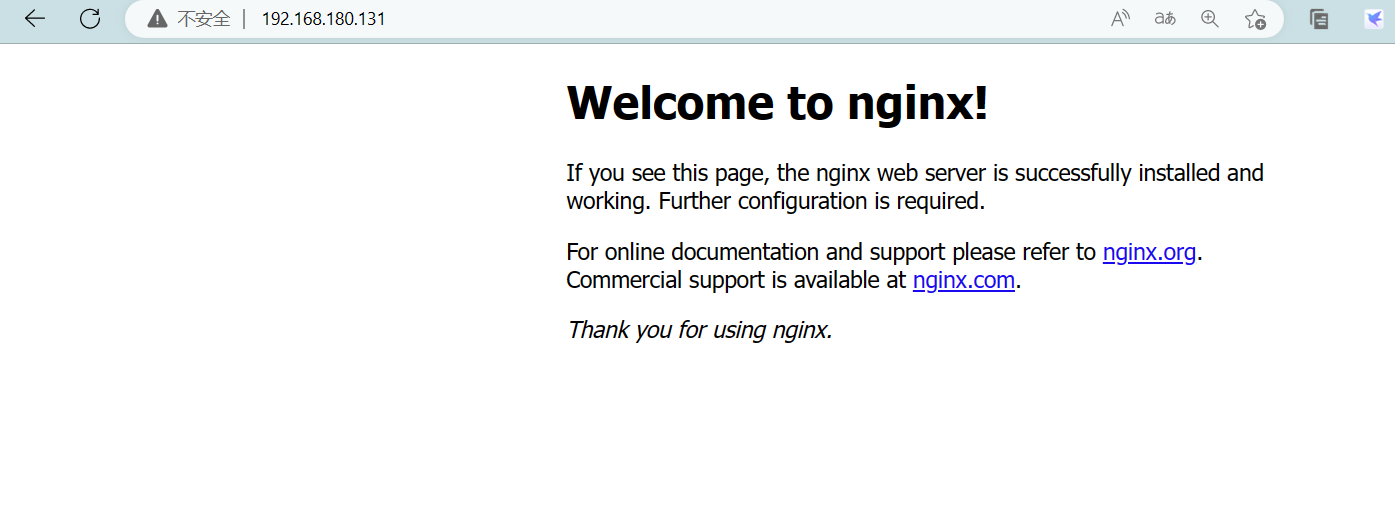
IP:192.168.180.131
yum安装
配置nginx源
# 执行如下命令 rpm -ivh http://nginx.org/packages/centos/7/noarch/RPMS/nginx-release-centos-7-0.el7.ngx.noarch.rpm # 运行如下 [root@localhost ~]# rpm -ivh http://nginx.org/packages/centos/7/noarch/RPMS/nginx-release-centos-7-0.el7.ngx.noarch.rpm Retrieving http://nginx.org/packages/centos/7/noarch/RPMS/nginx-release-centos-7-0.el7.ngx.noarch.rpm warning: /var/tmp/rpm-tmp.G6IXR0: Header V4 RSA/SHA1 Signature, key ID 7bd9bf62: NOKEY Preparing... ################################# [100%] Updating / installing... 1:nginx-release-centos-7-0.el7.ngx ################################# [100%] # 出现如上所示,则配置成功,也可以在/etc/yum.repos.d/ 下看到多了一个nginx.repo文件 [root@localhost ~]# cd /etc/yum.repos.d/ [root@localhost yum.repos.d]# ls CentOS-Base.repo CentOS-Media.repo docker-ce.repo CentOS-CR.repo CentOS-Sources.repo nginx.repo CentOS-Debuginfo.repo CentOS-Vault.repo CentOS-fasttrack.repo CentOS-x86_64-kernel.repo 执行以下命令开始安装
yum install -y nginx
启动nginx
# 输入如下命令,没有报错,则启动成功 nginx 浏览器访问, IP:80

源码编译安装
下载安装包
进入官网下载:nginx: download

上传至虚拟机
新建一个目录用来存放nginx 相关文件
mkdir -p /usr/local/nginx
将下载好的压缩包上传到刚刚新建好的目录下并解压
[root@localhost ~]# mkdir -p /usr/local/nginx [root@localhost nginx]# ll total 1052 -rw-r--r-- 1 root root 1073948 Mar 29 17:53 nginx-1.22.1.tar.gz # 解压 tar -zxvf nginx-1.22.1.tar.gz [root@localhost nginx]# tar -zxvf nginx-1.22.1.tar.gz nginx-1.22.1/ nginx-1.22.1/auto/ nginx-1.22.1/conf/ nginx-1.22.1/contrib/ nginx-1.22.1/src/ nginx-1.22.1/configure nginx-1.22.1/LICENSE nginx-1.22.1/README nginx-1.22.1/html/ ············ 安装编译环境
# 安装gcc,源码编译依赖 gcc 环境 yum -y install gcc-c++ # 安装pcre,pcre是一个perl库,包括perl兼容的正则表达式库,nginx的http模块使用pcre来解析正则表达式,所以需要安装pcre库 yum install -y pcre pcre-devel # 安装zlib,zlib 库提供了很多种压缩和解压缩的方式,nginx 使用 zlib 对 http 包的内容进行 gzip yum install -y zlib zlib-devel # 安装OpenSSL库 yum install -y openssl openssl-devel # 进入解压后的目录 [root@localhost ~]# cd /usr/local/nginx/ [root@localhost nginx]# ls nginx-1.22.1 nginx-1.22.1.tar.gz [root@localhost nginx]# cd nginx-1.22.1 [root@localhost nginx-1.22.1]# ll total 800 drwxr-xr-x 6 kaisa kaisa 326 Mar 29 17:55 auto -rw-r--r-- 1 kaisa kaisa 317399 Oct 19 16:02 CHANGES -rw-r--r-- 1 kaisa kaisa 485035 Oct 19 16:02 CHANGES.ru drwxr-xr-x 2 kaisa kaisa 168 Mar 29 17:55 conf -rwxr-xr-x 1 kaisa kaisa 2590 Oct 19 16:02 configure drwxr-xr-x 4 kaisa kaisa 72 Mar 29 17:55 contrib drwxr-xr-x 2 kaisa kaisa 40 Mar 29 17:55 html -rw-r--r-- 1 kaisa kaisa 1397 Oct 19 16:02 LICENSE drwxr-xr-x 2 kaisa kaisa 21 Mar 29 17:55 man -rw-r--r-- 1 kaisa kaisa 49 Oct 19 16:02 README drwxr-xr-x 9 kaisa kaisa 91 Mar 29 17:55 src # 执行安装 ./configure make make install # 执行完后 输入 whereis nginx 检查是否安装成功,如果出现路径则安装成功 [root@localhost nginx-1.22.1]# whereis nginx nginx: /usr/local/nginx # 启动nginx,需进入安装目录 [root@localhost ~]# cd /usr/local/nginx/ [root@localhost nginx]# ls conf html logs nginx-1.22.1 nginx-1.22.1.tar.gz sbin [root@localhost nginx]# ./sbin/nginx # 查看进程 [root@localhost nginx]# ps -ef | grep nginx root 6787 1 0 18:15 ? 00:00:00 nginx: master process ./sbin/nginx nobody 6788 6787 0 18:15 ? 00:00:00 nginx: worker process root 6790 1415 0 18:16 pts/1 00:00:00 grep --color=auto nginx 浏览器查看访问 IP:80
nginx常用命令
# 进入nginx的执行目录 cd /usr/local/nginx/sbin # 启动nginx ./nginx # 停止nginx(强制停止) ./nginx -s stop # 退出nginx(安全退出) ./nginx -s quit # 重新加载配置文件(修改过配置文件后使用) ./nginx -s reload # 防火墙相关命令 # 关闭防火墙 systemctl stop firewalld # 开启防火墙 systemctl start firewalld # 查看防火墙状态 systemctl status firewalld # 查看防火墙规则 firewall-cmd --list-all # 查询端口是否开放 firewall-cmd --query-port=80/tcp # 开放80端口 firewall-cmd --permanent --add-port=80/tcp # 关闭80端口 firewall-cmd --permanent --remove-port=8080/tcp # 重启防火墙(修改配置后要重启防火墙) firewall-cmd --reload docker部署nginx
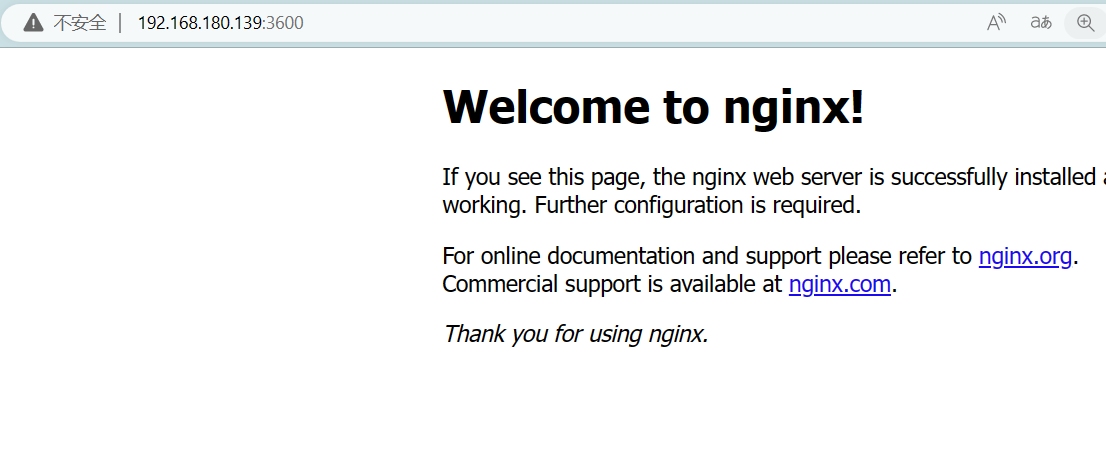
# 拉取镜像 [root@localhost ~]# docker pull nginx Using default tag: latest latest: Pulling from library/nginx f1f26f570256: Pull complete 7f7f30930c6b: Pull complete 2836b727df80: Pull complete e1eeb0f1c06b: Pull complete 86b2457cc2b0: Pull complete 9862f2ee2e8c: Pull complete Digest: sha256:2ab30d6ac53580a6db8b657abf0f68d75360ff5cc1670a85acb5bd85ba1b19c0 Status: Downloaded newer image for nginx:latest docker.io/library/nginx:latest # 查看镜像 [root@localhost ~]# docker images REPOSITORY TAG IMAGE ID CREATED SIZE nginx latest 080ed0ed8312 38 hours ago 142MB # 启动容器 [root@localhost ~]# docker run -d --name mynginx -p 3600:80 nginx c4c63ea02cd8c4fb0fb4f99ed97319a28d13d88d45564290e9a605909227b3ed # 查看容器进程 [root@localhost ~]# docker ps CONTAINER ID IMAGE COMMAND CREATED STATUS PORTS NAMES c4c63ea02cd8 nginx "/docker-entrypoint.…" 9 seconds ago Up 8 seconds 0.0.0.0:3600->80/tcp, :::3600->80/tcp mynginx 浏览器访问 虚拟机IP:3600 (这里我做了端口映射 ,默认的话是80端口)
访问成功!
