
阅读量:1
最近学习hugging face里面的物体检测模型,发现一个方便快捷的工具!
Gradio 是通过友好的 Web 界面演示机器学习模型的最快方式,以便任何人都可以在任何地方使用它!
一、核心优势:
使用这个开发这种演示机器学习模型的web界面会比django会快上不少!
只需要一个py文件即可实现模型界面创建,部署模型到服务器及时间响应所有功能。
二、重要参考连接:
官网如下:
别人的部署到hugging face的space服务器案例如下:(可全网任意访问-)
https://huggingface.co/spaces/ClassCat/DETR-Object-Detection
案例对应的代码如下:
https://huggingface.co/spaces/ClassCat/DETR-Object-Detection/tree/main
三、自己本地服务器部署的案例
自己的物检测及体识别的代码(亲测成功):
import torch from transformers import pipeline from PIL import Image import matplotlib.pyplot as plt import matplotlib.patches as patches from random import choice import io detector50 = pipeline(model="facebook/detr-resnet-50")#自动下载模型,大约200MB # detector101 = pipeline(model="facebook/detr-resnet-101") import gradio as gr COLORS = ["#ff7f7f", "#ff7fbf", "#ff7fff", "#bf7fff", "#7f7fff", "#7fbfff", "#7fffff", "#7fffbf", "#7fff7f", "#bfff7f", "#ffff7f", "#ffbf7f"] fdic = { "family" : "Arial", "style" : "italic", "size" : 15, "color" : "yellow", "weight" : "bold" } def get_figure(in_pil_img, in_results): plt.figure(figsize=(16, 10)) plt.imshow(in_pil_img) #pyplot.gcf() ax = plt.gca() for prediction in in_results: selected_color = choice(COLORS) x, y = prediction['box']['xmin'], prediction['box']['ymin'], w, h = prediction['box']['xmax'] - prediction['box']['xmin'], prediction['box']['ymax'] - prediction['box']['ymin'] ax.add_patch(plt.Rectangle((x, y), w, h, fill=False, color=selected_color, linewidth=3)) ax.text(x, y, f"{prediction['label']}: {round(prediction['score']*100, 1)}%", fontdict=fdic) plt.axis("off") return plt.gcf() def infer(model, in_pil_img): results = None if model == "detr-resnet-101": results = detector101(in_pil_img) else: results = detector50(in_pil_img) figure = get_figure(in_pil_img, results) buf = io.BytesIO() figure.savefig(buf, bbox_inches='tight') buf.seek(0) output_pil_img = Image.open(buf) return output_pil_img with gr.Blocks(title="DETR Object Detection - ClassCat", css=".gradio-container {background:lightyellow;}" ) as demo: #sample_index = gr.State([]) gr.HTML("""<div style="font-family:'Times New Roman', 'Serif'; font-size:16pt; font-weight:bold; text-align:center; color:royalblue;">DETR Object Detection</div>""") gr.HTML("""<h4 style="color:navy;">1. Select a model.</h4>""") model = gr.Radio(["detr-resnet-50", "detr-resnet-101"], value="detr-resnet-50", label="Model name") gr.HTML("""<br/>""") gr.HTML("""<h4 style="color:navy;">2-a. Select an example by clicking a thumbnail below.</h4>""") gr.HTML("""<h4 style="color:navy;">2-b. Or upload an image by clicking on the canvas.</h4>""") with gr.Row(): input_image = gr.Image(label="Input image", type="pil") output_image = gr.Image(label="Output image with predicted instances", type="pil") gr.Examples(['samples/cats.jpg', 'samples/detectron2.png'], inputs=input_image) gr.HTML("""<br/>""") gr.HTML("""<h4 style="color:navy;">3. Then, click "Infer" button to predict object instances. It will take about 10 seconds (on cpu)</h4>""") send_btn = gr.Button("Infer") send_btn.click(fn=infer, inputs=[model, input_image], outputs=[output_image]) gr.HTML("""<br/>""") gr.HTML("""<h4 style="color:navy;">Reference参考链接</h4>""") gr.HTML("""<ul>""") gr.HTML("""<li><a href="https://colab.research.google.com/github/facebookresearch/detr/blob/colab/notebooks/detr_attention.ipynb" target="_blank">Hands-on tutorial for DETR</a>""") gr.HTML("""</ul>""") #demo.queue() demo.launch(debug=True)界面及功能都正常,展示如下:

tips1:运行上述代码,如果报代理错误:
在终端使用如下代码再重新启动jupyter-noterbook,使用下面命令即可解决:
(base) jie@dell:~/桌面$ unset all_proxy; unset ALL_PROXY tip2:如果拖动自己的图片在预测框显示错误,原因是点击预测太快了。需要等图片上传完后点预测才能成功,点太快会出现错误两字。不限制图片尺寸。
四、入门gradio案例:
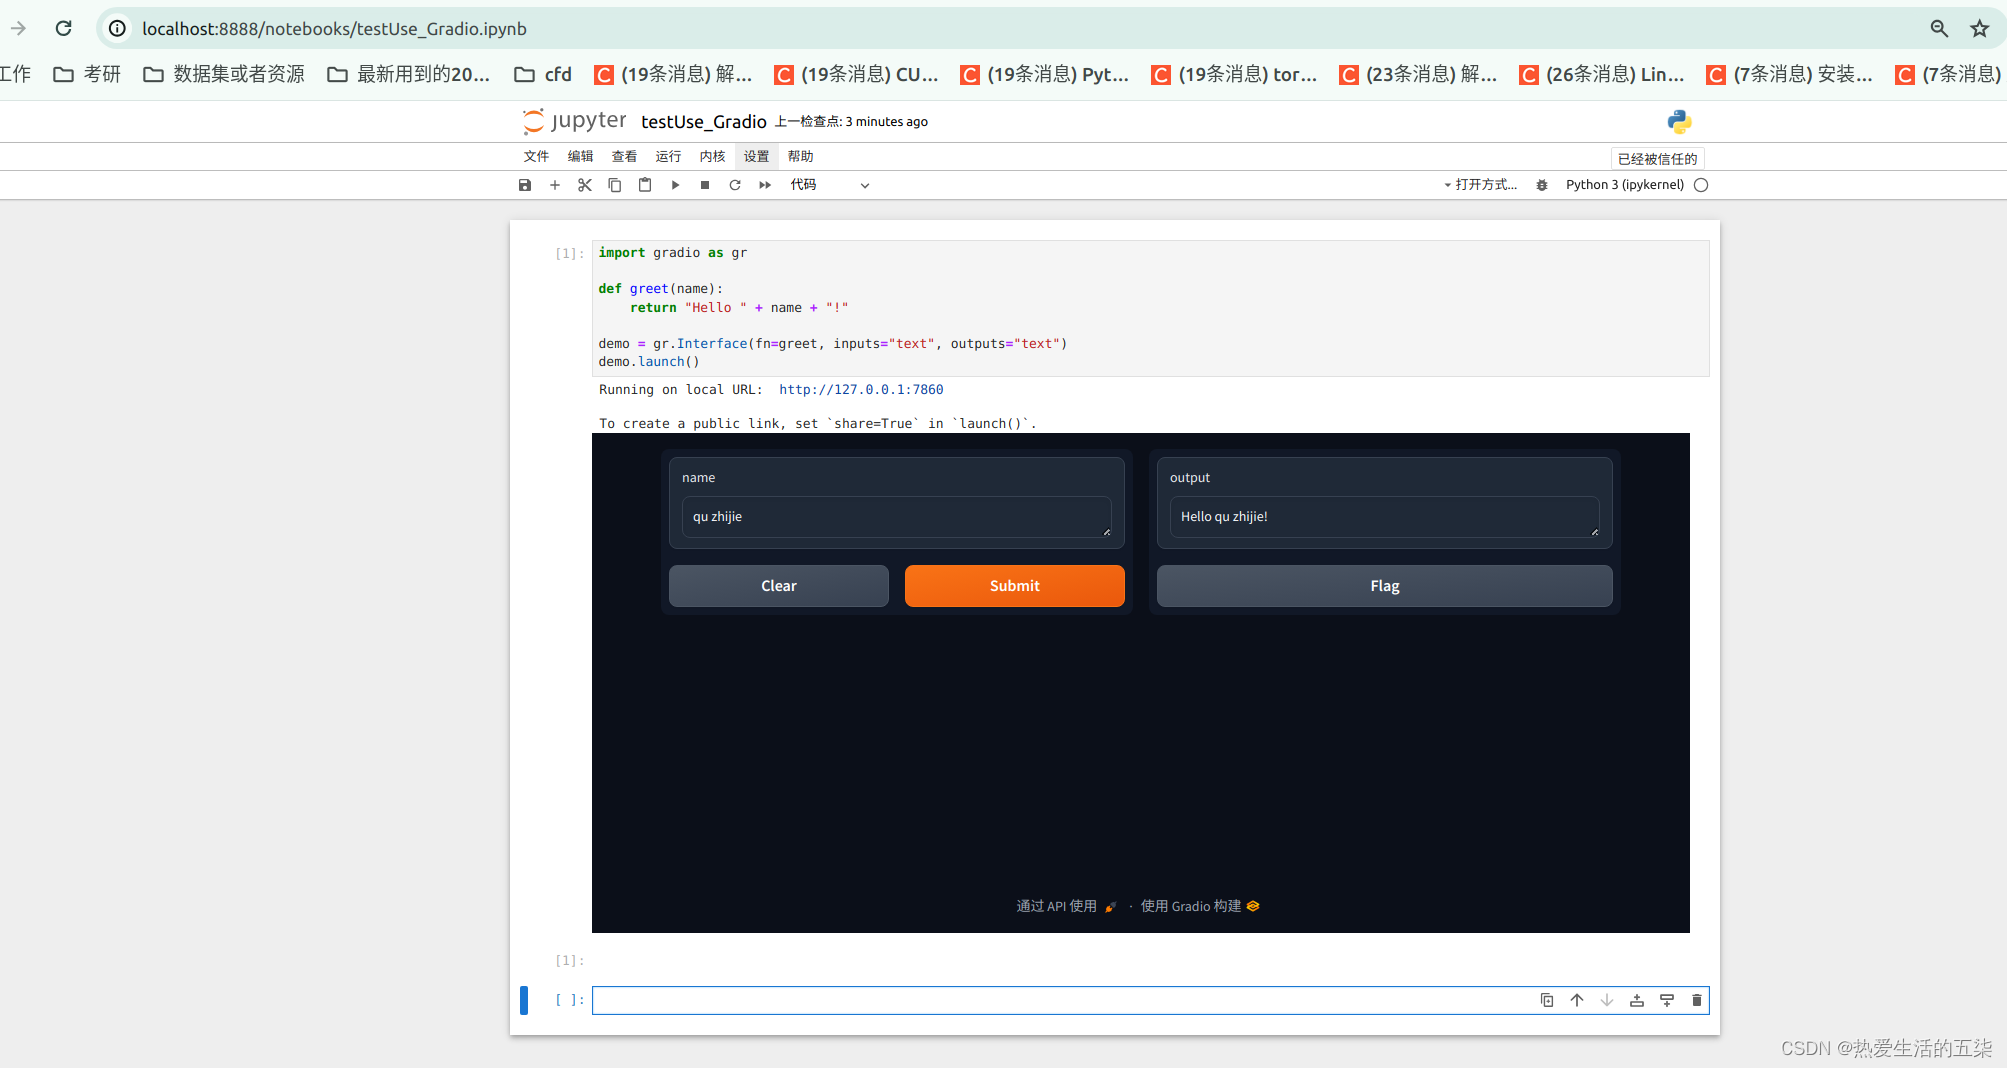
import gradio as gr def greet(name): return "Hello " + name + "!" demo = gr.Interface(fn=greet, inputs="text", outputs="text") demo.launch() 实现对姓名打招呼的功能,本地服务器的界面如下:
四、尝试在远程服务器上搭建(重要)
本人项目链接:https://huggingface.co/spaces/wuqi57/facebook-detr-resnet-50
在远程服务器上需要下载包和上传模型文件,官方提供了api:
https://huggingface.co/facebook/detr-resnet-50/tree/main?inference_api=true
以及打包好的space环境
https://huggingface.co/facebook/detr-resnet-50/tree/main?space_deploy=true
上面两种方式就可以直接使用,直接创建一个app.py文件就可以运行,避免了上传大量的模型文件和下载相应的库。(实例见本人上面的项目链接)
