一、前言
本文主要讲讲QT中服务器与客户端的使用方法,QT已经封装好了,调用相应类直接访问即可。本文以QT中的QT中的TCP为例子,讲下使用方法以及线程中使用。
二、正文
2.1 Sever的使用方法
2.1.1 思路
QT中Sever使用的时候大致步骤为:
1、创建监听的服务器对象
2、监听到数据信号,创建QTcpSocket的套接字对象
3、检测是否可以接收数据
4、信息发送,查看数据发送是否正常
总的来说,就是先确定要监听的地址与端口,然后数据在套接字中,套接字在QT中是QTcpSocket
封装的类,直接用就行,最后通过套接字接收数据或者发送数据即可。
2.1.2 代码示例
#ifndef WIDGET_H #define WIDGET_H #include <QWidget> #include <QTcpServer> #include <QTcpSocket> QT_BEGIN_NAMESPACE namespace Ui { class Widget; } QT_END_NAMESPACE class Widget : public QWidget { Q_OBJECT public: Widget(QWidget *parent = nullptr); ~Widget(); private: Ui::Widget *ui; QTcpServer *m_server; QTcpSocket *m_tcp; }; #endif // WIDGET_H #include "widget.h" #include "ui_widget.h" Widget::Widget(QWidget *parent) : QWidget(parent) , ui(new Ui::Widget) { ui->setupUi(this); ui->lineEdit_port->setText("8888"); //创建监听的服务器对象 m_server = new QTcpServer(this); connect(ui->pushButton_listen, &QPushButton::clicked, this, [=](){ m_server->listen(QHostAddress::Any, ui->lineEdit_port->text().toInt()); ui->pushButton_listen->setDisabled(true); }); //监听到数据信号,创建QTcpSocket的套接字对象 connect(m_server, &QTcpServer::newConnection, this, [=](){ m_tcp = m_server->nextPendingConnection(); //检测是否可以接收数据 connect(m_tcp, &QTcpSocket::readyRead, this, [=](){ QByteArray data = m_tcp->readAll(); ui->textEdit_historymsg->append("客户端说: " + data); }); }); //信息发送 connect(ui->pushButton_send, &QPushButton::clicked, this, [=](){ QString msg = ui->textEdit_sendmsg->toPlainText(); m_tcp->write(msg.toUtf8()); ui->textEdit_historymsg->append("服务器说: " + msg); }); } Widget::~Widget() { delete ui; } 2.1.3 细节讲解
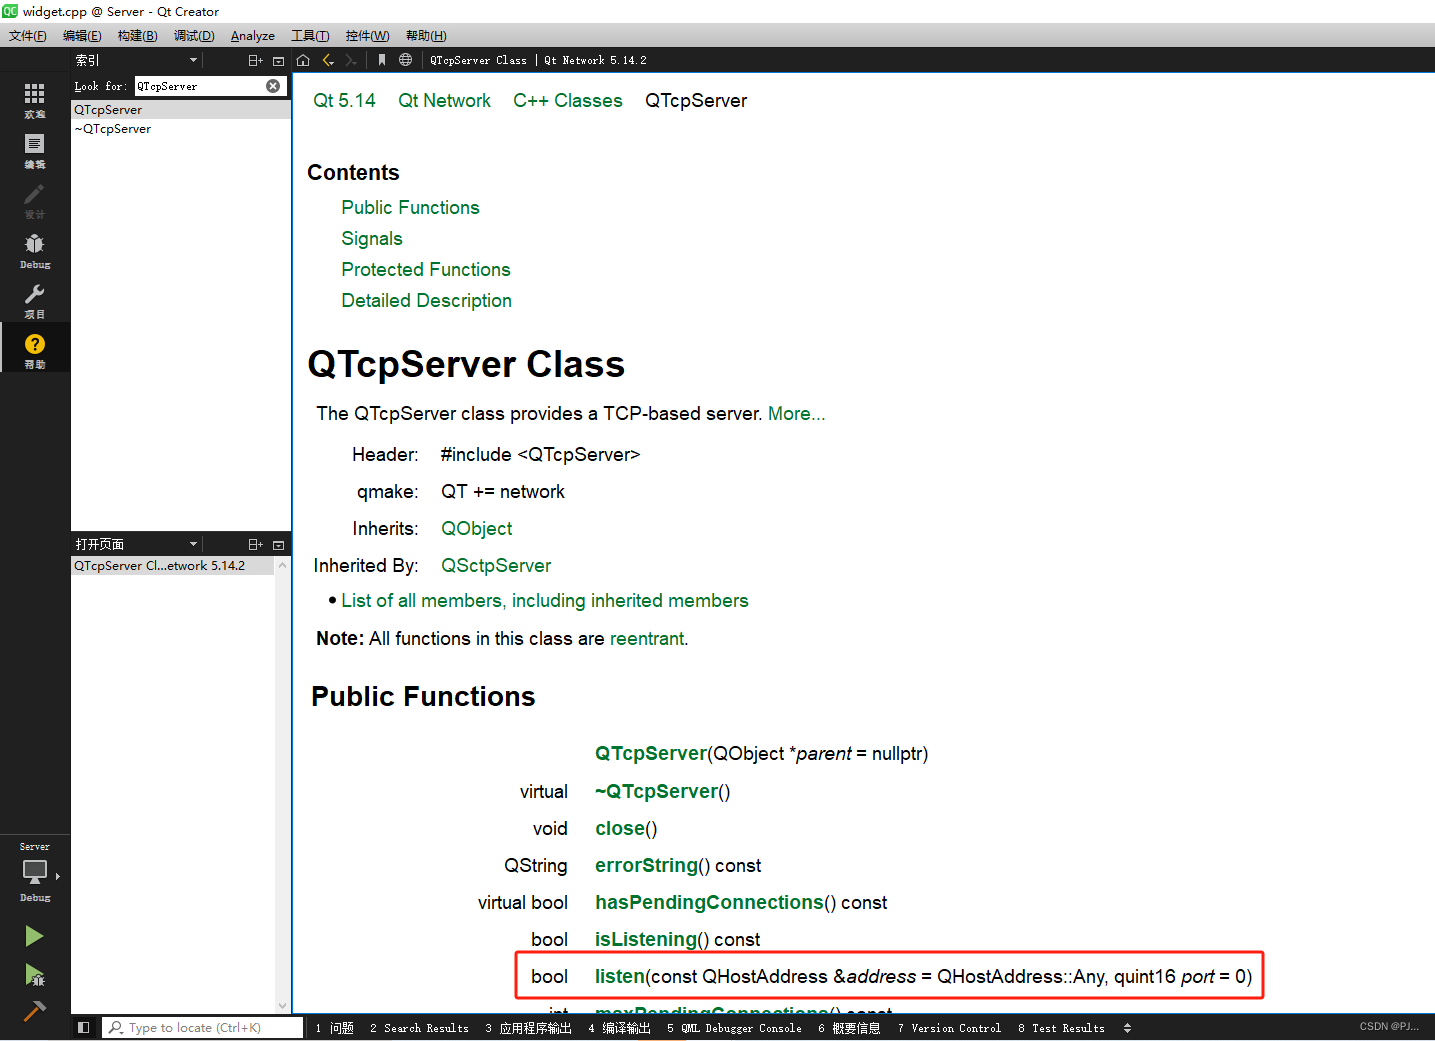
创建服务器对象QTcpServer,对象有监听的方法listen。

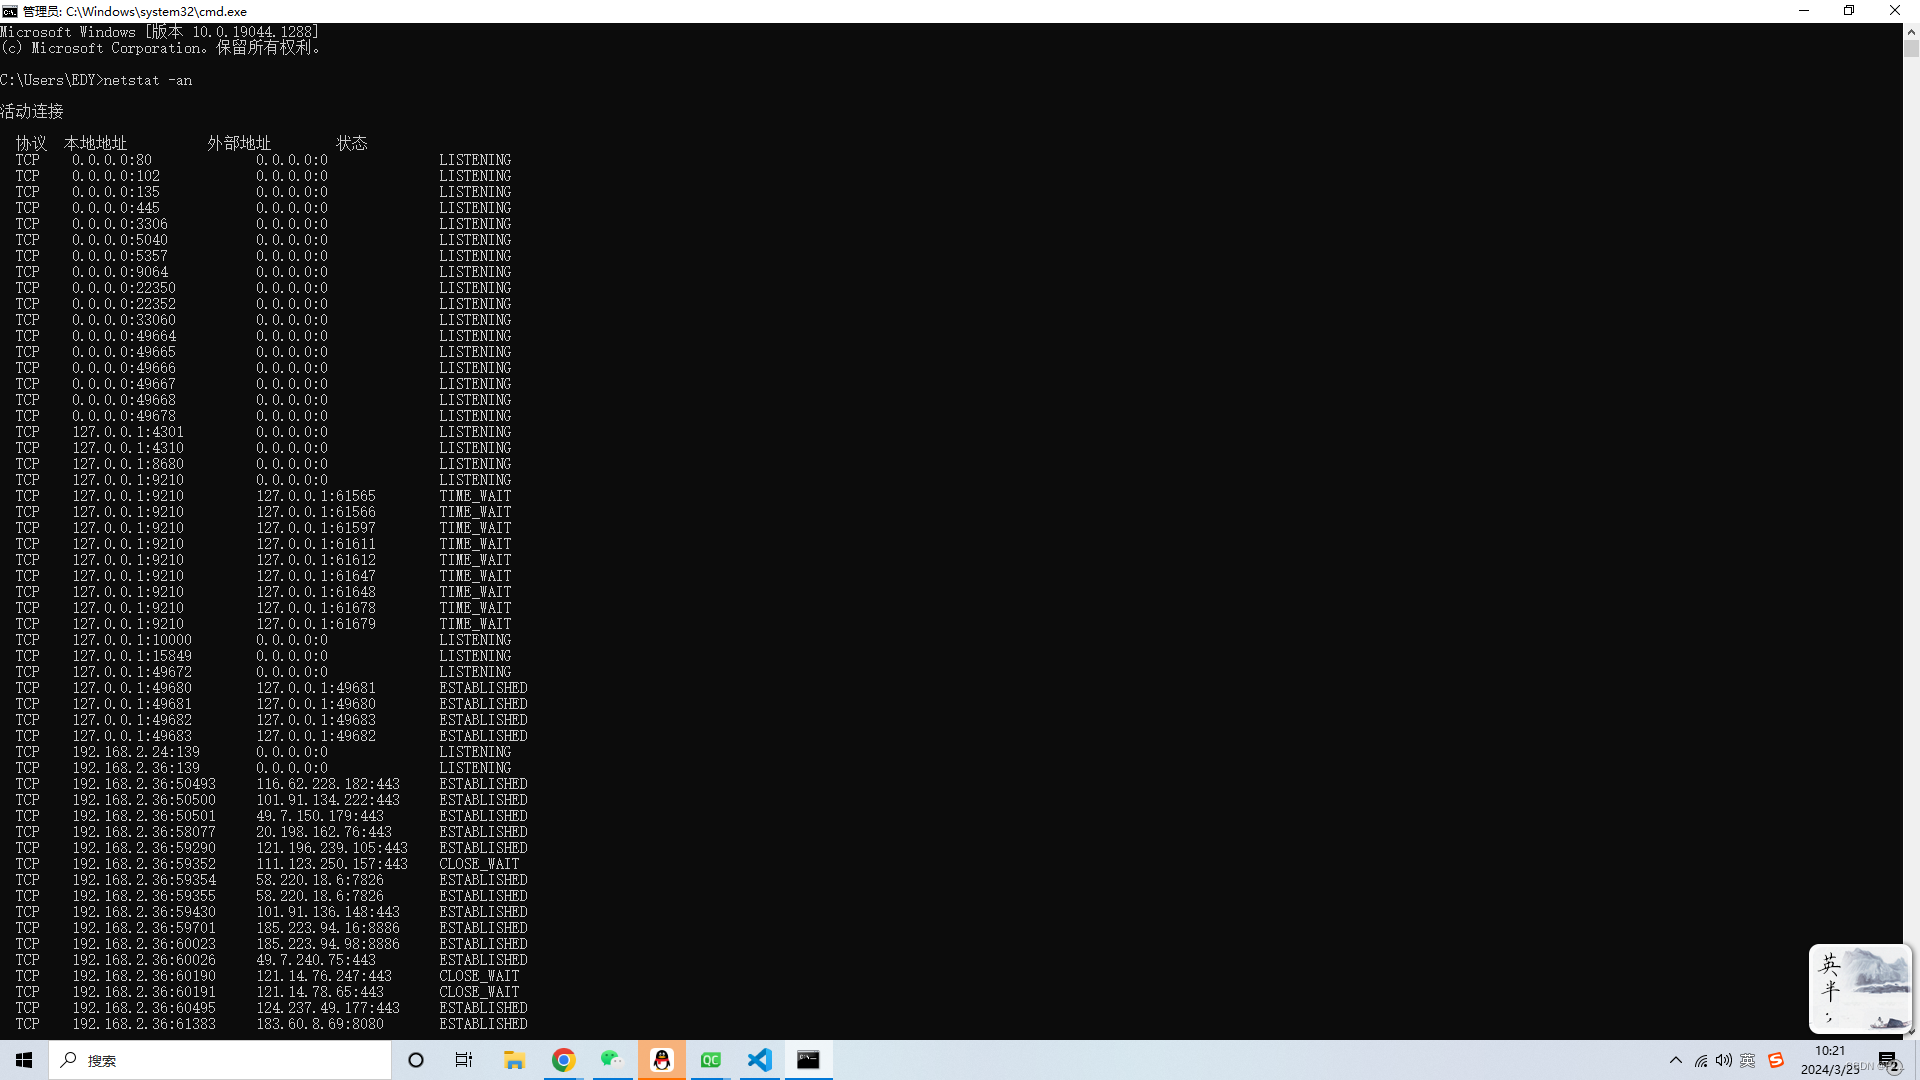
监听的地址设置所有即可访问你电脑可以收到的所有地址,可以用win+R进入cmd查看有哪些,比如:
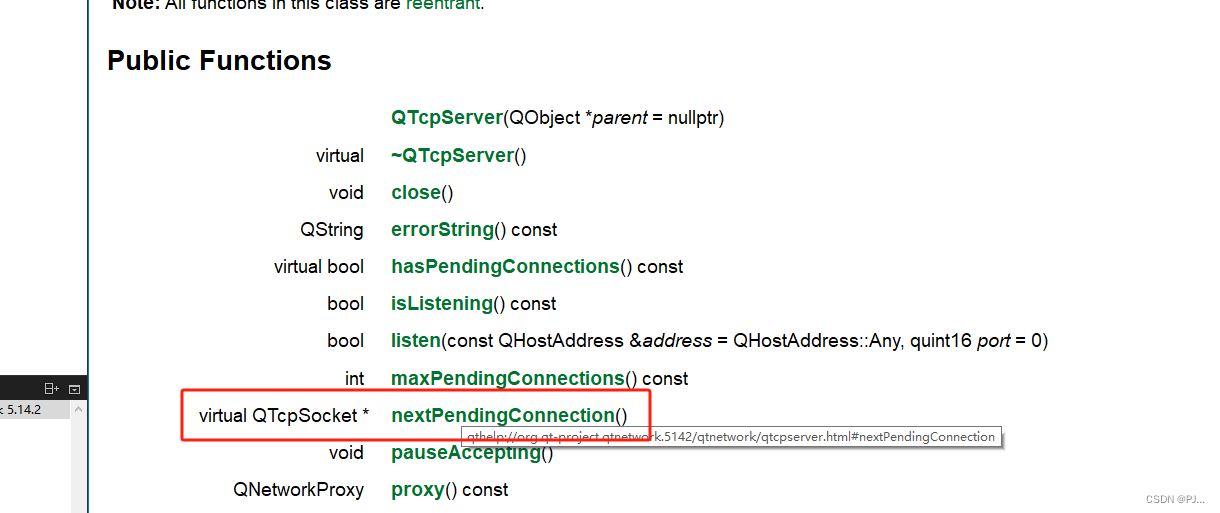
获取到新的连接后,将下一个挂起的连接作为已连接的QTcpSocket对象返回


准备读取信号有了后即可开始读取套接字内的数据。
2.1.4 演示
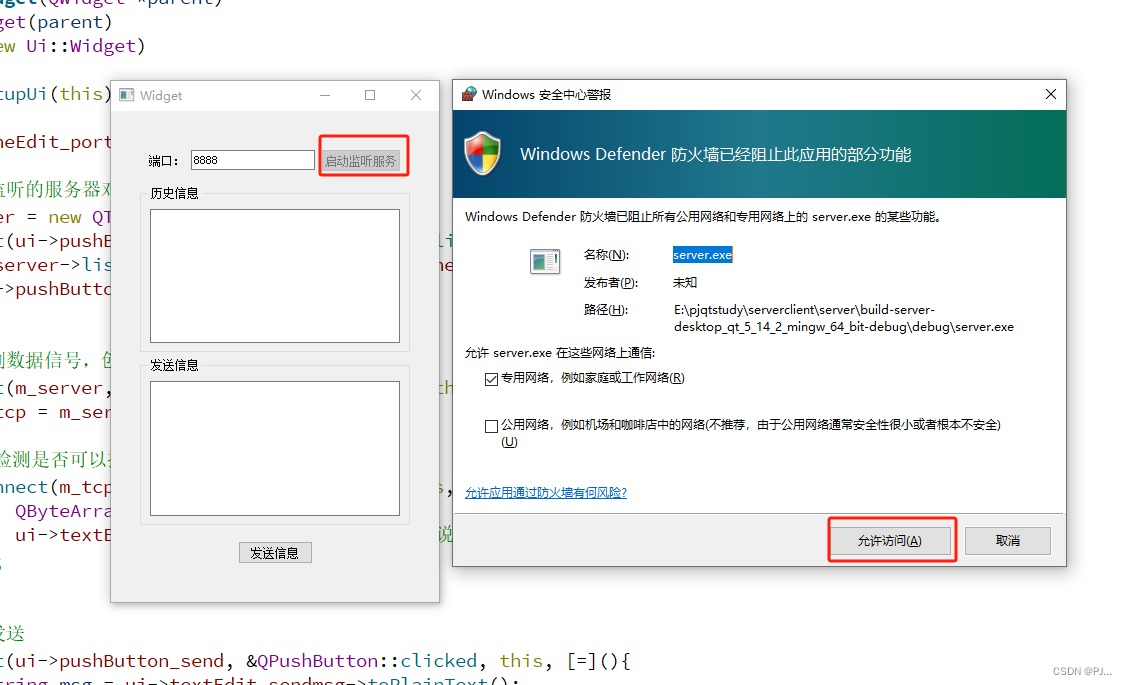
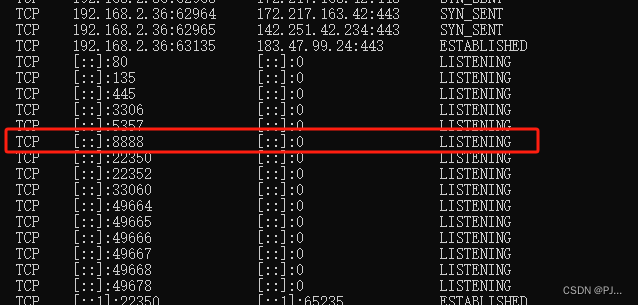
监听成功
2.2 Client的使用方法
2.2.1 思路
QT中Client使用的时候大致步骤为:
1、创建Socket对象,连接服务器
2、数据交互
3、根据需求断开连接
总体来说很简单,套接字连接好服务器的地址与端口即可,前提是服务器开启了,不然连接会失败。
2.2.2 代码示例
#ifndef WIDGET_H #define WIDGET_H #include <QWidget> #include <QTcpSocket> QT_BEGIN_NAMESPACE namespace Ui { class Widget; } QT_END_NAMESPACE class Widget : public QWidget { Q_OBJECT public: Widget(QWidget *parent = nullptr); ~Widget(); private: Ui::Widget *ui; QTcpSocket *m_socket; }; #endif // WIDGET_H #include "widget.h" #include "ui_widget.h" #include <QHostAddress> Widget::Widget(QWidget *parent) : QWidget(parent) , ui(new Ui::Widget) { ui->setupUi(this); ui->lineEdit_address->setText("192.168.2.24"); ui->lineEdit_connect->setText("8888"); //创建Socket对象,连接服务器 m_socket = new QTcpSocket(this); connect(ui->pushButton_connect, &QPushButton::clicked, this, [=](){ m_socket->connectToHost(QHostAddress(ui->lineEdit_address->text()), ui->lineEdit_connect->text().toInt()); ui->pushButton_connect->setDisabled(true); ui->pushButton_close->setEnabled(true); }); //断开连接 connect(ui->pushButton_close, &QPushButton::clicked, this, [=](){ m_socket->close(); ui->pushButton_connect->setEnabled(true); ui->pushButton_close->setDisabled(true); }); //数据交互 connect(m_socket, &QTcpSocket::connected, this, [=](){ ui->textEdit_history->append("服务器连接成功!!!!"); }); connect(m_socket, &QTcpSocket::readyRead, this, [=](){ ui->textEdit_history->append("服务器说: " + m_socket->readAll()); }); connect(m_socket, &QTcpSocket::disconnected, this, [=](){ ui->textEdit_history->append("服务器断开连接!!!!"); }); connect(ui->pushButton_send, &QPushButton::clicked, this, [=](){ m_socket->write(ui->textEdit_send->toPlainText().toUtf8()); ui->textEdit_history->append("客户端说: " + ui->textEdit_send->toPlainText().toUtf8()); }); } Widget::~Widget() { delete ui; } 2.2.3 细节讲解
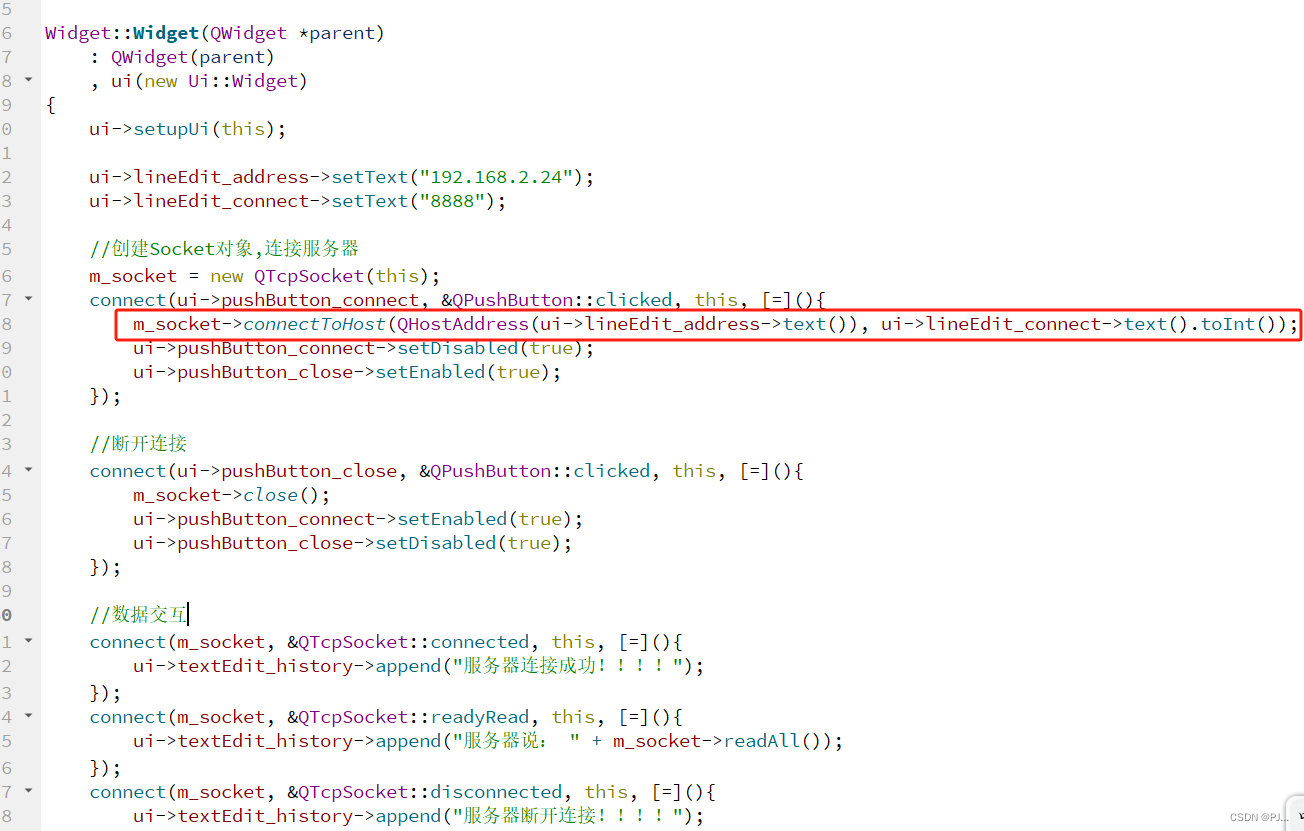
没啥可讲的,QT都封装好了,连接好就能直接用,比串口的请求响应简单方便多了。
2.2.4 演示
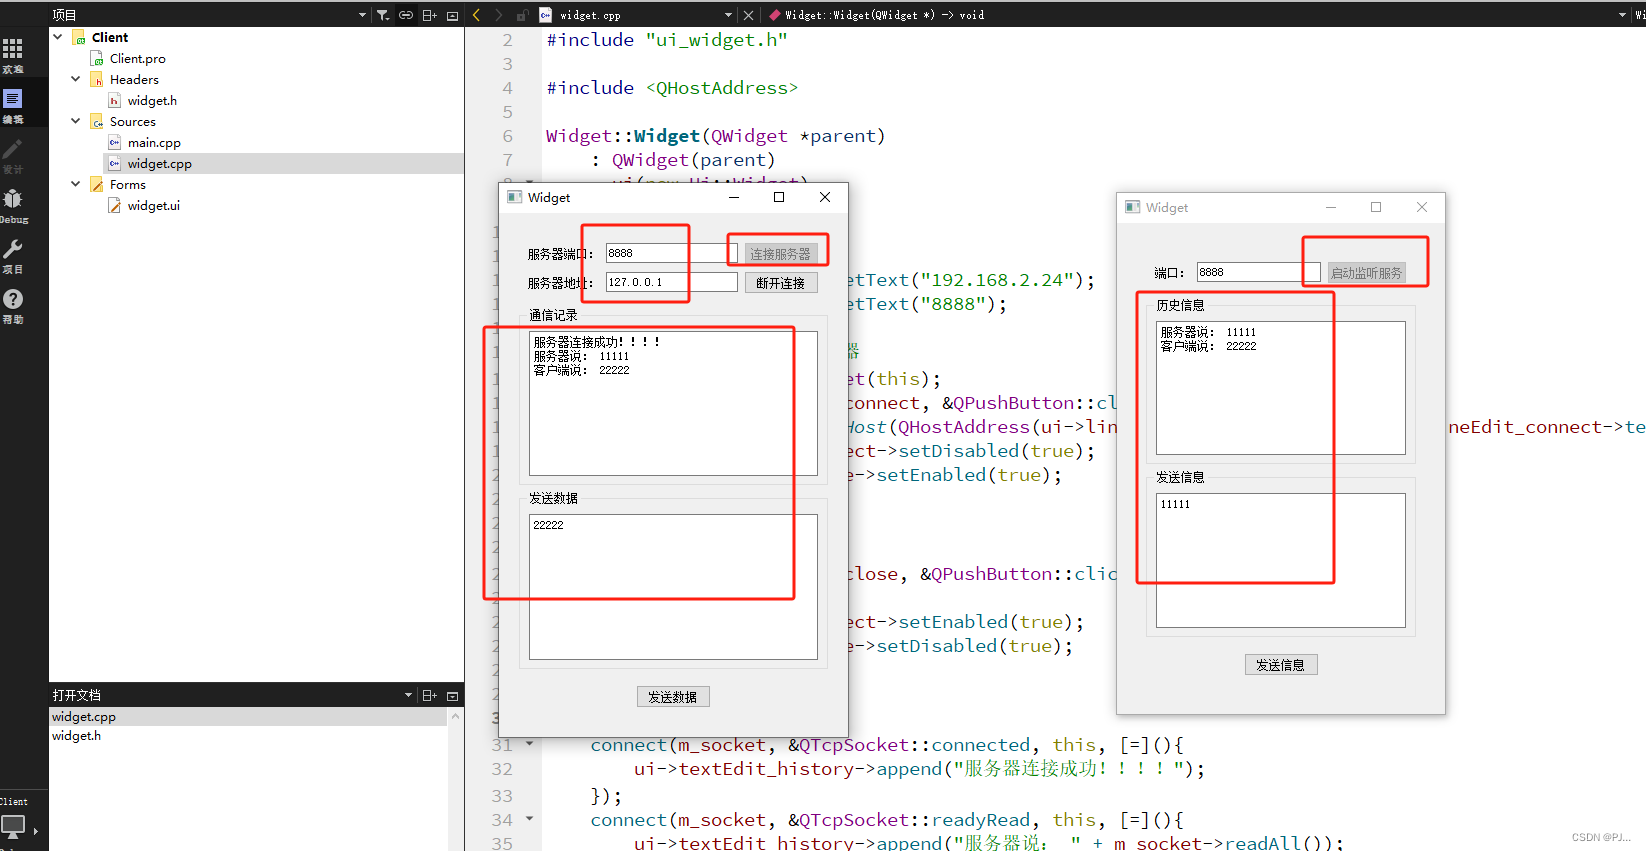
注意,先开启服务器,然后才能使用,局域网可以内部使用,外部使用需要申请IP。
2.3 线程中的使用
在实际项目中,数据的部分大多是写进线程的,关于线程的了解在前文中有讲述,需要的朋友可以自行查阅。
下面以文件从客户端传到服务器为例:
2.3.1 代码示例
2.3.1.1 Sever
#ifndef MAINWINDOW_H #define MAINWINDOW_H #include <QMainWindow> #include <QTcpServer> QT_BEGIN_NAMESPACE namespace Ui { class MainWindow; } QT_END_NAMESPACE class MainWindow : public QMainWindow { Q_OBJECT public: MainWindow(QWidget *parent = nullptr); ~MainWindow(); private slots: void on_pushButton_listen_clicked(); private: Ui::MainWindow *ui; QTcpServer* m_server; }; #endif // MAINWINDOW_H #ifndef ACCEPTFILE_H #define ACCEPTFILE_H #include <QObject> #include <QThread> #include <QTcpSocket> class acceptfile : public QThread { Q_OBJECT public: explicit acceptfile(QTcpSocket* tcp, QThread *parent = nullptr); signals: void over(); protected: void run() override; private: QTcpSocket* m_tcp; }; #endif // ACCEPTFILE_H #include "mainwindow.h" #include "ui_mainwindow.h" #include "acceptfile.h" #include <QMessageBox> MainWindow::MainWindow(QWidget *parent) : QMainWindow(parent) , ui(new Ui::MainWindow) { ui->setupUi(this); //创建服务器对象 m_server = new QTcpServer(this); //创建套接字 connect(m_server, &QTcpServer::newConnection, this, [=](){ QTcpSocket* tcp = m_server->nextPendingConnection(); //创建子线程 acceptfile* subthread = new acceptfile(tcp); subthread->start(); //释放资源 connect(subthread, &acceptfile::over, this, [=](){ subthread->quit(); subthread->wait(); subthread->deleteLater(); QMessageBox::information(this, "文件接收", "文件接收完毕!!!!!!!"); }); }); } MainWindow::~MainWindow() { delete ui; } void MainWindow::on_pushButton_listen_clicked() { m_server->listen(QHostAddress::Any, ui->lineEdit_port->text().toUShort()); } #include "acceptfile.h" #include <QFile> acceptfile::acceptfile(QTcpSocket* tcp, QThread *parent) : QThread(parent) { m_tcp = tcp; } void acceptfile::run() { //创建文件对象,保存客户端发送过来的文件内容 QFile* file = new QFile("C:/Users/EDY/Desktop/QTtest/recv.txt"); file->open(QFile::WriteOnly); //读取套接字socket的内容 connect(m_tcp, &QTcpSocket::readyRead, this, [=](){ static int total = 0; static int count = 0; if(count == 0) { m_tcp->read((char*)&total, 4); } //读出剩余数据 QByteArray all = m_tcp->readAll(); count += all.size(); file->write(all); //判断是否接收完毕 if(total == count) { m_tcp->close(); m_tcp->deleteLater(); file->close(); file->deleteLater(); emit over(); } }); //进入事件循环 exec(); } 2.3.1.2 Client
#ifndef MAINWINDOW_H #define MAINWINDOW_H #include <QMainWindow> #include <QThread> QT_BEGIN_NAMESPACE namespace Ui { class MainWindow; } QT_END_NAMESPACE class MainWindow : public QMainWindow { Q_OBJECT public: MainWindow(QWidget *parent = nullptr); ~MainWindow(); signals: void startconnect(unsigned short, QString); void sendFile(QString path); private slots: void on_connectserver_btn_clicked(); void on_file_btn_clicked(); void on_send_btn_clicked(); private: Ui::MainWindow *ui; }; #endif // MAINWINDOW_H #ifndef SENDFILE_H #define SENDFILE_H #include <QObject> #include <QTcpSocket> class sendfile : public QObject { Q_OBJECT public: explicit sendfile(QObject *parent = nullptr); //连接服务器 void connectServer(unsigned short address, QString ip); //发送文件 void sendFile(QString path); signals: void connectOK(); void gameover(); void curpercent(int); private: QTcpSocket* m_tcp; }; #endif // SENDFILE_H #include "mainwindow.h" #include "ui_mainwindow.h" #include "sendfile.h" #include <QFileDialog> #include <QMessageBox> MainWindow::MainWindow(QWidget *parent) : QMainWindow(parent) , ui(new Ui::MainWindow) { ui->setupUi(this); ui->port->setText("8888"); ui->IP->setText("192.168.2.24"); ui->progressBar->setRange(0, 100); ui->progressBar->setValue(0); //创建线程对象 QThread* thrd = new QThread; //创建任务 sendfile* worker = new sendfile; //将work放入子线程 worker->moveToThread(thrd); //连接服务器 connect(this, &MainWindow::startconnect, worker, &sendfile::connectServer); //连接文件发送 connect(this, &MainWindow::sendFile, worker, &sendfile::sendFile); //处理连接服务器的子线程数据 connect(worker, &sendfile::connectOK, this, [=](){ QMessageBox::information(this, "连接服务器", "连接成功!!!!"); }); connect(worker, &sendfile::gameover, this, [=](){ //资源释放 thrd->quit(); thrd->wait(); worker->deleteLater(); thrd->deleteLater(); }); //处理选择文件发送子线程数据 connect(worker, &sendfile::curpercent, ui->progressBar, &QProgressBar::setValue); //线程开始 thrd->start(); } MainWindow::~MainWindow() { delete ui; } void MainWindow::on_connectserver_btn_clicked() { QString ip = ui->IP->text(); unsigned short port = ui->port->text().toUShort(); emit startconnect(port, ip); } void MainWindow::on_file_btn_clicked() { QString path = QFileDialog::getOpenFileName(); if(path.isEmpty()) { QMessageBox::warning(this, "打开文件", "选择的文件路径不能为空!!"); return; } ui->file->setText(path); } void MainWindow::on_send_btn_clicked() { emit sendFile(ui->file->text()); } #include "sendfile.h" #include <QFile> #include <QFileInfo> sendfile::sendfile(QObject *parent) : QObject(parent) { } void sendfile::connectServer(unsigned short address, QString ip) { m_tcp = new QTcpSocket; m_tcp->connectToHost(ip, address); connect(m_tcp, &QTcpSocket::connected, this, &sendfile::connectOK); connect(m_tcp, &QTcpSocket::disconnected, this, [=](){ m_tcp->close(); m_tcp->deleteLater(); emit gameover(); }); } void sendfile::sendFile(QString path) { QFile file(path); QFileInfo info(path); int filesize = info.size(); file.open(QFile::ReadOnly); while (!file.atEnd()) { static int num = 0; if(num == 0) { m_tcp->write((char*)&filesize, 4); } QByteArray line = file.readLine(); num += line.size(); int percent = (num * 100 / filesize); emit curpercent(percent); m_tcp->write(line); } } 2.3.2 代码讲解
没啥好讲的,可以看看代码,写得很详细,文件传输部分跟普通数据也是一样的,区别就是需要用到文件的类QFile和QFileInfo,一个是文件对象,一个是文件信息对象。简单来说指文件是QFile,指文件的具体数据是QFileInfo。源码已上传
2.3.3 演示
QTcp服务器与客户端
