本人查阅无数资料,历时3周搭建成功
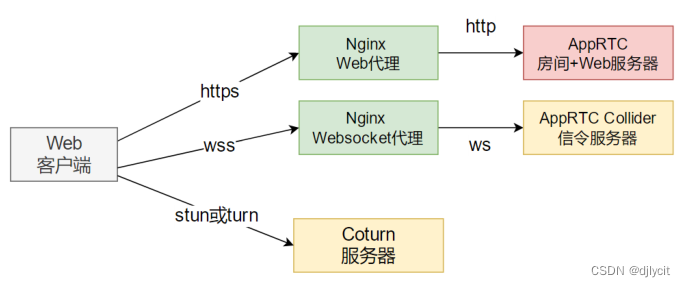
一、服务器组成
- AppRTC 房间+Web服务器 https://github.com/webrtc/apprtc
- Collider 信令服务器,在AppRTC源码里
- CoTurn coturn打洞+中继服务器
- Nginx 服务器,用于Web访问代理和Websocket代理。

AppRTC 房间+Web服务器使用python+js语言
AppRTC Collider信令服务器采用go语言
Coturn 采用C语言
在部署到公网时需要通过Nginx做Web和Websocket的代理连接
二、安装步骤
- 安装虚拟机
- 使用VMware虚拟机安装ubuntu 16.04
- WMware安装过程中的问题及解决方法
- 完美解决ubuntu18.04下vi不能使用方向键和退格键
【Linux】完美解决ubuntu18.04下vi不能使用方向键和退格键_ubuntu方向键变字母-CSDN博客 - Ubuntu 16.04 开启root用户和使用root用户登陆
Ubuntu 16.04 开启root用户和使用root用户登陆_ubuntu 16.04 怎么用root登录-CSDN博客 - VMware虚拟机和主机间复制粘贴共享剪贴板
VMware虚拟机和主机间复制粘贴共享剪贴板 - 知乎
- 完美解决ubuntu18.04下vi不能使用方向键和退格键
- 准备工作
- 安装vim
sudo apt‐get install vim - 安装ssh
sudo apt‐get install openssh‐server - 安装ifconfig工具
sudo apt‐get install net‐tools
sudo apt‐get install iputils‐ping - 更新源
- 备份source.list源
sudo mv /etc/apt/sources.list /etc/apt/sources.list.old - 执行命令打开sourcse.list文件
sudo vim /etc/apt/sources.list - 复制以下源到sources.list
# deb cdrom:[Ubuntu 16.04 LTS _Xenial Xerus_ ‐ Release amd64 (20160420.1)]/ xenial main restricted deb‐src http://archive.ubuntu.com/ubuntu xenial main restricted #Added by software‐properties deb http://mirrors.aliyun.com/ubuntu/ xenial main restricted deb‐src http://mirrors.aliyun.com/ubuntu/ xenial main restricted multiverse universe #Added by software‐properties deb http://mirrors.aliyun.com/ubuntu/ xenial‐updates main restricted deb‐src http://mirrors.aliyun.com/ubuntu/ xenial‐updates main restricted multiverse universe #Added by software‐properties deb http://mirrors.aliyun.com/ubuntu/ xenial universe deb http://mirrors.aliyun.com/ubuntu/ xenial‐updates universe deb http://mirrors.aliyun.com/ubuntu/ xenial multiverse deb http://mirrors.aliyun.com/ubuntu/ xenial‐updates multiverse deb http://mirrors.aliyun.com/ubuntu/ xenial‐backports main restricted universe multiverse deb‐src http://mirrors.aliyun.com/ubuntu/ xenial‐backports main restricted universe multiverse #Added by software‐properties deb http://archive.canonical.com/ubuntu xenial partner deb‐src http://archive.canonical.com/ubuntu xenial partner deb http://mirrors.aliyun.com/ubuntu/ xenial‐security main restricted deb‐src http://mirrors.aliyun.com/ubuntu/ xenial‐security main restricted multiverse universe #Added by software‐properties deb http://mirrors.aliyun.com/ubuntu/ xenial‐security universe deb http://mirrors.aliyun.com/ubuntu/ xenial‐security multiverse -
保存后更新源 sudo apt‐get update
- 安装git
sudo apt‐get install git
- 备份source.list源
- 安装vim
- 安装go
- ubuntu安装、升级、卸载golang
golang1.15下载地址
https://studygolang.com/dl/golang/go1.15.linux-amd64.tar.gz
- 开启trun服务
nohup turnserver -L 192.168.101.36 -a -u vrviu:viu@1234 -v -f -r nort.gov &
nohup $GOPATH/bin/collidermain ‐port=8089 ‐tls=false ‐room‐server="http://192.168.101.36:8090" & - 安装python工具
- 下载setuptools‐0.6c11‐py2.7.egg
https://pypi.python.org/packages/2.7/s/setuptools/setuptools-0.6c11-py2.7.egg
- 下载pip‐1.5.4.tar.gz
https://pypi.python.org/packages/source/p/pip/pip-1.5.4.tar.gz python2.7源码安装requests模块 https://www.cnblogs.com/nhxuan/p/17275502.html
https://pypi.python.org/packages/5b/0b/34be574b1ec997247796e5d516f3a6b6509c4e064f2885a96ed885ce7579/requests-2.12.4.tar.gz
- 下载setuptools‐0.6c11‐py2.7.egg
- 安装cnpm
- npm install -g cnpm@5.2.0 --registry=http://registry.npm.taobao.org/
- 修改配置文件
配置防火墙,允许访问8090端口(tcp,此端口用于web访问)
配置文件修改(主要是配置apprtc对应的conturn和collider相关参数vim/root/webrtc/apprtc/out/app_engine/constants.py修改后(填的都是外网IP,为了适合更多数朋友测试,我这里用的是内网的环境,在公网部署填入公网IP即可)
的完整配置文件。
# Copyright 2015 Google Inc. All Rights Reserved. """AppRTC Constants. This module contains the constants used in AppRTC Python modules. """ import os # Deprecated domains which we should to redirect to REDIRECT_URL. REDIRECT_DOMAINS = [ 'apprtc.appspot.com', 'apprtc.webrtc.org', 'www.appr.tc' ] # URL which we should redirect to if matching in REDIRECT_DOMAINS. REDIRECT_URL = 'https://appr.tc' ROOM_MEMCACHE_EXPIRATION_SEC = 60 * 60 * 24 MEMCACHE_RETRY_LIMIT = 100 LOOPBACK_CLIENT_ID = 'LOOPBACK_CLIENT_ID' # Turn/Stun server override. This allows AppRTC to connect to turn servers # directly rather than retrieving them from an ICE server provider. #ICE_SERVER_OVERRIDE = None # Enable by uncomment below and comment out above, then specify turn and stun ICE_SERVER_OVERRIDE = [ { "urls": [ "turn:192.168.101.64:3478?transport=udp", "turn:192.168.101.64:3478?transport=tcp" ], "username": "vrviu", "credential": "viu@1234" }, { "urls":[ "stun:192.168.101.64:3478" ] } ] ICE_SERVER_BASE_URL = 'https://192.168.101.64' ICE_SERVER_URL_TEMPLATE = '%s/v1alpha/iceconfig?key=%s' ICE_SERVER_API_KEY = os.environ.get('ICE_SERVER_API_KEY') HEADER_MESSAGE = os.environ.get('HEADER_MESSAGE') ICE_SERVER_URLS = [url for url in os.environ.get('ICE_SERVER_URLS', '').split(',') if url] # Dictionary keys in the collider instance info constant. WSS_INSTANCE_HOST_KEY = 'host_port_pair' WSS_INSTANCE_NAME_KEY = 'vm_name' WSS_INSTANCE_ZONE_KEY = 'zone' WSS_INSTANCES = [{ WSS_INSTANCE_HOST_KEY: '192.168.101.64:8088', WSS_INSTANCE_NAME_KEY: 'wsserver-std', WSS_INSTANCE_ZONE_KEY: 'us-central1-a' },{ WSS_INSTANCE_HOST_KEY: '192.168.101.64:8088', WSS_INSTANCE_NAME_KEY: 'wsserver-std-2', WSS_INSTANCE_ZONE_KEY: 'us-central1-f' }] WSS_HOST_PORT_PAIRS = [ins[WSS_INSTANCE_HOST_KEY] for ins in WSS_INSTANCES] # memcache key for the active collider host. WSS_HOST_ACTIVE_HOST_KEY = 'wss_host_active_host' # Dictionary keys in the collider probing result. WSS_HOST_IS_UP_KEY = 'is_up' WSS_HOST_STATUS_CODE_KEY = 'status_code' WSS_HOST_ERROR_MESSAGE_KEY = 'error_message' RESPONSE_ERROR = 'ERROR' RESPONSE_ROOM_FULL = 'FULL' RESPONSE_UNKNOWN_ROOM = 'UNKNOWN_ROOM' RESPONSE_UNKNOWN_CLIENT = 'UNKNOWN_CLIENT' RESPONSE_DUPLICATE_CLIENT = 'DUPLICATE_CLIENT' RESPONSE_SUCCESS = 'SUCCESS' RESPONSE_INVALID_REQUEST = 'INVALID_REQUEST' IS_DEV_SERVER = os.environ.get('APPLICATION_ID', '').startswith('dev') BIGQUERY_URL = 'https://www.googleapis.com/auth/bigquery' # Dataset used in production. BIGQUERY_DATASET_PROD = 'prod' # Dataset used when running locally. BIGQUERY_DATASET_LOCAL = 'dev' # BigQuery table within the dataset. BIGQUERY_TABLE = 'analytics'进入apprtc目录
#编译cd/root/webrtc/apprtcsudocnpminstallsudogrunt build 测试启动
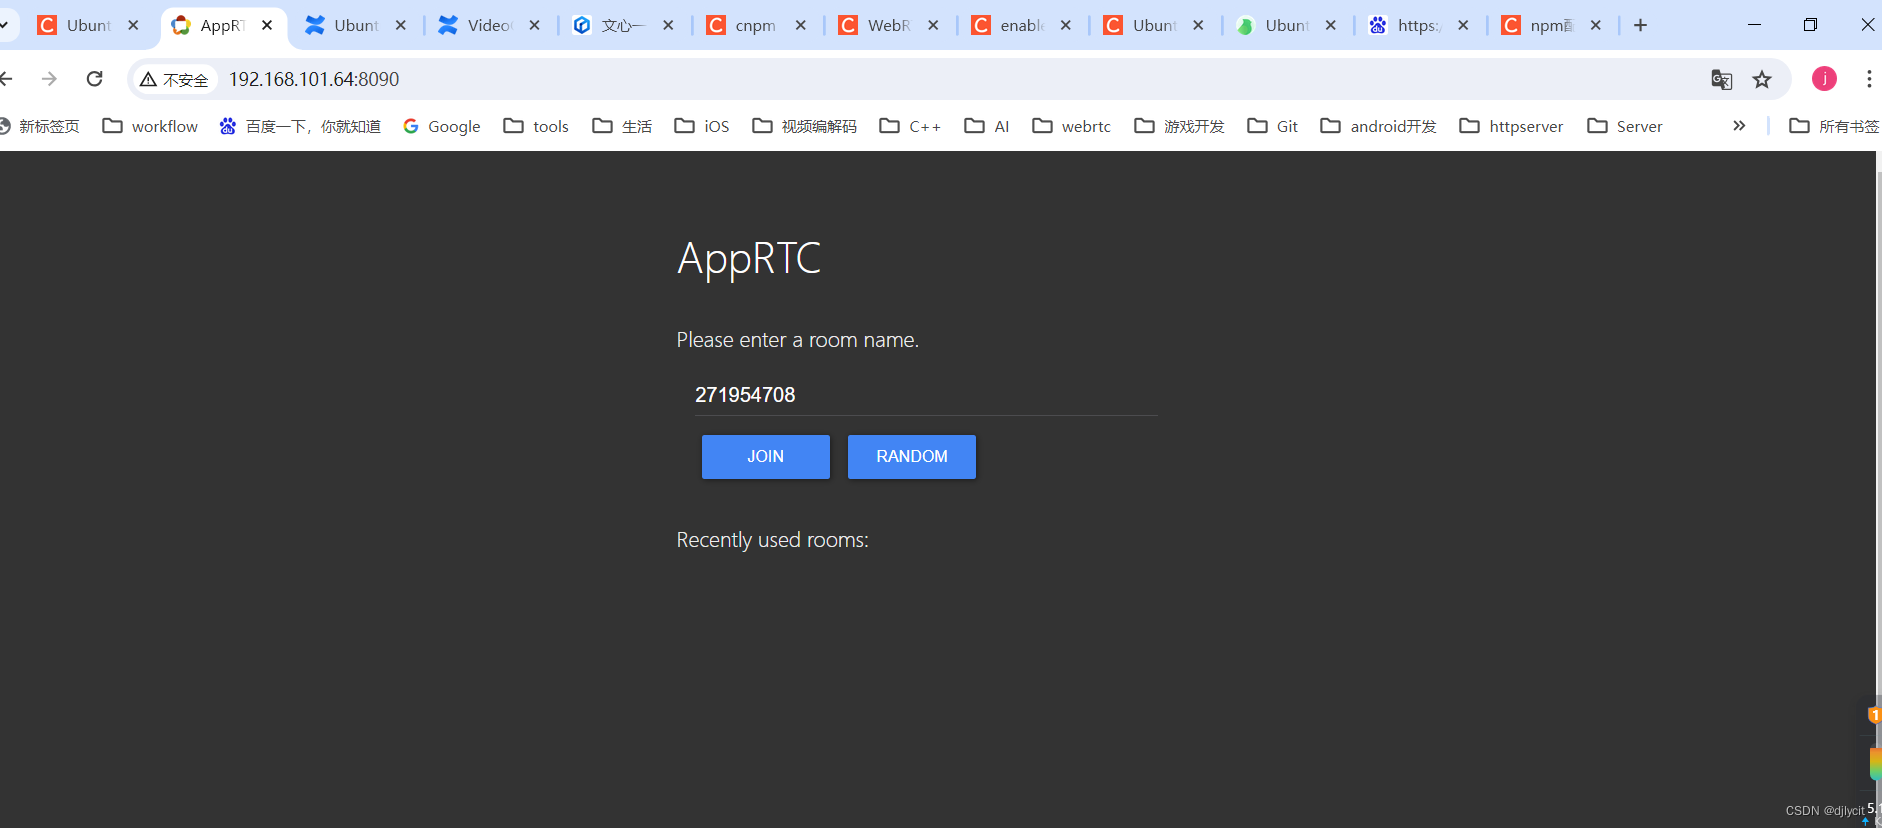
sudo/root/webrtc/google_appengine/dev_appserver.py --host=192.168.101.64 --port=8090/root/webrtc/apprtc/out/app_engine--skip_sdk_update_check
