
阅读量:4
stdin、stdout、stderr
注意:stderr是不缓存的,stdout则进行行间缓存。接下来我们看下行间缓存的效果,请参考以下代码:
#include "stdio.h" #include <unistd.h> int main(int argc, char** argv) { for (int i = 0; i < 5; i++) { fprintf(stdout, "This is stdout[%d]", i); sleep(1); } sleep(1); fprintf(stdout,"\n"); for (int i = 0; i < 5; i++) { fprintf(stderr, "This is stderr[%d]", i); sleep(1); } return 0; }运行程序会发现,stdout在输出\n时才瞬间输出
而stderr是一个个输出的
概念解释(可以略过)
在通常情况下,Linux/UNIX每个程序在开始运行的时刻,都会打开3个已经打开的stream. 分别用来输入,输出,打印诊断和错误信息。通常他们会被连接到用户终端。这3个句柄的类型为指向FILE的指针。可以被fprintf、fread等函数使用,他们在程序开始启动后,stdin, stdout, and stderr 的文件描述符是 0, 1和2,其它的文件描述符则排在其后。
Linux的本质就是一切皆文件,输入输出设备也是以文件形式存在和管理的。
重定向
#include <stdio.h> int main(int argc, char** argv) { printf("welcome to qiniu!\n"); fprintf(stdout, "I am martin!\n"); perror("are you all ready?\n"); fprintf(stderr, "Martin always stay with you!\n"); return 0; }覆盖式重定向>
默认情况下会使得标准输出重定向到文件:
./test > test.txt
- 标准输出重定向到文件: ./test 1 > testout.txt
- 标准错误重定向到文件: ./test 2 > testerr.txt
- 标准输出和标准出错重定向到文件: ./test > test.txt 2>&1
追加式重定向>>
标准输出重定向到文件: ./test 1 >> testout.txt
输出内容在testout,txt后面追加
程序代码中利用文件流进行重定向
利用freopen函数
函数原型:
#include<stdio.h> FILE *freopen(const char *filename, const char *mode, FILE *stream);- filename:需要重定向到的文件名或文件路径。
- mode:代表文件访问权限的字符串,如"r"(只读)、"w"(只写)、"a"(追加)等,这些模式与fopen函数中的模式相同。
- stream:需要被重定向的文件流指针,通常使用标准流文件(stdin、stdout、stderr)的指针。
返回值
- 如果成功,freopen函数返回一个新的文件指针,该指针指向被重新打开(或重定向)的文件。
- 如果失败,返回NULL,并设置全局变量errno为相应的错误代码。
代码示例:
#include<stdio.h> int main() { FILE* out = freopen("out.log","w",stdout); printf("%s\n","hello everybody!!!!!"); fprintf(stdout,"how are u?"); return 0; }将标准输出重定向至out.log文件
注意
如果我们实在要用printf或者fprintf去生成日志的话,最好还是加上这些信息,__FILE__ __LINE__ __FUNCTION__, __DATE__, __TIME__。
当然我们一定要明白,printf设计到文件,这会引起IO中断,因此执行printf比一般的指令的效率要低很多。
Log4cpp组件
step 1 : 安装log4cpp
- log4cpp的官网是:Log for C++ Project
wget https://nchc.dl.sourceforge.net/project/log4cpp/log4cpp-1.1.x%20%28new%29/log4cpp-1.1/log4cpp-1.1.3.tar.gz tar xzvf log4cpp-1.1.3.tar.gz cd log4cpp ./configure --prefix=/home/xiaomai/shared_bike/third/ --build=arm-linux make make install其中./configure --prefix=....后面的路径指的是log4cpp的安装位置,
我们将log4cpp安装至第三方文件夹third
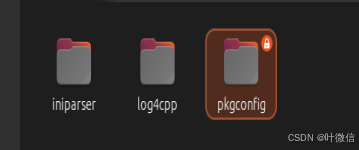
在shared_bike/third/lib文件夹下创建log4cpp文件夹,用来存放log4cpp对应的库文件
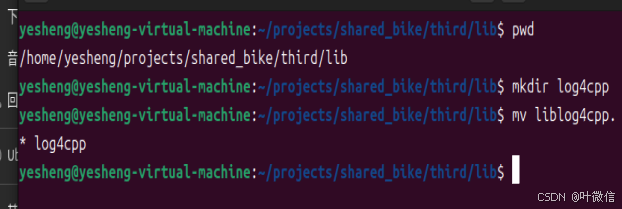
外面还剩一个pkgconfig暂时没用
step 2 : 包含头文件
#include <log4cpp/Category.hh> #include <log4cpp/FileAppender.hh> #include <log4cpp/PatternLayout.hh> #include <log4cpp/OstreamAppender.hh>step 3 : 初始化日志输出的目的地(appenders)
//以root身份输出到std::cout log4cpp::Appender* appender = new log4cpp::OstreamAppender("root", &std::cout); //以root身份输出到log文件 log4cpp::Appender *appender = new log4cpp::FileAppender("root", "test.log");appender有以下这些:
log4cpp::FileAppender // 输出到文件
log4cpp::RollingFileAppender // 输出到回卷文件,即当文件到达某个大小后回卷
log4cpp::OstreamAppender // 输出到一个ostream类
log4cpp::RemoteSyslogAppender // 输出到远程syslog服务器
log4cpp::StringQueueAppender // 内存队列
log4cpp::SyslogAppender // 本地syslog
log4cpp::Win32DebugAppender // 发送到缺省系统调试器
log4cpp::NTEventLogAppender // 发送到win 事件日志
上文,我们说过日志输出到终端或者文件中实际上是很慢的,会引起IO中断,所以我们可以输出到内存里StringQueueAppender,然后从StringQueueAppender输出到其它地方,这样我们的线程执行是比较高效的。
step 4 : 设置日志输出的格式
log4cpp::PatternLayout *patternLayout = new log4cpp::PatternLayout(); patternLayout->setConversionPattern("%d [%p] - %m%n"); appender->setLayout(patternLayout);日志输出格式控制有:
%% - 单一的%符号
%c - 分类
%d - 日期格式:日期格式字符后可能跟着一个用花括号括起来的日期格式说明符。例如,%d{%H:%M:%S,%l} 或 %d{%d %m %Y %H:%M:%S,%l}。如果没有给出日期格式说明符,则使用以下格式:“Wed Jan 02 02:03:55 1980”。日期格式说明符的语法与 ANSI C 函数 strftime 相同,但增加了一个说明符 %l,用于表示毫秒,并用零填充至三位数。
%m - 消息
%n - 换行符
%p - 优先级
%r - 表示自布局创建以来的毫秒数
%R - 表示自1970年1月1日以来的秒数
%u - 表示进程开始以来的时钟周期数
%x - 代表NDC(嵌套的诊断上下文),它是一种用于在多线程环境中跟踪用户特定信息的机制。
%t - 线程名称
默认情况下,PatternLayout的ConversionPattern设置为“%m%n”。
step 5 : 设置类别输出的(category)和日志优先级(priority)
代码示例:
log4cpp::Category &root = log4cpp::Category::getRoot(); root.setPriority(log4cpp::Priority::NOTICE); root.addAppender(appender);日志的级别总共有:NOTSET < DEBUG < INFO < NOTICE < WARN < ERROR < CRIT < ALERT < FATAL = EMERG。日志级别的意思是低于该级别的日志不会被记录。
step 6 : 定义一个宏
#define LOG(__level) log4cpp::Category::getRoot() << log4cpp::Priority::__level << __FILE__ << " " << __LINE__ << ": "
当然也可以使用Category定义的函数:
/** * Log a message with the specified priority. * @param priority The priority of this log message. * @param stringFormat Format specifier for the string to write * in the log file. * @param ... The arguments for stringFormat **/ virtual void log(Priority::Value priority, const char* stringFormat, ...) throw(); /** * Log a message with the specified priority. * @param priority The priority of this log message. * @param message string to write in the log file **/ virtual void log(Priority::Value priority, const std::string& message) throw(); void debug(const char* stringFormat, ...) throw(); void debug(const std::string& message) throw(); void info(const char* stringFormat, ...) throw();step 7 : 使用宏定义记录日志
LOG(DEBUG) << "i am happy."; LOG(INFO) << "oh, you happy, we happy."; LOG(NOTICE)<< "please do not contact me. "; LOG(WARN) << "i am very busy now."; LOG(ERROR) << "oh, what happed?";log4cpp实战
在log4cpp的使用过程中可以封装一个单例.
在实际工程上应用,我们是使用日志配置文件去控制日志记录的。接下来让我们先配置一个日志配置文件:
1.在conf文件夹下创建配置文件log.conf
#定义Root category的属性 log4cpp.rootCategory=DEBUG, RootLog #定义RootLog属性 log4cpp.appender.RootLog=RollingFileAppender log4cpp.appender.RootLog.layout=PatternLayout #log4cpp.appender.RootLog.layout.ConversionPattern=%d{% m-%d %H:%M:%S %l} [%t][%p]%m%n log4cpp.appender.RootLog.layout.ConversionPattern=%d{%m-%d %H:%M:%S %l} [%t][%p]%m%n log4cpp.appender.RootLog.fileName=/var/log/qiniu_bike.log log4cpp.appender.RootLog.maxFileSize=268435456 #256MB log4cpp.appender.RootLog.fileNamePattern=qiniu_bike_%i.log log4cpp.appender.RootLog.maxBackupIndex=2562.对log4cpp进行封装
头文件:
logger.h
#ifndef DISTRIBUTED_LOGGER_H #define DISTRIBUTED_LOGGER_H #include <iostream> #include <string> #include <log4cpp/Category.hh> #include <log4cpp/FileAppender.hh> #include <log4cpp/OstreamAppender.hh> #include <log4cpp/PatternLayout.hh> #include <log4cpp/RemoteSyslogAppender.hh> #include <log4cpp/PropertyConfigurator.hh> using namespace std; class Logger { public: bool init(const string& log_conf_file); //初始化 log.conf 文件 用 log4cpp的接口对 log.conf 文件进行读取、配置 static Logger* instance() { return &instance_; } //单例模式 在任何地方都只有一个对象 log4cpp::Category* GetHandle() { return category_; } protected: static Logger instance_; //单例模式对象 log4cpp::Category* category_; //通过该对象进行日志的操作 }; #define LOG_INFO Logger::instance()->GetHandle()->info //info 为 category_ 对象的成员函数 #define LOG_DEBUG Logger::instance()->GetHandle()->debug //debug 为 category_ 对象的成员函数 #define LOG_ERROR Logger::instance()->GetHandle()->error //error 为 category_ 对象的成员函数 #define LOG_WARN Logger::instance()->GetHandle()->warn //warn 为 category_ 对象的成员函数 #endif解析:
1.Logger类中有一个静态单例,我们调用Logger的方法时使用这个静态单例就行
2.category_表示单例的日志类别,在init执行的时候对其进行初始化
3.instance()函数返回这个静态单例
4.宏定义了一些宏函数方便发送message
cpp文件:
logger.cpp
#include "logger.h" Logger Logger::instance_; //静态成员需要在外部进行定义 //初始化 log.conf 文件 用 log4cpp的接口对 log.conf 文件进行读取、配置 bool Logger::init(const string& log_conf_file) { try { log4cpp::PropertyConfigurator::configure(log_conf_file); //使用 log4cpp 的接口初始化 log.conf 文件 } catch (log4cpp::ConfigureFailure& f) //如果失败 { cerr << " load log config file " << log_conf_file.c_str() << " failed with result : " << f.what() << endl; // f.what() 函数可以获取错误原因 return false; } //如果成功 执行以下代码 category_ = &log4cpp::Category::getRoot(); return true; }PS
1.对静态单例instance_进行了定义:
2.log4cpp::PropertyConfigurator::configure(log_conf_file)方法读取配置文件
3.改动CMakeLists.txt
修改src/common下的CMakeLists.txt
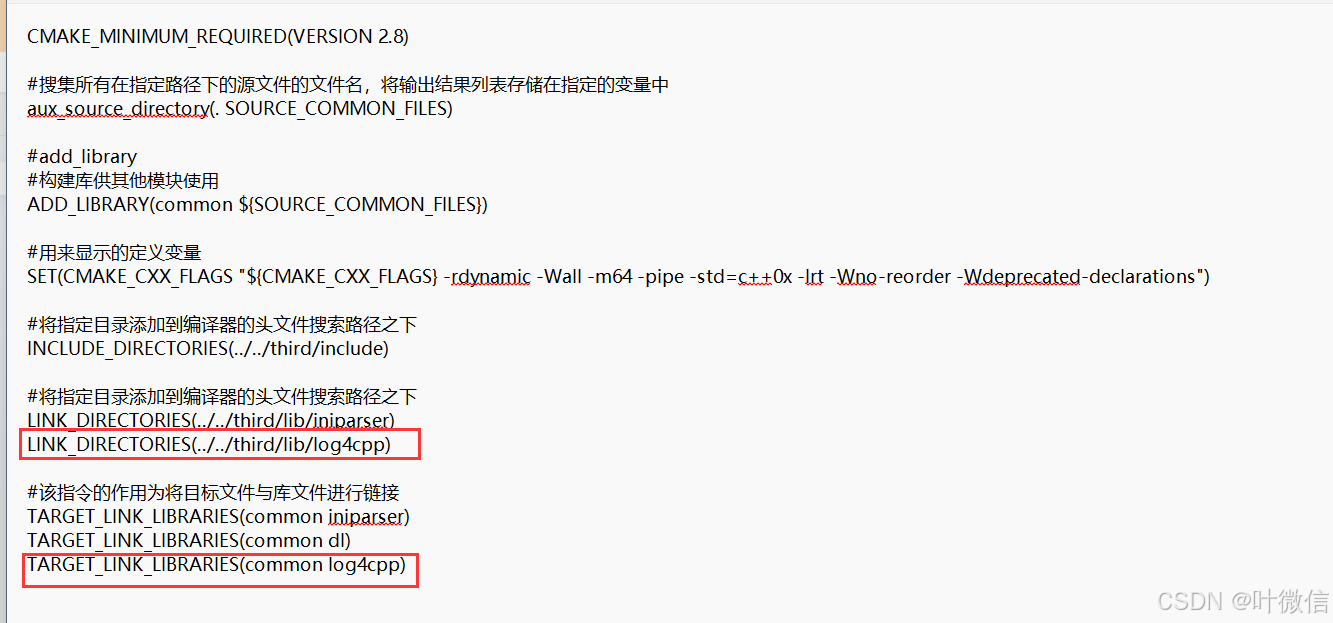
如图所示,修改两个地方
4.修改main.cpp
#include"iniconfig.h" #include"configdef.h" #include"logger.h" int main(int argc,char** argv) { if (argc != 3)//指定两个配置文件:服务器配置、项目日志配置 { printf("Please input shbk<config file path> <log file config>!\n"); return -1; } //初始化日志 if (!Logger::instance()->init(std::string(argv[2]))) { fprintf(stderr,"init log module failed.\n"); return -2; } Iniconfig config; if (!config.loadfile(std::string(argv[1]))) { /*printf("load project config %s failed.\n",argv[1]);*/ LOG_ERROR("load project config % s failed.\n",argv[1]); //上面的代码相当于:Logger::instance()->GetHandle()->error(.......) return -3; } st_env_config conf_args = config.getconfig(); LOG_INFO("[database] ip:%s port:%d user:%s pwd:%s db_name:%s [server] port:%d \n", conf_args.db_ip.c_str(), conf_args.db_port, conf_args.db_user.c_str(), conf_args.db_pwd.c_str(), conf_args.db_name.c_str(), conf_args.svr_port); /*printf("[database] ip:%s port:%d user:%s pwd:%s db_name:%s [server] port:%d \n",conf_args.db_ip.c_str(),conf_args.db_port,conf_args.db_user.c_str(),conf_args.db_pwd.c_str(),conf_args.db_name.c_str(),conf_args.svr_port);*/ return 0; }PS:
a.argc由原来的两个变为了3个: ./shared_bike <项目配置> <项目日志配置>
b.需要判断Logger是否初始化成功
c.Logger初始化前使用fprintf输出,Logger初始化成功后可以利用Logger的宏寒素进行输出
5.运行程序
在shared_bike/src文件夹下执行
cmake . make sudo ./shared_bike ../conf/shared_bike.ini ../conf/log.conf 注意一定要在root权限下运行shared_bike,否则没有/var/log的写入权限。
