环境描述
部署环境及版本说明
操作系统:Kylin Linux Advanced Server V10 SP3
Zabbix:Zabbix 6.4.1 for rhel(组件包含:Server,Frontend,Agent)数据库(Mysql)WEB SERVER(Apache)
Mysql数据库:mysql Ver 8.0.30以上
PHP:PHP 7.4.33
Httpd:Apache/2.4.43
银河麒麟兼容适配查询 https://eco.kylinos.cn/zoology/commercial.html
安装
1.安装Httpd
dnf install -y httpd #dnf 安装Apache/2.4.43 systemctl start httpd #启动Httpd服务 systemctl status httpd #检查Httpd服务状态 systemctl enable httpd #将Httpd服务设置开机启动 httpd -v #查看Httpd版本信息 设置防火墙策略
firewall-cmd --zone=public --add-port=80/tcp --permanent #添加80端口 systemctl restart firewalld.service #重启防火墙 firewall-cmd --list-all #检测端口设置是否生效 2.安装php
wget https://www.php.net/distributions/php-7.4.33.tar.gz #下载php安装包 tar -zxvf php-7.4.33.tar.gz #解压安装包 cd php-7.4.33/ 安装库支持
yum install libxml2-devel libjpeg-devel libpng-devel openssl-devel libcurl-devel libxslt-devel libzip-devel wget vim unzip oniguruma-devel gd gd-devel freetype freetype-devel sqlite-devel 
安装完成反馈信息
编译安装参数设置
./configure --prefix=/usr/local/php74 --with-config-file-path=/usr/local/php74/etc --with-mysqli=mysqlnd --with-pdo-mysql=mysqlnd --enable-gd --with-jpeg=/usr/local/jpeg --with-freetype=/usr/local/freetype --with-xpm=/usr/lib64 --with-zlib-dir=/usr/local/zlib --with-iconv --with-libxml --enable-xml --enable-bcmath --enable-shmop --enable-sysvsem --enable-inline-optimization --enable-opcache --enable-mbregex --enable-fpm --enable-mbstring --enable-ftp --with-openssl --enable-pcntl --enable-sockets --with-xmlrpc --with-zip --enable-soap --without-pear --with-gettext --enable-session --with-curl --enable-ctype --enable-mysqlnd --enable-pdo --with-zlib --with-bz2 
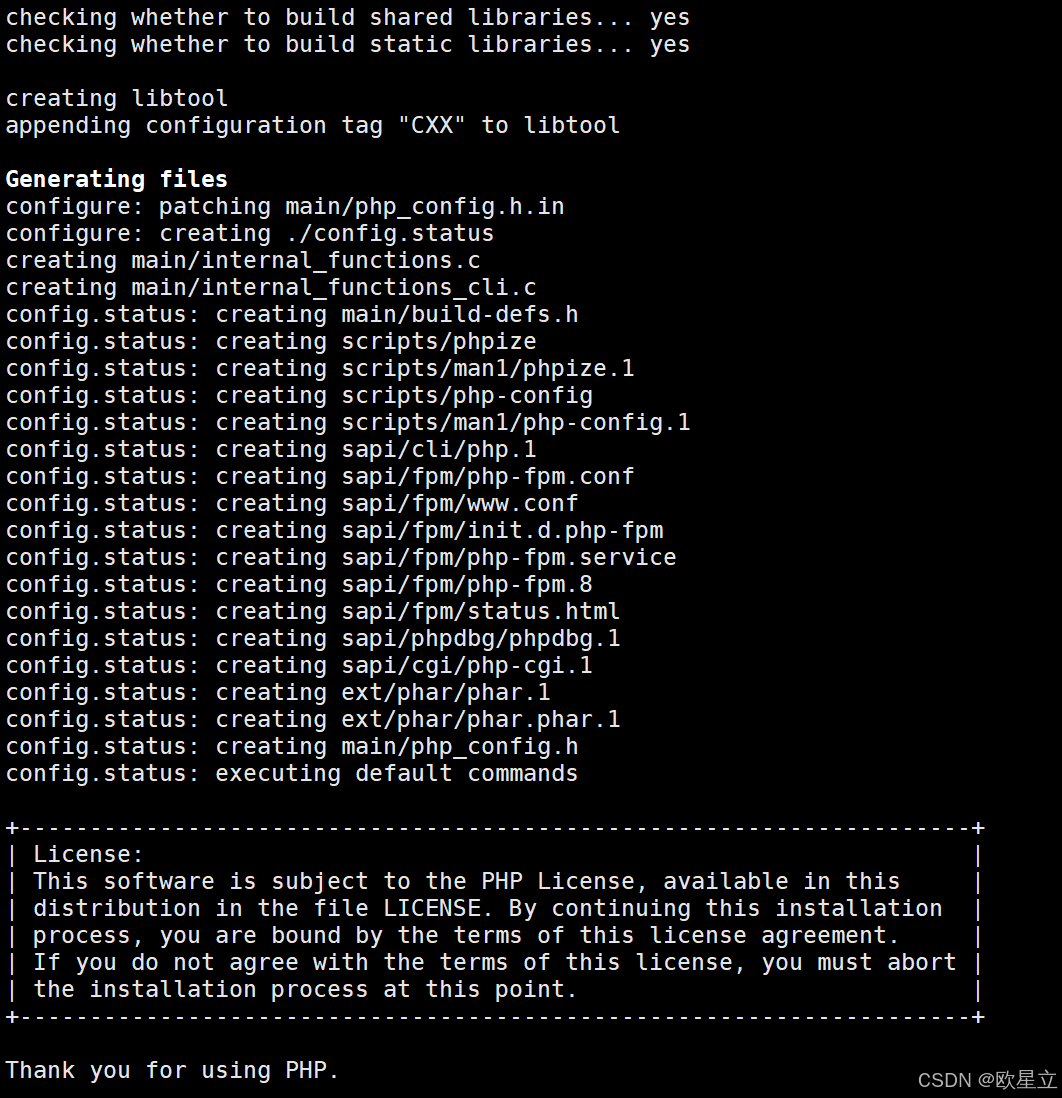
参数设置检查反馈信息
执行编译安装命令
make -j4 && make install 
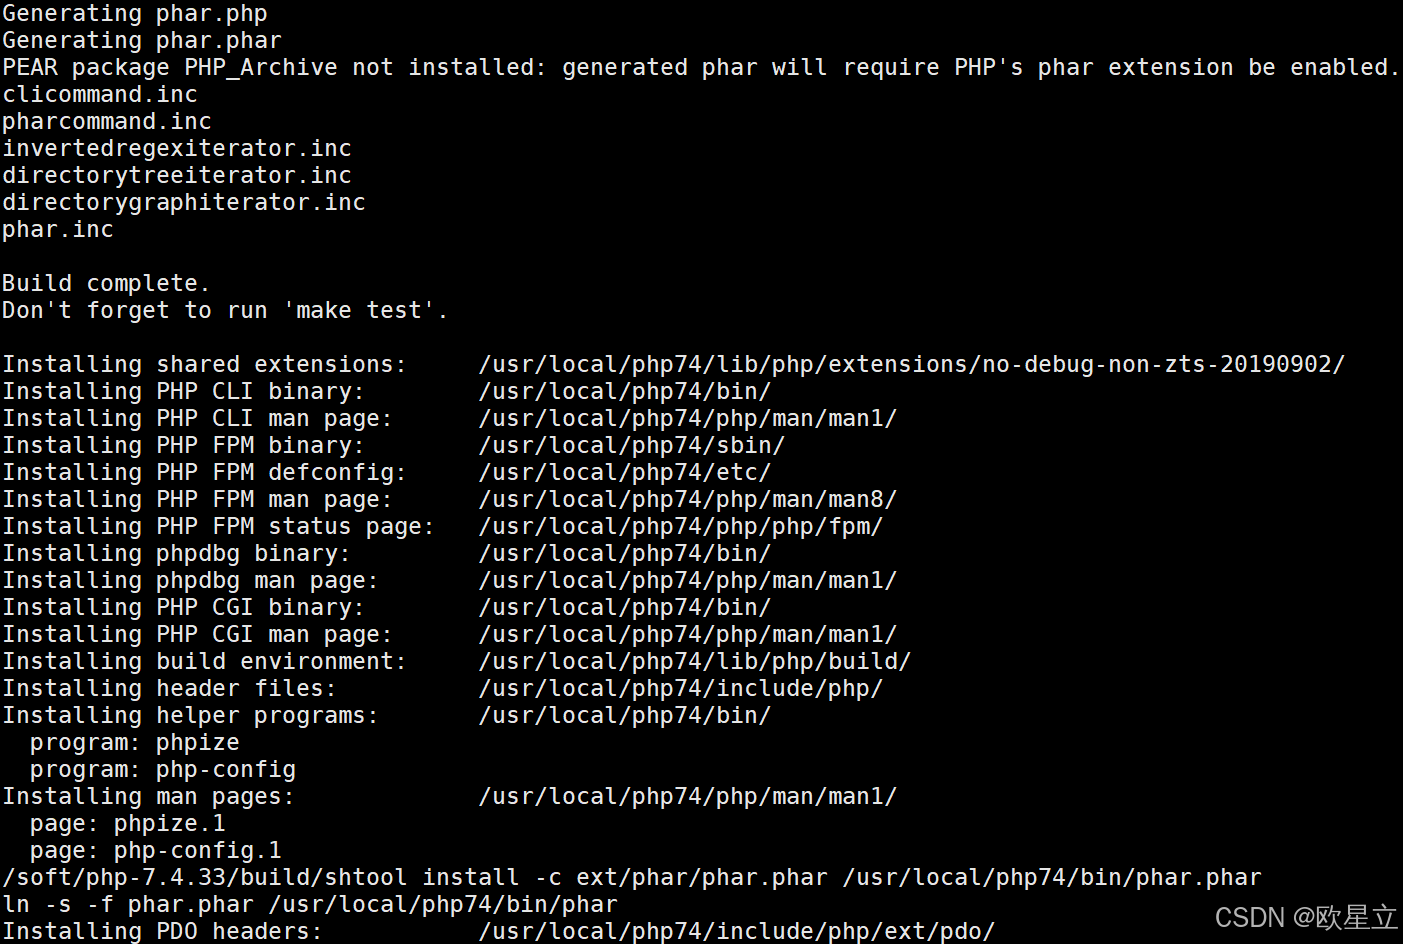
编译安装完成反馈信息
echo $? 0 #检查make执行结果,为0表示正常 配置文件导入
cd /usr/local/php74/etc mv php-fpm.conf.default php-fpm.conf mv php-fpm.d/www.conf.default php-fpm.d/www.conf cd /soft/php-7.4.33/ #改变当前目录至php安装源文件目录 cp php.ini-development /usr/local/php74/etc/php.ini 添加环境变量
建立软链接(方便后续安装新版本的php)
ln -s /usr/local/php74 /usr/local/php
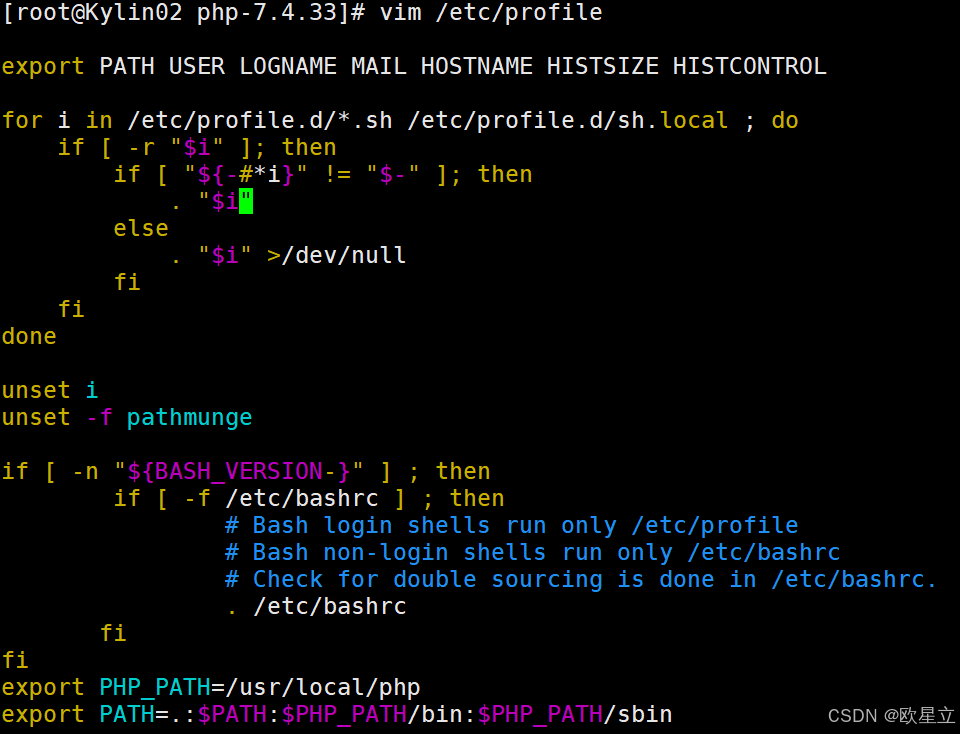
vim /etc/profile
在末尾添加:
export PHP_PATH=/usr/local/php
export PATH=.: P A T H : PATH: PATH:PHP_PATH/bin:$PHP_PATH/sbin
source /etc/profile 编辑完后,执行 source /etc/profile 重新加载环境变量
设置开机启动
执行 命令 vim /etc/systemd/system/php-fpm.service,添加以下脚本
[Unit] Description=PHP FastCGI Process Manager After=network.target [Service] Type=simple ExecStart=/usr/local/php74/sbin/php-fpm --nodaemonize --fpm-config /usr/local/php74/etc/php-fpm.conf ExecReload=/bin/kill -USR2 $MAINPID [Install] WantedBy=multi-user.target 
保存后,执行命令 systemctl start php-fpm 启动服务,执行命令 systemctl enable php-fpm 设置开机启动
systemctl start php-fpm #启动php systemctl status php-fpm #查看php运行状况 systemctl enable php-fpm #设置php开机启动 
查看php运行状况
php -v 
查看php版本信息
3.安装Mysql数据库
检查系统默认是否安装mariadb数据库
rpm -qa|grep mariadb 
已安装mariadb-connector-c-3.0.6-8.ky10.x86_64
卸载mariadb数据库
rpm -e --nodeps mariadb-connector-c-3.0.6-8.ky10.x86_64 下载Mysql数据安装包,这里下载的是8.0.32
wget https://cdn.mysql.com/archives/mysql-8.0/mysql-8.0.32-1.el8.x86_64.rpm-bundle.tar 解压安装包
tar -xf mysql-8.0.32-1.el8.x86_64.rpm-bundle.tar 安装Mysql相关程序
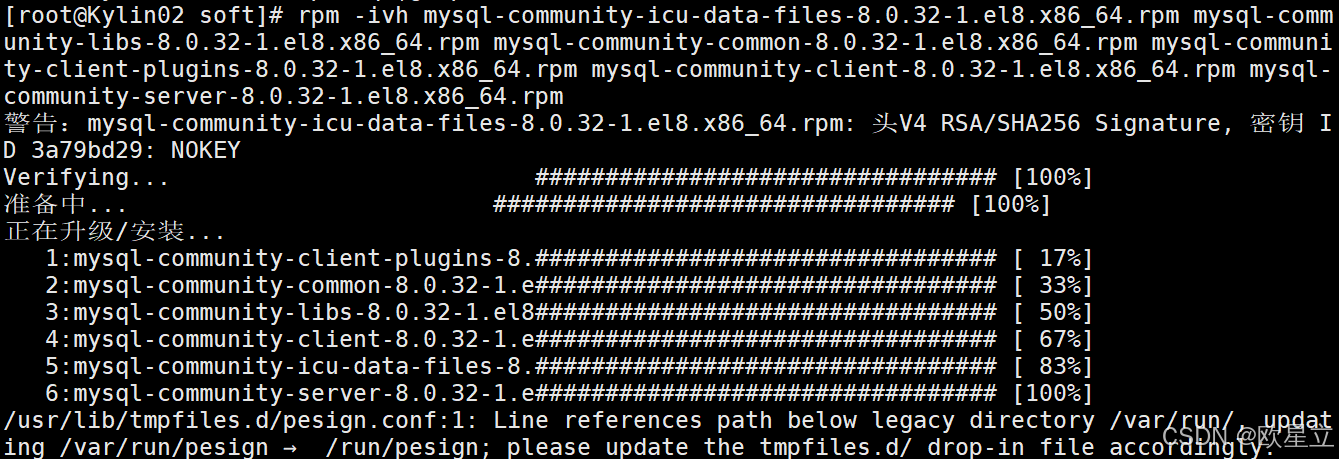
rpm -ivh mysql-community-icu-data-files-8.0.32-1.el8.x86_64.rpm mysql-community-libs-8.0.32-1.el8.x86_64.rpm mysql-community-common-8.0.32-1.el8.x86_64.rpm mysql-community-client-plugins-8.0.32-1.el8.x86_64.rpm mysql-community-client-8.0.32-1.el8.x86_64.rpm mysql-community-server-8.0.32-1.el8.x86_64.rpm 
安装报错了,需要去修改一个配置文件 /usr/lib/tmpfiles.d/pesign.conf
vim /usr/lib/tmpfiles.d/pesign.conf 将/var/run/pesign 改为/run/pesign
再次安装
rpm -ivh mysql-community-icu-data-files-8.0.32-1.el8.x86_64.rpm mysql-community-libs-8.0.32-1.el8.x86_64.rpm mysql-community-common-8.0.32-1.el8.x86_64.rpm mysql-community-client-plugins-8.0.32-1.el8.x86_64.rpm mysql-community-client-8.0.32-1.el8.x86_64.rpm mysql-community-server-8.0.32-1.el8.x86_64.rpm 
安装成功,启动Mysql数据并检查运行状态
systemctl start mysqld systemctl status mysqld netstat -nlpt | grep mysqld systemctl enable mysqld 查看mysql初始化密码
cat /var/log/mysqld.log | grep password 登录数据库并修改初始化密码
mysql -uroot -p mysql> alter user 'root'@'localhost' identified by 'Root123..'; mysql> flush privileges; mysql> select user,host from mysql.user; mysql> quit; 4.安装Zabbix 6.4
检查net-snmp版本
rpm -qa | grep net-snmp 
net-snmp版本应高于5.7.18
执行Zabbix安装命令
rpm -Uvh https://repo.zabbix.com/zabbix/6.4/rhel/8/x86_64/zabbix-release-6.4-1.el8.noarch.rpm dnf clean all dnf install zabbix-server-mysql zabbix-web-mysql zabbix-apache-conf zabbix-sql-scripts zabbix-selinux-policy zabbix-agent 
安装报错信息缺失libevent-2.1、libevent_pthreads-2.1
