任务定时器模块TimerWheel在本项目中的简单使用:
下面这张图 是channel模块,poller模块,TimerWheel模块,EventLoop模块,LoopThreadPool模块进行组合。便于大家对这个项目的理解,因为代码看起来挺复杂的。
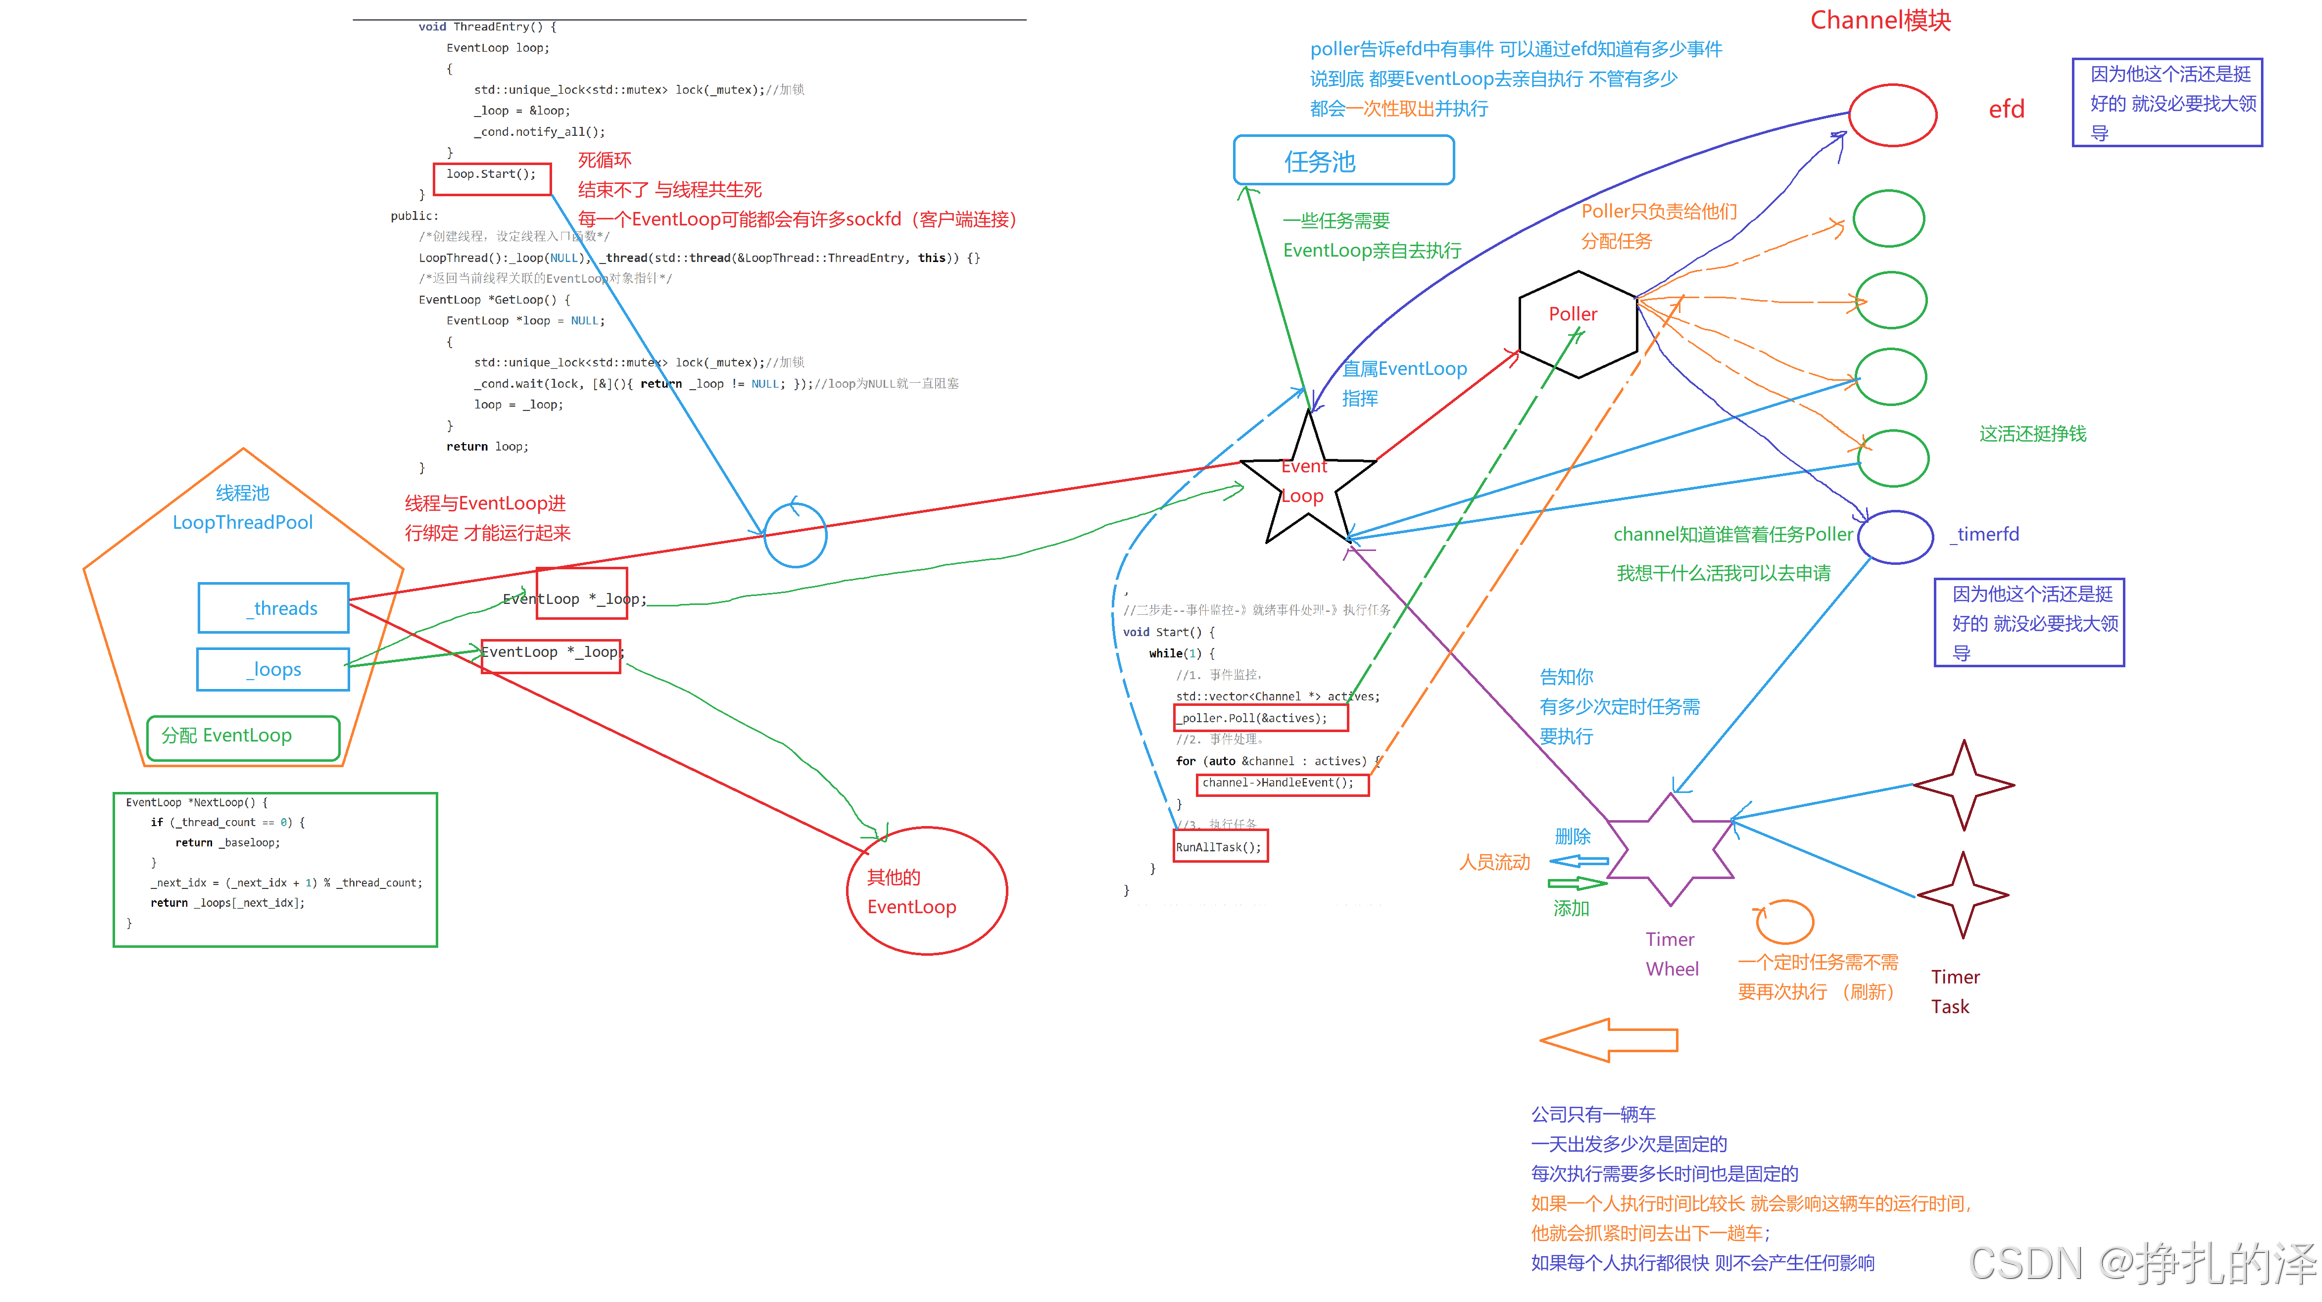
上面右下角就是定时器模块。
TimerTask类的实现:
using TaskFunc = std::function<void()>; using ReleaseFunc = std::function<void()>; class TimerTask{ private: uint64_t _id; // 定时器任务对象ID uint32_t _timeout; //定时任务的超时时间 bool _canceled; // false-表示没有被取消, true-表示被取消 TaskFunc _task_cb; //定时器对象要执行的定时任务 ReleaseFunc _release; //用于删除TimerWheel中保存的定时器对象信息 public: TimerTask(uint64_t id, uint32_t delay, const TaskFunc &cb): _id(id), _timeout(delay), _task_cb(cb), _canceled(false) {} ~TimerTask() { if (_canceled == false) _task_cb(); _release(); } void Cancel() { _canceled = true; } void SetRelease(const ReleaseFunc &cb) { _release = cb; } uint32_t DelayTime() { return _timeout; } };TimerWheel模块中的成员:
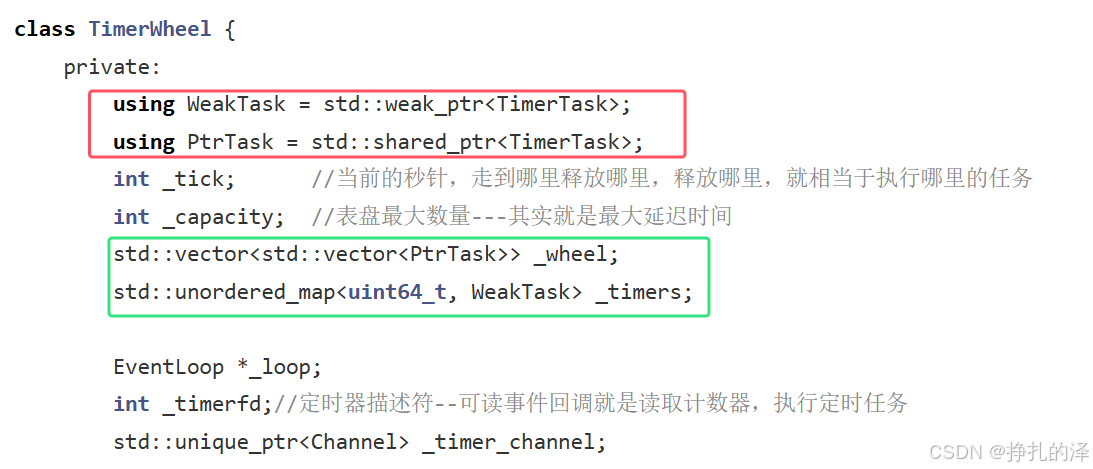
红色方框:是定义的智能指针,将来要存储到下面绿色方框中的。
对于容器 vector<vector<PtrTask>> _wheel;
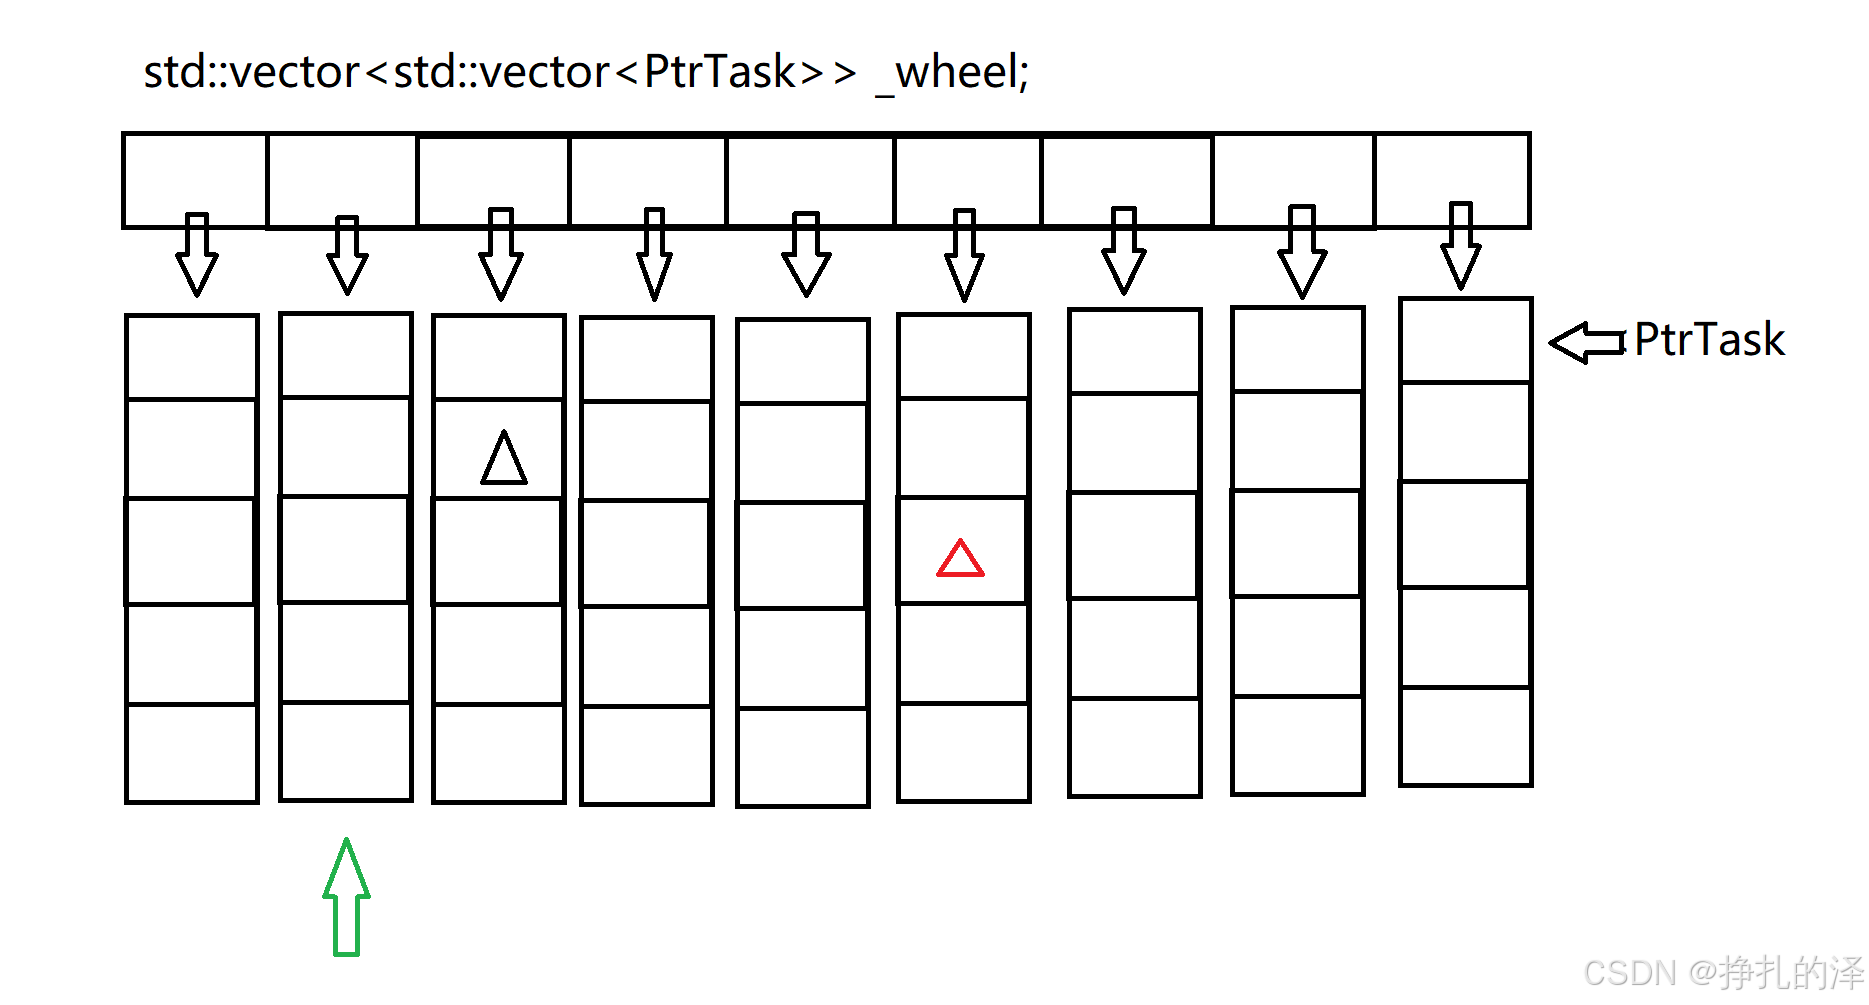
当绿色箭头走到_wheel数组某个位置上时,会调用vector中对应的清理函数,将vector中的元素全部释放,但是vector中存储的是智能指针shared_ptr,对于shared_ptr当引用计数减为0时会释放管理的资源,我们只需要将定时任务放到TimerTask类的析构函数中,就实现了定时任务的自动执行。
黑色三角行表示原有的定时任务,红色三角形表示刷新后的定时任务。当你启动非活跃连接销毁(如果不启动非活跃连接销毁,会存在有些恶意连接,长时间连接不释放,占用资源,导致其他链接无法,对服务器进行连接)。
那如何刷新定时任务,当客户端连接向文件描述符上发送数据,服务端就会检测到,调用对应的函数,并对定时任务进行刷新,在现在的位置加上设置的定时事件,红色三角形就是加定时事件4s所刷新的位置。每个vector<PtrTask>中存的元素个数都是不一样的。
对于容器unordered_map<uint64_t, WeakTask> _timers;
有人就会问,这个绿色箭头都还没走到,黑色三角形所在位置,如何将黑色三角形进行刷新的呢?
这是个好问题,那么weakptr就是管理shared_ptr的,用shared_ptr对weak_ptr进行初始化,并不会造成shared_ptr引用计数的增加。同时你可以通过weak_ptr通过的调用接口获取,他所管理的shared_ptr, 我只需在存储weak_ptr的容器中去寻找对应的weak_ptr就可以了。
他是利用哈希桶实现的,下面就是简单的容器实现图。
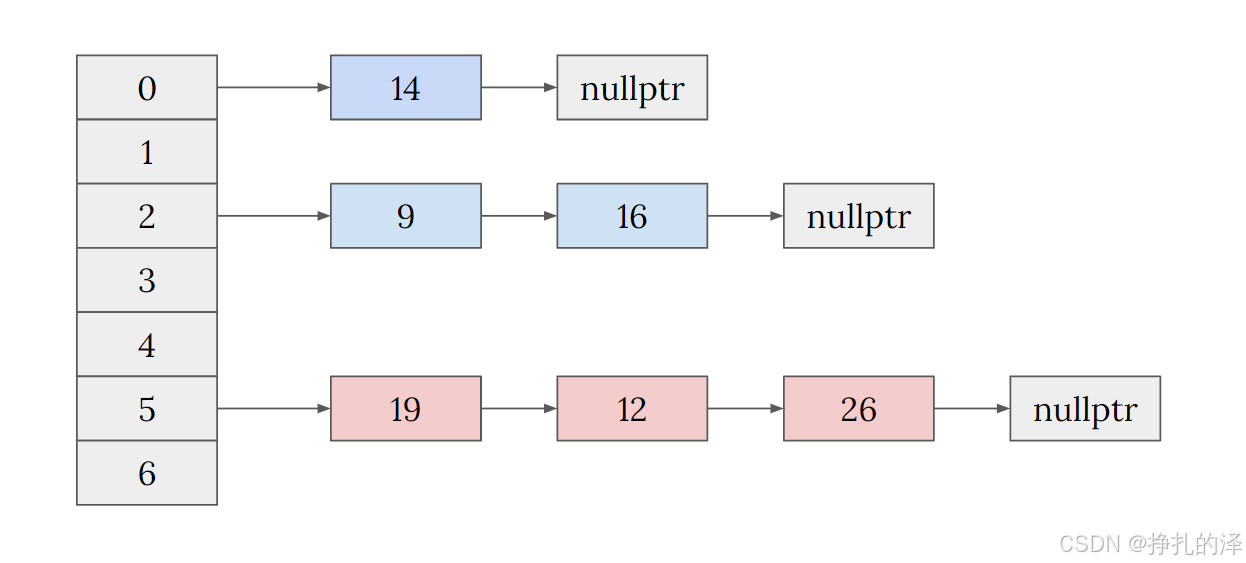
数组中的每个位置都存有一个链表,该链表中存放weak_ptr,之所以选用unorder_map作为容器是因为他查询效率比较快,删除效率高。
如何删除定时任务:
其实这个并不难,你想shared_ptr是可以自动释放所管理的资源的,那不就相当于删除了嘛,但是定时任务还是执行了。这是就要用一个变量来控制这个定时任务是否需要执行。
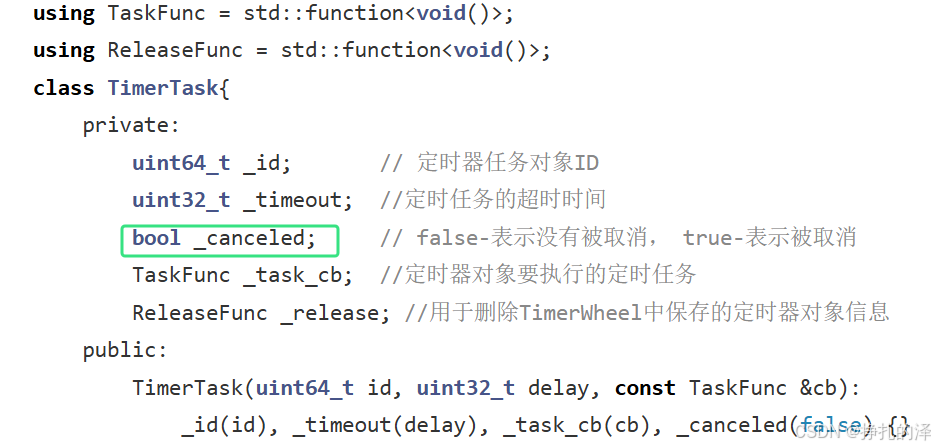
你不想执行就对这个变量进行设置就行。就比如一个连接被用户强制断开,那个绿色箭头还没有走到对应的定时任务位置,就断开连接,那么箭头后续就不要执行那个定时任务,因为执行了也没有意义。
void TimerAddInLoop(uint64_t id, uint32_t delay, const TaskFunc &cb) { PtrTask pt(new TimerTask(id, delay, cb)); pt->SetRelease(std::bind(&TimerWheel::RemoveTimer, this, id)); int pos = (_tick + delay) % _capacity; _wheel[pos].push_back(pt); _timers[id] = WeakTask(pt); } void TimerRefreshInLoop(uint64_t id) { //通过保存的定时器对象的weak_ptr构造一个shared_ptr出来,添加到轮子中 auto it = _timers.find(id); if (it == _timers.end()) { return;//没找着定时任务,没法刷新,没法延迟 } PtrTask pt = it->second.lock();//lock获取weak_ptr管理的对象对应的shared_ptr int delay = pt->DelayTime(); int pos = (_tick + delay) % _capacity; _wheel[pos].push_back(pt); } void TimerCancelInLoop(uint64_t id) { auto it = _timers.find(id); if (it == _timers.end()) { return;//没找着定时任务,没法刷新,没法延迟 } PtrTask pt = it->second.lock(); if (pt) pt->Cancel(); }看完这两容器的相关解释,我想上面这段 对定时器模块的增添 刷新 删除应该就不会陌生了。
TimerWheel模块中为什么会有EventLoop对象:
因为定时器模块也是事件,是事件就需要被EventLoop模块管理,我们如果想添加定时任务,就在EventLoop对象中调用,方便。


定时器模块如何运行
在Channel模块中,我就提及到了这个文件描述符,他是如何添加到Poller模块中的。
这里介绍一下为什么要使用这个文件描述符,首先,我们要想到代码运行的场景。
如果一个定时任务执行时间很长,那么就会导致,vector<PtrTask> 中的一个任务运行时间很长,而后边的任务在规定时间内没有释放。也就是说导致其他任务超时了。

通过设置这个结构体来控制,多长时间算一次超时。他会用八字节存储超时的次数,再通过poller来通知channel对象,调用对应的读就绪回调函数。
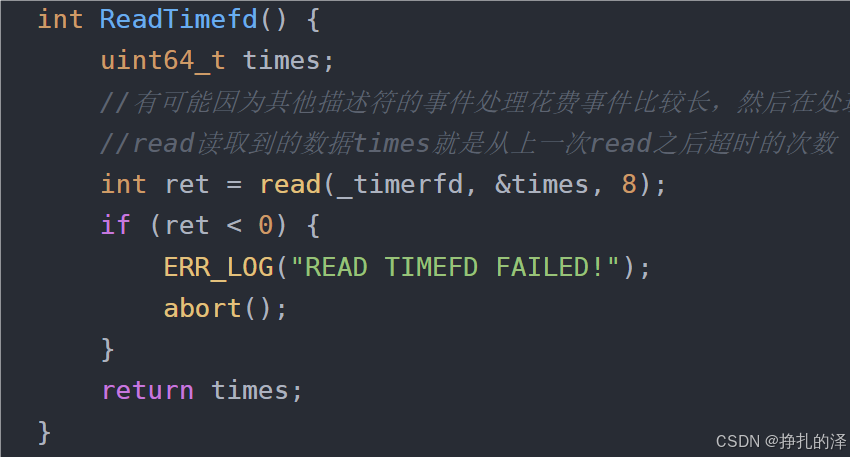
static int CreateTimerfd() { int timerfd = timerfd_create(CLOCK_MONOTONIC, 0); if (timerfd < 0) { ERR_LOG("TIMERFD CREATE FAILED!"); abort(); } //int timerfd_settime(int fd, int flags, struct itimerspec *new, struct itimerspec *old); struct itimerspec itime; itime.it_value.tv_sec = 1; itime.it_value.tv_nsec = 0;//第一次超时时间为1s后 itime.it_interval.tv_sec = 1; itime.it_interval.tv_nsec = 0; //第一次超时后,每次超时的间隔时 timerfd_settime(timerfd, 0, &itime, NULL); return timerfd; } int ReadTimefd() { uint64_t times; //有可能因为其他描述符的事件处理花费事件比较长,然后在处理定时器描述符事件的时候,有可能就已经超时了很多次 //read读取到的数据times就是从上一次read之后超时的次数 int ret = read(_timerfd, ×, 8); if (ret < 0) { ERR_LOG("READ TIMEFD FAILED!"); abort(); } return times; } //这个函数应该每秒钟被执行一次,相当于秒针向后走了一步 void RunTimerTask() { _tick = (_tick + 1) % _capacity; _wheel[_tick].clear();//清空指定位置的数组,就会把数组中保存的所有管理定时器对象的shared_ptr释放掉 } void OnTime() { //根据实际超时的次数,执行对应的超时任务 int times = ReadTimefd(); for (int i = 0; i < times; i++) { RunTimerTask(); } }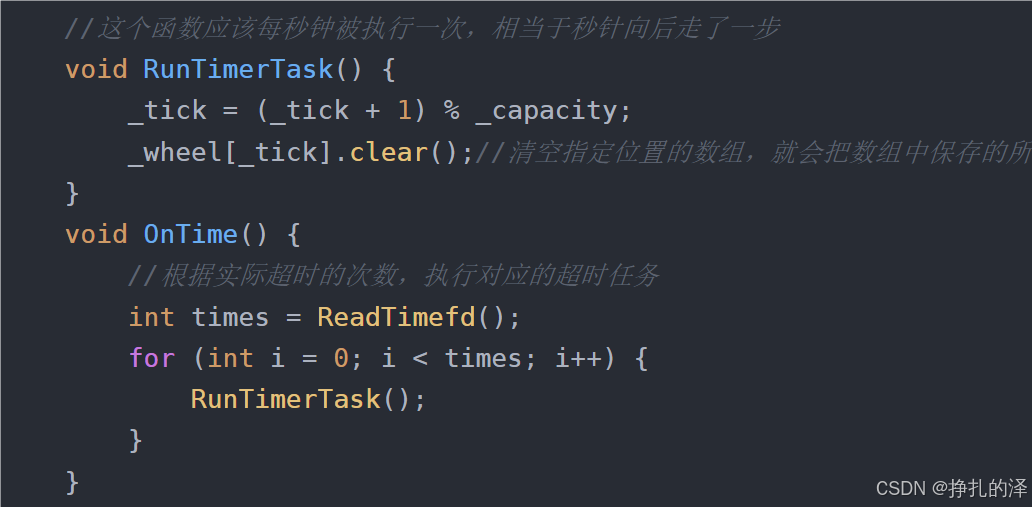
注意:这部分代码就是定时器如何运行的,但是只是个框架,并没有设置时间,你可以通过sleep函数在RunTimerTask中进行设置。_capacity就是定时的最大时间,如果超出,就不能实现大于_capacity的定时效果,所以说这里需要根据具体的实际情况进行设置。
好了,到这里我认为已经没什么难度了,顶多你就是不熟悉那个 定时文件描述符,不过没关系,我刚开始接触也不知道,查查资料了解就行。
总体代码:
using TaskFunc = std::function<void()>; using ReleaseFunc = std::function<void()>; class TimerTask{ private: uint64_t _id; // 定时器任务对象ID uint32_t _timeout; //定时任务的超时时间 bool _canceled; // false-表示没有被取消, true-表示被取消 TaskFunc _task_cb; //定时器对象要执行的定时任务 ReleaseFunc _release; //用于删除TimerWheel中保存的定时器对象信息 public: TimerTask(uint64_t id, uint32_t delay, const TaskFunc &cb): _id(id), _timeout(delay), _task_cb(cb), _canceled(false) {} ~TimerTask() { if (_canceled == false) _task_cb(); _release(); } void Cancel() { _canceled = true; } void SetRelease(const ReleaseFunc &cb) { _release = cb; } uint32_t DelayTime() { return _timeout; } }; class TimerWheel { private: using WeakTask = std::weak_ptr<TimerTask>; using PtrTask = std::shared_ptr<TimerTask>; int _tick; //当前的秒针,走到哪里释放哪里,释放哪里,就相当于执行哪里的任务 int _capacity; //表盘最大数量---其实就是最大延迟时间 std::vector<std::vector<PtrTask>> _wheel; std::unordered_map<uint64_t, WeakTask> _timers; EventLoop *_loop; int _timerfd;//定时器描述符--可读事件回调就是读取计数器,执行定时任务 std::unique_ptr<Channel> _timer_channel; private: void RemoveTimer(uint64_t id) { auto it = _timers.find(id); if (it != _timers.end()) { _timers.erase(it); } } static int CreateTimerfd() { int timerfd = timerfd_create(CLOCK_MONOTONIC, 0); if (timerfd < 0) { ERR_LOG("TIMERFD CREATE FAILED!"); abort(); } //int timerfd_settime(int fd, int flags, struct itimerspec *new, struct itimerspec *old); struct itimerspec itime; itime.it_value.tv_sec = 1; itime.it_value.tv_nsec = 0;//第一次超时时间为1s后 itime.it_interval.tv_sec = 1; itime.it_interval.tv_nsec = 0; //第一次超时后,每次超时的间隔时 timerfd_settime(timerfd, 0, &itime, NULL); return timerfd; } int ReadTimefd() { uint64_t times; //有可能因为其他描述符的事件处理花费事件比较长,然后在处理定时器描述符事件的时候,有可能就已经超时了很多次 //read读取到的数据times就是从上一次read之后超时的次数 int ret = read(_timerfd, ×, 8); if (ret < 0) { ERR_LOG("READ TIMEFD FAILED!"); abort(); } return times; } //这个函数应该每秒钟被执行一次,相当于秒针向后走了一步 void RunTimerTask() { _tick = (_tick + 1) % _capacity; _wheel[_tick].clear();//清空指定位置的数组,就会把数组中保存的所有管理定时器对象的shared_ptr释放掉 } void OnTime() { //根据实际超时的次数,执行对应的超时任务 int times = ReadTimefd(); for (int i = 0; i < times; i++) { RunTimerTask(); } } void TimerAddInLoop(uint64_t id, uint32_t delay, const TaskFunc &cb) { PtrTask pt(new TimerTask(id, delay, cb)); pt->SetRelease(std::bind(&TimerWheel::RemoveTimer, this, id)); int pos = (_tick + delay) % _capacity; _wheel[pos].push_back(pt); _timers[id] = WeakTask(pt); } void TimerRefreshInLoop(uint64_t id) { //通过保存的定时器对象的weak_ptr构造一个shared_ptr出来,添加到轮子中 auto it = _timers.find(id); if (it == _timers.end()) { return;//没找着定时任务,没法刷新,没法延迟 } PtrTask pt = it->second.lock();//lock获取weak_ptr管理的对象对应的shared_ptr int delay = pt->DelayTime(); int pos = (_tick + delay) % _capacity; _wheel[pos].push_back(pt); } void TimerCancelInLoop(uint64_t id) { auto it = _timers.find(id); if (it == _timers.end()) { return;//没找着定时任务,没法刷新,没法延迟 } PtrTask pt = it->second.lock(); if (pt) pt->Cancel(); } public: TimerWheel(EventLoop *loop):_capacity(60), _tick(0), _wheel(_capacity), _loop(loop), _timerfd(CreateTimerfd()), _timer_channel(new Channel(_loop, _timerfd)) { _timer_channel->SetReadCallback(std::bind(&TimerWheel::OnTime, this)); _timer_channel->EnableRead();//启动读事件监控 } /*定时器中有个_timers成员,定时器信息的操作有可能在多线程中进行,因此需要考虑线程安全问题*/ /*如果不想加锁,那就把对定期的所有操作,都放到一个线程中进行*/ void TimerAdd(uint64_t id, uint32_t delay, const TaskFunc &cb); //刷新/延迟定时任务 void TimerRefresh(uint64_t id); void TimerCancel(uint64_t id); /*这个接口存在线程安全问题--这个接口实际上不能被外界使用者调用,只能在模块内,在对应的EventLoop线程内执行*/ bool HasTimer(uint64_t id) { auto it = _timers.find(id); if (it == _timers.end()) { return false; } return true; } }; void TimerWheel::TimerAdd(uint64_t id, uint32_t delay, const TaskFunc &cb) { _loop->RunInLoop(std::bind(&TimerWheel::TimerAddInLoop, this, id, delay, cb)); } //刷新/延迟定时任务 void TimerWheel::TimerRefresh(uint64_t id) { _loop->RunInLoop(std::bind(&TimerWheel::TimerRefreshInLoop, this, id)); } void TimerWheel::TimerCancel(uint64_t id) { _loop->RunInLoop(std::bind(&TimerWheel::TimerCancelInLoop, this, id)); }