安装nginx 1.26.1
平滑升级、负载均衡
安装依赖 gcc gcc-c++ pcre-devel openssl-devel
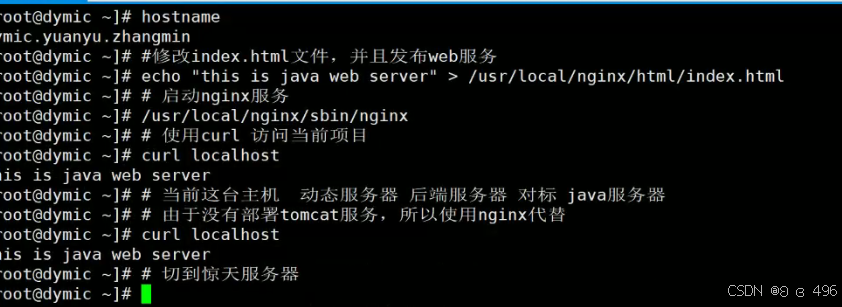

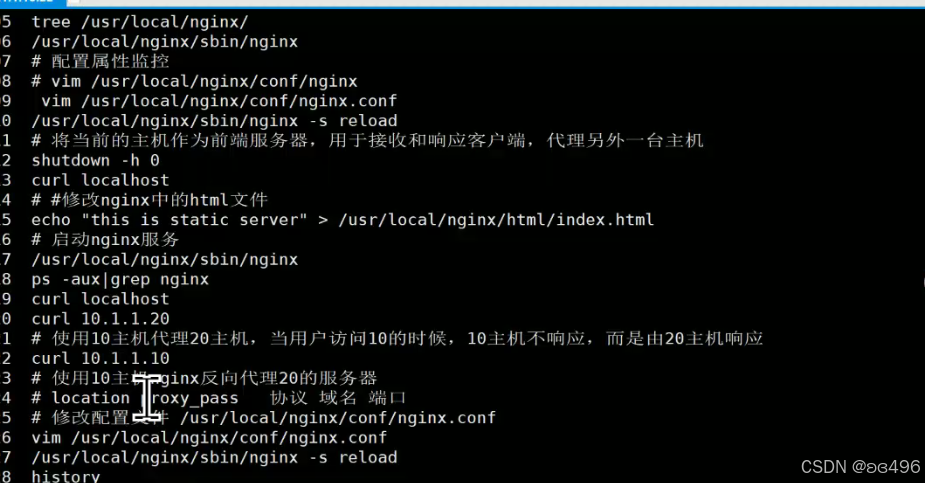
七层负载均衡配置:
[root@f ~]# vim /usr/local/nginx/conf/nginx.conf43 location / { 44 # root html; 45 # index index.html index.htm; 46 proxy_pass http:192.168.1.17:80 #当访问本机的80端口时,跳转到服务器组 47 } 总结:
1、一般来说会使用nginx代理动态服务器,例如代理tomcat发布的动态web服务
2、在这个案例中是使用nginx代替的
3、nginx反向代理,是不需要被代理的服务器同意的,只需要在nginx中的location中配置
location / {
proxy_pass 协议 域名|ip : 端口
}
:wq
./sbin/nginx -s reload #重载配置文件
负载均衡的基础
nginx访客IP黑名单
设置黑名单、白名单
[root@CYX ~]# scp root@192.168.1.17:~/nginx-1.26.1.tar.gz ./
[root@CYX ~]# yum -y install gcc gcc-c++ openssl-devel pcre-devel
[root@CYX ~]# tar -zxvf nginx-1.26.1.tar.gz
[root@CYX ~]# cd nginx-1.26.1/
[root@CYX nginx-1.26.1]# ./configure --prefix=/usr/local/nginx --user=nginx --group=nginx --with-http_ssl_module --with-http_stub_status_module --with-http_realip_module --with-stream[root@CYX nginx-1.26.1]# make && make install
账号,修改index.html里的内容,并且访问测试,都能访问到
[root@CYX nginx-1.26.1]# useradd -s /bin/nologin -M nginx
[root@CYX nginx-1.26.1]# /usr/local/nginx/sbin/nginx
[root@CYX nginx-1.26.1]# echo "wxnl" > /usr/local/nginx/html/index.html
[root@CYX nginx-1.26.1]# curl localhost
wxnl
设置仅一个主机可以访问,其他都不可以访问
在配置文件中的server模块中设置
allow允许,deny禁止
可以对IP生效,也可以对网段生效
[root@CYX nginx-1.26.1]# vim /usr/local/nginx/conf/nginx.conf

负载均衡
让每一台主机都能获得相应的压力
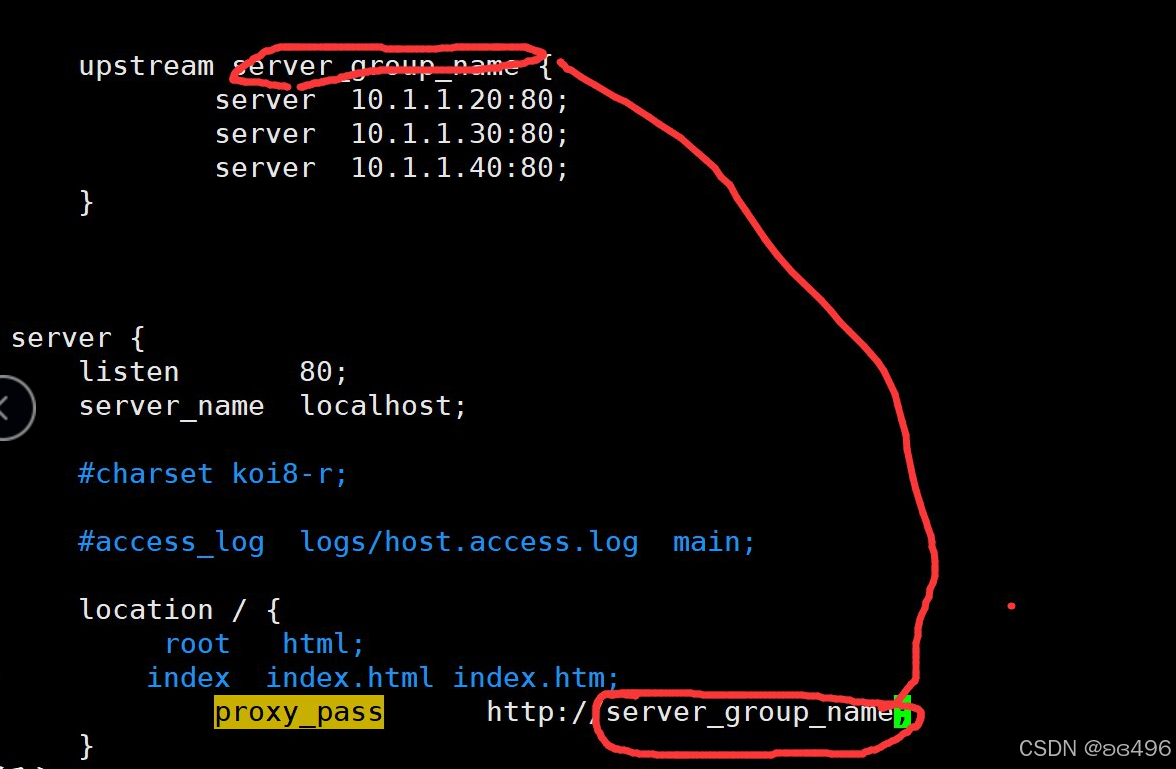
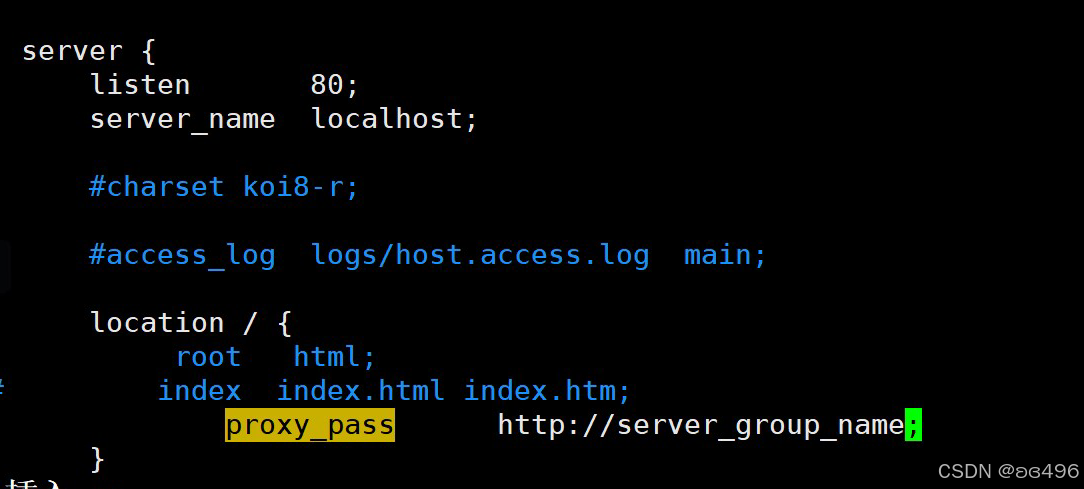
负载均衡策略
(1)轮询
upstream backend {
server 192.168.33.11:8080;
server 192.168.33.22:8080;
}
(2)weight 加权
upstream backend {
server 192.168.33.11:8080 weight=5;
server 192.168.33.22:8080 weight=2; # 权重默认为 1,谁权重大,谁优先处理请求
}
(3)ip_hash
注意: 使用ip_hash指令无法保证后端服务器的负载均衡,可能导致有些 后端服务器接收到的请求多,有些后端服务器接受的请求少,而且设置 后端服务器权重等方法将不起作用
upstream backend {
ip_hash; # ip_hash算法
server 192.168.33.11:8080;
server 192.168.33.22:8080;
}
(4)least_conn
最少连接,把请求转发给连接数较少的后端服务器
upstream backend {
least_conn; # 将请求转发给连接数较少的后端服务器
server 192.168.33.11:8080;
server 192.168.33.22:8080;
}
(5)url_hash
按访问url的hash结果来分配请求,使每个url定向到同一个后端服务器,
要配合缓存命中来使用
upstream backend {
hash $request_uri;
server 192.168.33.11:8080;
server 192.168.33.22:8080;
}
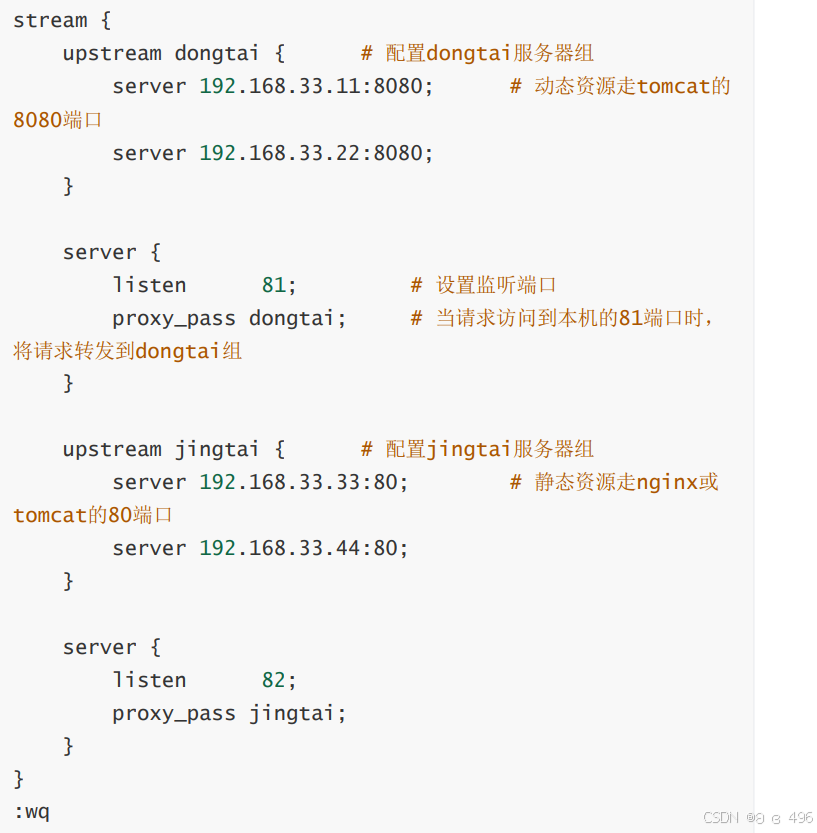
nginx 四层负载均衡
使用stream模块,与七层的http模块同级
[root@f ~]# nginx -v #查看版本及安装模块进行备份
[root@f ~]# cp /usr/local/nginx/sbin/nginx /usr/local/nginx/sbin/nginxbak安装指定模块并编译
657 cd nginx-1.26.1/ 658 ./configure --prefix=/usr/local/nginx --user=nginx --group=nginx --with-http_ssl_module --with-http_stub_status_module --with-http_realip_module --with-stream 659 make && make install模块添加成功
# nginx -V
修改配置文件
[root@server ~]# vim /usr/local/nginx/conf/nginx.conf
kill不仅仅用于杀死进程,还可以向软件进程发送信号
常用的-9和-15一个是强杀,一个是正常杀
kill 信号 进程编号
# 重新加载nginx配置文件
sbin/nginx -c /usr/local/nginx/conf/nginx.conf
#查看进程
[root@f ~]# ps -aux|grep nginx
root 1583 0.0 0.1 46128 1956 ? Ss 07:35 0:00 nginx: master process /usr/local/nginx/sbin/nginx
nginx 1684 0.0 0.2 46588 2256 ? S 07:41 0:00 nginx: worker process
root 6782 0.0 0.0 112824 980 pts/1 R+ 19:36 0:00 grep --color=auto nginx
上传新版本,并且解压、编译,安装相应的依赖(新版本必须和旧版本保持一致)
用kill -USR2 启用新版本的Nginx的软件
kill -USR2 老版本的pid编号
主要功能会根据上一次的启动方式再重新运行一次之前的启动命令
[root@f ~]# ls /usr/local/nginx/sbin/ nginx nginxbak nginx.old 重装新的版本以后,会出现新的启动工具
[root@f ~]# /usr/local/nginx/sbin/nginx -v nginx version: nginx/1.26.1 [root@f ~]# /usr/local/nginx/sbin/nginx.old -v nginx version: nginx/1.26.1 再次查看进程,找到老版本的pid
[root@f ~]# ps -ef|grep nginx root 1583 1 0 07:35 ? 00:00:00 nginx: master process /usr/local/nginx/sbin/nginx nginx 1684 1583 0 07:41 ? 00:00:00 nginx: worker process root 6839 6464 0 19:46 pts/1 00:00:00 grep --color=auto nginx使用老的nginx进程创建新的进程
[root@f ~]# kill -USR2 1583 [root@f ~]# ps -ef|grep nginx root 1583 1 0 07:35 ? 00:00:00 nginx: master process /usr/local/nginx/sbin/nginx nginx 1684 1583 0 07:41 ? 00:00:00 nginx: worker process root 6847 6464 0 19:47 pts/1 00:00:00 grep --color=auto nginx 此时会出现两套master进程,这个时候处理客户请求的就是新的nginx服务 了
关闭老版本的所有子进程
关闭老版本的主进程
[root@f ~]# kill -QUIT 1583 [root@f ~]# ps -ef|grep nginx root 6866 6464 0 19:50 pts/1 00:00:00 grep --color=auto nginx使用curl查看当前服务器的版本
curl -I localhost