https://blog.csdn.net/qq_48372575/article/details/125630622
我下面是CPU运行的,GPU链接在上面
Anaconda下载
https://docs.anaconda.com/miniconda/miniconda-other-installer-links/

参考链接:
https://blog.csdn.net/qq_48372575/article/details/125630622
https://blog.csdn.net/wzk4869/article/details/127795541
https://blog.csdn.net/weixin_47038938/article/details/115470086

创建一个新的环境
conda create --name pytorch python=3.9 -y 激活 d2l 环境
conda activate pytorch 安装PyTorch的CPU或GPU版本
pip install torch==1.12.0 pip install torchvision==0.13.0 安装d2l包
pip install d2l==0.17.6 查看环境
conda env list 
进入哪个激活
activate pytorch 如果出现这样的错误(不同的错误执行不同的代码)
pip install torchtext==0.5.0 

安装PyTorch之后,在anaconda prompt中激活新创建的环境变量之后,import torch 并 print(torch.version)没有问题,说明Pytorch已经安装成功。但是打开Jupyter notebook后 import torch却提示“No module named torch”
安装如下步骤得到了解决:
(1)打开Anaconda Prompt, 激活之前安装Pytorch时创建的环境变量
conda install ipython conda install jupyter (2)这样其实还不行,接着在这个环境变量中安装nb_conda
conda install nb_conda 本来以为这样就可以了,这样安装之后,在该环境变量激活的情况下,输入jupyter notebook启动jupyter notebook,是可以看到在新建文件中有了新的环境变量,这种情况下,大多数的人已经可以正常使用了。但是我这边新建之后,jupyter notebook 显示kernel error,还是用不了。
(3)关闭jupyter notebook 和当前Anaconda Prompt,然后重新打开Anaconda Prompt,按照之间的方法激活新的环境变量,然后输入:=
python -m ipykernel install --user -i http://pypi.douban.com/simple --trusted-host=pypi.douban.com (4)在该环境变量下输入 jupyter notebook,启动jupter,问题解决。
设置Jupyter Notebook的代码路径
jupyter notebook --generate-config 
在“此电脑”中搜索。删除最后一个""后面的的内容,包括“\”。
用记事本打开它。
按下ctrl+F就可以开始查找。查找内容如下:
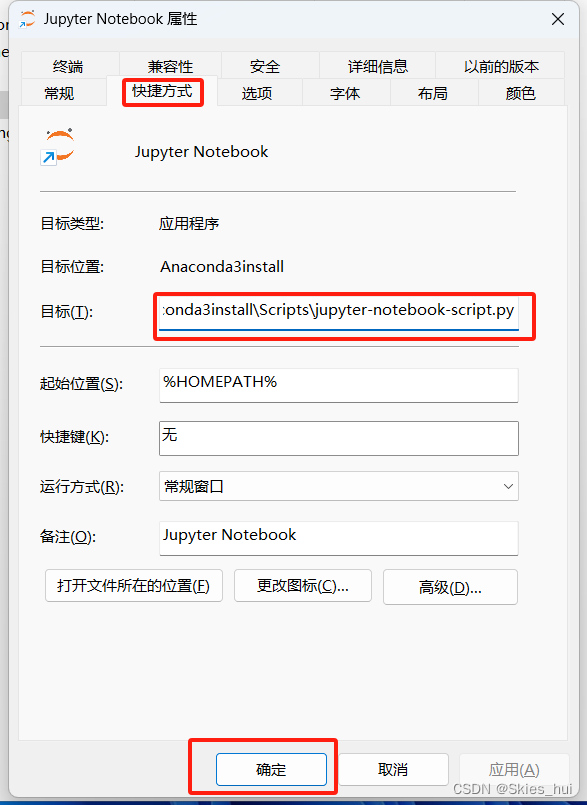
The directory to use for notebooks and kernels # 这里是我的路径,' '里面修改成你们的就可以了 c.NotebookApp.notebook_dir='D:\jupyter' 然后找到Jupyter Notebook快捷方式,点击属性,在快捷方式选项下,将目标栏中的.py后面的内容删掉(连%也要删掉),然后点击确定。

这样就把默认修改目录修改成自己需要的目录了。
修改打开的默认路径
cmd下载
# 下载 pip install notebook # 打开 jupyter notebook 设置Jupyter Notebook的代码路径
jupyter notebook --generate-config 
在“此电脑”中搜索。删除最后一个""后面的的内容,包括“\”。
用记事本打开它。
按下ctrl+F就可以开始查找。查找内容如下:
The directory to use for notebooks and kernels c.ServerApp.root_dir = 'D:\jupyter' 然后找到Jupyter Notebook快捷方式,点击属性,在快捷方式选项下,将目标栏中的.py后面的内容删掉(连%也要删掉),然后点击确定。

这样就把默认修改目录修改成自己需要的目录了。
建立jupyter notebook的快捷方式
jupyter-notebook.exe 
找到之后,右键该文件,找到“发送到”,找到“桌面快捷方式”。然后就会发现桌面上已经建立好了!
