阅读量:0
效果

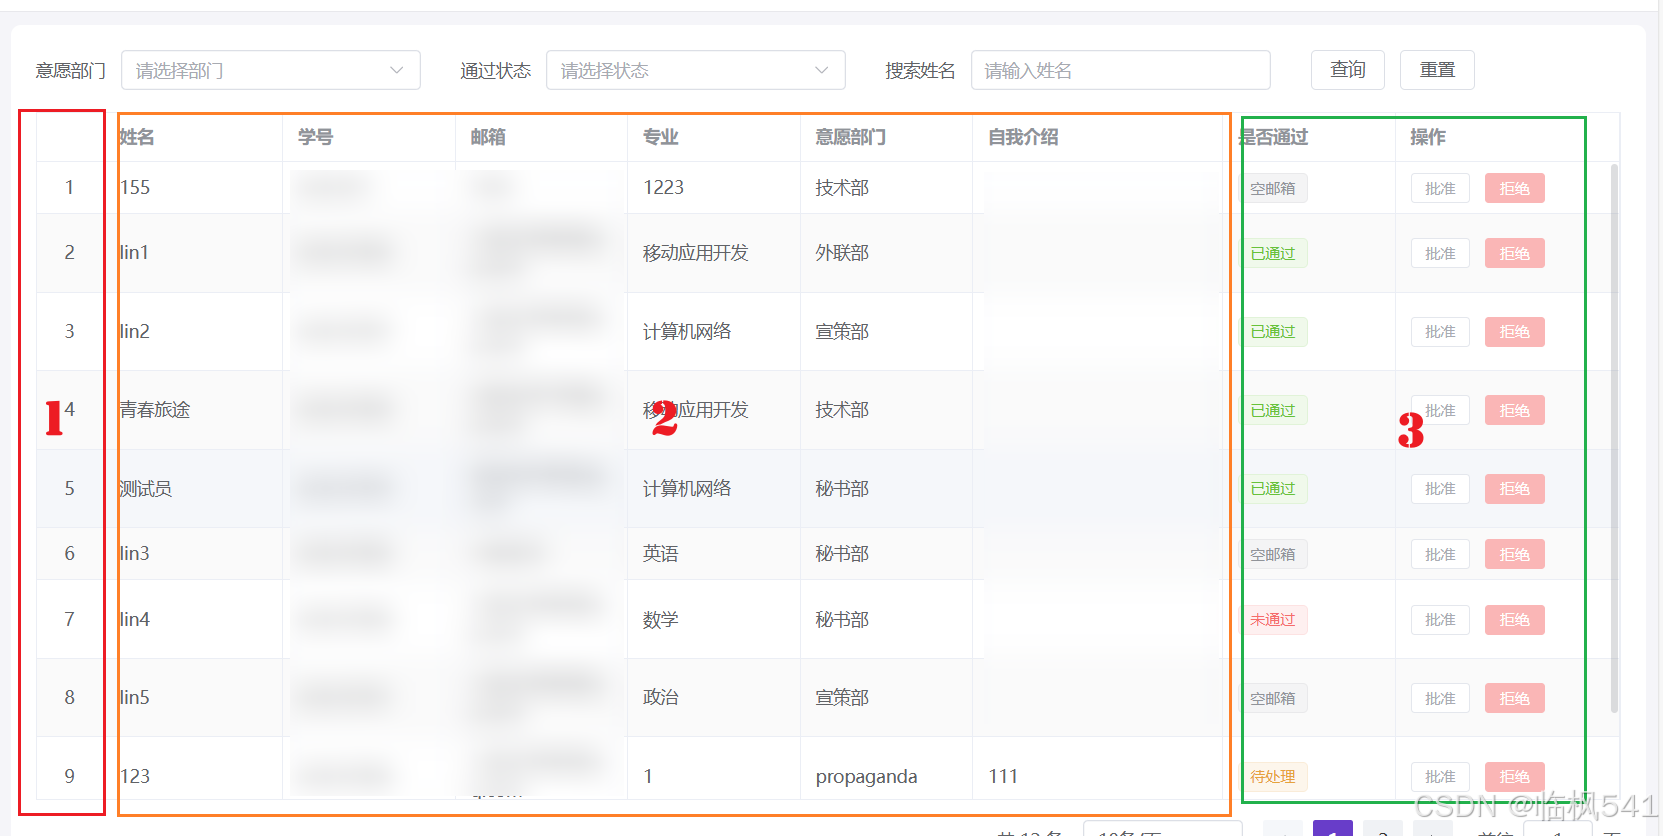
像这样的表格我们可以这样划分一下区域:
- 1区域的渲染是通过取反插槽的条件
- 2区域的渲染是写在 slot 插槽的内部的,直接显示行数据
- 3区域的渲染是通过具名插槽 bind 渲染
直接上代码:
子组件:
<template> <el-table v-loading="loading" border stripe :data="props.data"> <template v-for="column in props.columns" :key="column.id"> <el-table-column :label="column.label" :align="column.align" :type="column.type" :width="column.width" :prop="column.prop" > <template v-if="column.type !== 'index'" #default="scope"> <slot :name="`default.${column.prop}`" v-bind="scope"> {{ scope.row[column.prop] }} </slot> </template> </el-table-column> </template> </el-table> </template> <script lang="ts" setup> interface TablePropsItem { id: number; label: string; prop: string; width: string; align: 'left' | 'center' | 'right'; type: 'default' | 'index' | 'selection' | 'expand'; options?: any[]; } interface TableProps { columns: TablePropsItem[]; data: any[]; loading: boolean; } const props = defineProps<TableProps>(); </script> 父组件:
<CustomTable :loading="tableLoading" :data="tableData" :columns="tableColumns" > <!-- 是否通过 --> <template #default.status="{ row }"> <el-tag :type="getStatusTagType(row.status)"> {{ getStatusLabel(row.status) }} </el-tag> </template> <!-- 操作 --> <template #default.operate="{ row }"> <el-button :disabled="disabledBtnStatus(row)" size="small" @click="handleEmailSend(true)" > 批准 </el-button> <el-button :disabled="disabledBtnStatus(row)" size="small" type="danger" @click="handleEmailSend(false)" > 拒绝 </el-button> </template> </CustomTable>const tableColumns = [ { id: 0, type: 'index', align: 'center', width: '55' }, { id: 1, label: '姓名', prop: 'name' }, { id: 2, label: '学号', prop: 'studentId' }, { id: 3, label: '邮箱', prop: 'email' }, { id: 4, label: '专业', prop: 'profession' }, { id: 5, label: '意愿部门', prop: 'department' }, { id: 6, label: '自我介绍', prop: 'introduction', width: '200' }, { id: 7, label: '是否通过', prop: 'status', type: 'tag' }, { id: 8, label: '操作', prop: 'operate', width: '180' } ]; // 注意观察 // 1. 子组件的 `default.${column.prop}` // 2. 父组件的 #default.operate="{ row }" // 3. 数据的 prop 的属性值就这么简单!其他功能自行拓展即可,欢迎三连,谢谢
