
阅读量:0
目录
# 为什么选择Spring Boot与Redis整合?
将Spring Boot与Redis整合可以充分利用两者的优势,简化开发并提升应用性能。具体好处包括:
- 缓存支持:使用Redis作为缓存层可以极大提高应用的响应速度和可扩展性。
- 会话管理:将用户会话存储在Redis中,可以实现分布式会话管理。
- 数据持久性:Redis的持久化功能可以确保数据的可靠性。
- 简化配置:Spring Boot的自动配置和Redis Starter可以简化配置工作。
了解了这些基础知识后,接下来将详细介绍如何在Spring Boot项目中整合Redis,包括依赖配置、连接设置、基本操作和应用案例。
1. 更新 pom.xml
确保你的项目包含了以下依赖。如果使用 Spring Initializr 已经添加了 spring-boot-starter-data-redis,这里就无需再次添加。
<dependencies> <dependency> <groupId>org.springframework.boot</groupId> <artifactId>spring-boot-starter-data-redis</artifactId> </dependency> <dependency> <groupId>org.apache.commons</groupId> <artifactId>commons-pool2</artifactId> </dependency> </dependencies>commons-pool2 是用于 Lettuce 连接池配置的依赖。
2. 配置application.yml
补充:
Spring Boot 1.x 和 Spring Boot 2.x 中,
spring.redis.host用于配置 Redis 连接属性。Spring Boot 3.x 中,
spring.redis.host已经弃用。从 Spring Boot 2.x 开始,引入了
spring.data.redis作为配置 Redis 连接的方式,并且在 Spring Boot 3.x 中也可以使用spring.data.redis进行配置。
在 src/main/resources 目录下,添加 Redis 连接池的配置。
application.yml:
server: port: 8080 spring: redis: host: 127.0.0.1 # 地址 port: 6379 # 端口号 database: 0 # 数据库索引(默认为0) timeout: 1800000 # 连接超时时间(毫秒) lettuce: pool: max-active: 20 # 连接池最大连接数(使用负值表示没有限制) max-wait: -1 # 最大阻塞等待时间(负数表示没有限制) max-idle: 5 # 连接池中最大空闲连接 min-idle: 0 # 连接池中最小空闲连接3. 创建 Redis 配置类
在 com.lei.my_redis.config 包中创建或更新 RedisConfig类,使用连接池配置 LettuceConnectionFactory。
package com.lei.my_redis.config; import org.apache.commons.pool2.impl.GenericObjectPoolConfig; import org.springframework.cache.annotation.CachingConfigurerSupport; import org.springframework.cache.annotation.EnableCaching; import org.springframework.context.annotation.Bean; import org.springframework.context.annotation.Configuration; import org.springframework.data.redis.connection.RedisStandaloneConfiguration; import org.springframework.data.redis.connection.lettuce.LettuceConnectionFactory; import org.springframework.data.redis.connection.lettuce.LettucePoolingClientConfiguration; import org.springframework.data.redis.core.RedisTemplate; import org.springframework.data.redis.serializer.StringRedisSerializer; @EnableCaching // 开启缓存 @Configuration // 配置类 public class RedisConfig extends CachingConfigurerSupport { /** * 配置 Redis 连接工厂 * 意义: LettuceConnectionFactory 是连接 Redis 服务器的入口,它使用了 Lettuce 客户端,并且配置了连接池来提高性能和资源管理 * @return LettuceConnectionFactory */ @Bean public LettuceConnectionFactory redisConnectionFactory() { // 配置 Redis 服务器的连接信息 RedisStandaloneConfiguration redisStandaloneConfiguration = new RedisStandaloneConfiguration(); redisStandaloneConfiguration.setHostName("localhost"); redisStandaloneConfiguration.setPort(6379); // redisStandaloneConfiguration.setPassword("password"); // 取消注释以设置密码 // 配置连接池 GenericObjectPoolConfig<Object> poolConfig = new GenericObjectPoolConfig<>(); poolConfig.setMaxTotal(10); // 连接池中的最大连接数 poolConfig.setMaxIdle(5); // 连接池中的最大空闲连接数 poolConfig.setMinIdle(1); // 连接池中的最小空闲连接数 poolConfig.setMaxWaitMillis(2000); // 连接池获取连接的最大等待时间 // 创建一个带有连接池配置的 Lettuce 客户端配置 LettucePoolingClientConfiguration lettucePoolingClientConfiguration = LettucePoolingClientConfiguration.builder() .poolConfig(poolConfig) .build(); // 返回带有连接池配置的 Redis 连接工厂 return new LettuceConnectionFactory(redisStandaloneConfiguration, lettucePoolingClientConfiguration); } /** * 配置并返回一个 RedisTemplate 实例,用于执行 Redis 操作 * 意义: RedisTemplate 提供了一种高级抽象,使得开发者可以通过模板方法操作 Redis,而无需直接处理底层的 Redis 命令。 * 它支持多种 Redis 操作,例如值操作、哈希操作、列表操作等 * @return RedisTemplate */ @Bean public RedisTemplate<String, Object> redisTemplate() { /* 1.创建 RedisTemplate: 这是 Spring 用于与 Redis 交互的核心类,简化了与 Redis 的交互。 2.设置连接工厂: 使用前面定义的 LettuceConnectionFactory。 3.设置序列化器: 设置键和值的序列化器,这里使用 StringRedisSerializer 来将键和值序列化为字符串。 */ RedisTemplate<String, Object> template = new RedisTemplate<>(); template.setConnectionFactory(redisConnectionFactory()); // 设置连接工厂 template.setKeySerializer(new StringRedisSerializer()); // 设置键的序列化器 template.setValueSerializer(new StringRedisSerializer()); // 设置值的序列化器 return template; } } 4. Redis 操作类
保持 Redis 操作类和控制器不变。它们已经实现了基本的 Redis 操作。这里只需更新 RedisService类以支持连接池即可。
package com.lei.my_redis.service; import org.springframework.beans.factory.annotation.Autowired; import org.springframework.data.redis.core.RedisTemplate; import org.springframework.stereotype.Service; import java.util.concurrent.TimeUnit; /** * RedisService 类提供了简化的 Redis 操作接口,用于在 Spring Boot 应用中存储和检索数据。 * 它通过 RedisTemplate 与 Redis 服务器交互,执行常见的操作如设置值、获取值、设置值带过期时间和删除值。 */ @Service public class RedisService { /* 意义: RedisTemplate 是 Spring 提供的一个 Redis 操作模板,它抽象了 Redis 的底层访问, 使开发者可以用 Java 对象操作 Redis。使用 @Autowired 注解,Spring 自动将配置好的 RedisTemplate 注入到 RedisService 类中 */ @Autowired private RedisTemplate<String, Object> redisTemplate; // 作用: 向 Redis 中存储一个键值对 public void setValue(String key, Object value) { redisTemplate.opsForValue().set(key, value); } // 作用: 从 Redis 中获取指定键的值 public Object getValue(String key) { return redisTemplate.opsForValue().get(key); } // 作用: 向 Redis 中存储一个键值对,并设置其过期时间 // timeout 指定时间量,timeUnit 指定时间单位 public void setValueWithExpiry(String key, Object value, long timeout, TimeUnit timeUnit) { redisTemplate.opsForValue().set(key, value, timeout, timeUnit); } // 作用: 从 Redis 中删除指定键及其对应的值 public void deleteValue(String key) { redisTemplate.delete(key); } }5. 创建控制器
RedisController类的实现保持不变。
package com.lei.my_redis.controller; import com.lei.my_redis.service.RedisService; import org.springframework.beans.factory.annotation.Autowired; import org.springframework.web.bind.annotation.GetMapping; import org.springframework.web.bind.annotation.PostMapping; import org.springframework.web.bind.annotation.RequestParam; import org.springframework.web.bind.annotation.RestController; /** * RedisController 是一个 REST 控制器类,用于处理客户端发来的 HTTP 请求,并通过调用 RedisService * 执行 Redis 数据操作。它提供了三个 API 端点:设置值、获取值和删除值 * RestController注解作用: 表示这个类是一个 RESTful 控制器,它的所有方法的返回值都会直接作为 HTTP 响应体返回。 * RestController注解意义: 结合 @Controller 和 @ResponseBody 的功能,简化了返回 JSON 格式数据的开发工作。 */ @RestController public class RedisController { @Autowired private RedisService redisService; /** * 作用: 处理 HTTP POST 请求,设置 Redis 中的键值对 * 1.使用 @RequestParam 注解获取请求参数 key 和 value * 2.调用 redisService.setValue(key, value) 方法,将 key 和 value 存储到 Redis 中 * 3.返回一个简单的字符串 "Value set" 作为响应 * 请求:POST /set?key=myKey&value=myValue * 响应:"Value set" * RequestParam注解:获取请求参数: 它从 HTTP 请求中获取参数,并将这些参数绑定到控制器方法的参数上 */ // @PostMapping("/set") @GetMapping("/set") public String setValue(@RequestParam String key, @RequestParam String value) { redisService.setValue(key, value); return "Value:(" + key + ") set"; } /** * 作用: 处理 HTTP GET 请求,从 Redis 中获取指定键的值 * 1.使用 @RequestParam 注解获取请求参数 key * 2.调用 redisService.getValue(key) 方法,从 Redis 中获取 key 对应的值,并将结果转换为 String 类型 * 3.返回获取的值 * 请求:GET /get?key=myKey * 响应:"myValue" // Redis 中对应 `myKey` 的值 */ @GetMapping("/get") public String getValue(@RequestParam String key) { return (String) redisService.getValue(key); } /** * 作用: 处理 HTTP POST 请求,删除 Redis 中指定键的值 * 1.使用 @RequestParam 注解获取请求参数 key * 2.调用 redisService.deleteValue(key) 方法,从 Redis 中删除 key 对应的键值对 * 3.返回一个简单的字符串 "Value deleted" 作为响应 * 请求:POST /delete?key=myKey * 响应:"Value deleted" */ // @PostMapping("/delete") @GetMapping("/delete") public String deleteValue(@RequestParam String key) { redisService.deleteValue(key); return "Value:(" + key + ") deleted"; } }6. 启动应用程序
SpringBootRedisApplication主类保持不变。
package com.lei.my_redis; import org.springframework.boot.SpringApplication; import org.springframework.boot.autoconfigure.SpringBootApplication; @SpringBootApplication public class MyRedisApplication { public static void main(String[] args) { SpringApplication.run(MyRedisApplication.class, args); } }7. 测试
启动应用程序后,可以选中通过 Postman 或浏览器访问以下 URL,验证 Redis 操作是否成功。
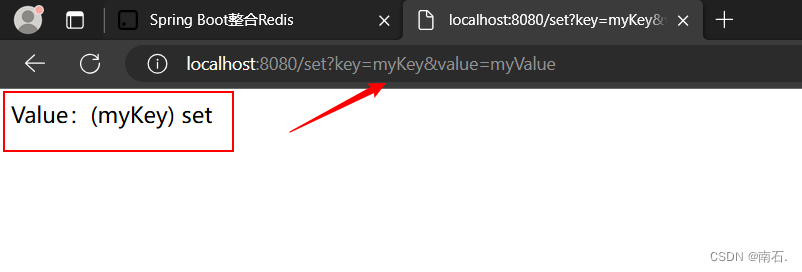
- 设置值:
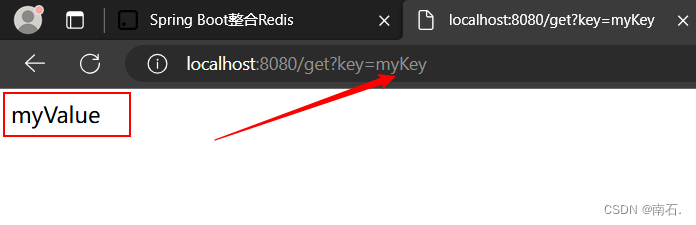
POST http://localhost:8080/set?key=mykey&value=myvalue - 获取值:
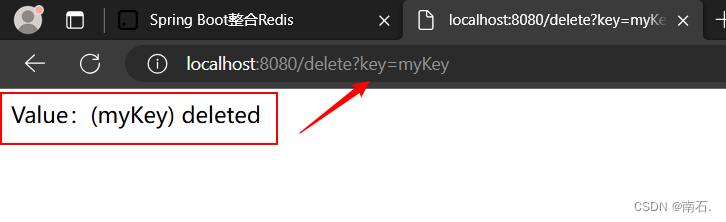
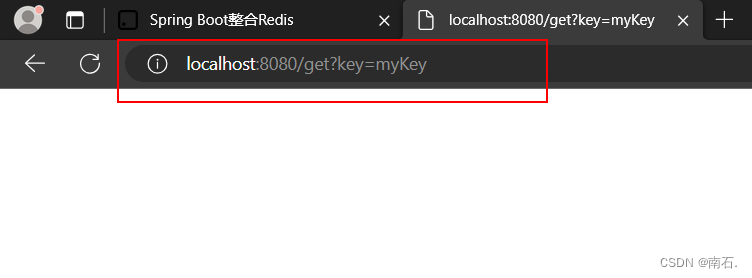
GET http://localhost:8080/get?key=mykey - 删除值:
POST http://localhost:8080/delete?key=mykey
案例1:设置值
案例2:获取值
案例3:删除值
成功在 Spring Boot 项目中整合了 Redis 并配置了连接池。我们使用连接池可以显著提高 Redis 操作的性能和资源管理效率。
