
阅读量:0
一、安装Docker
1. 卸载老版本
sudo apt-get remove docker docker-engine docker.io containerd runc 2. 安装必要依赖
sudo apt-get update sudo apt-get install -y \ apt-transport-https \ ca-certificates \ curl \ gnupg-agent 3. 设置软件源
注意:这里博主使用ubuntu系统中默认的tinghua源或aliyun源会出现如下连接问题。
Err:7 https://download.docker.com/linux/ubuntu focal InRelease Could not connect to download.docker.com:443 (2a03:2880:f129:83:face:b00c:0:25de), connection timed out Could not connect to download.docker.com:443 (179.60.193.16), connection timed out Fetched 2,910 B in 36s (81 B/s) W: Failed to fetch https://download.docker.com/linux/ubuntu/dists/focal/InRelease Could not connect to download.docker.com:443 (2a03:2880:f129:83:face:b00c:0:25de), connection timed out Could not connect to download.docker.com:443 (179.60.193.16), connection timed out 看到网上说的原因有很多种可能,可能是代理问题,也可能是防火墙问题,这里我们直接手动换成阿里源的docker软件列表
1. 首先设置密钥 # 官方密钥(不建议) curl -fsSL https://download.docker.com/linux/ubuntu/gpg | sudo gpg --dearmor -o /usr/share/keyrings/docker-archive-keyring.gpg # 阿里密钥(推荐) curl -fsSL https://mirrors.aliyun.com/docker-ce/linux/ubuntu/gpg | sudo gpg --dearmor -o /usr/share/keyrings/docker-archive-keyring.gpg 2. 设置软件源 # 官方源(不建议用) echo \ "deb [arch=amd64 signed-by=/usr/share/keyrings/docker-archive-keyring.gpg] https://download.docker.com/linux/ubuntu \ $(lsb_release -cs) stable" | sudo tee /etc/apt/sources.list.d/docker.list > /dev/null # 阿里源(推荐) echo \ "deb [arch=amd64 signed-by=/usr/share/keyrings/docker-archive-keyring.gpg] https://mirrors.aliyun.com/docker-ce/linux/ubuntu \ $(lsb_release -cs) stable" | sudo tee /etc/apt/sources.list.d/docker.list > /dev/null 4.更新软件列表
sudo apt-get update 得到反馈:
sudo apt-get update 命中:1 http://mirrors.aliyun.com/ubuntu focal InRelease 命中:2 http://mirrors.aliyun.com/ubuntu focal-updates InRelease 命中:3 https://mirrors.aliyun.com/docker-ce/linux/ubuntu focal InRelease 命中:4 http://mirrors.aliyun.com/ubuntu focal-backports InRelease 命中:5 http://security.ubuntu.com/ubuntu focal-security InRelease 正在读取软件包列表... 完成 软件列表更新完成
5. 安装Docker
sudo apt-get install docker-ce docker-ce-cli containerd.io docker-buildx-plugin docker-compose-plugin 等待安装成功…(如果还是连接失败,那真就是网络问题了,注意检查互联网连接!!)
6. 安装验证
sudo docker run hello-world 对于首次安装docker的用户来说,会在docker网站上pull下来一个新的image,叫hello-world。但是这里博主依然出现了连接问题,就是一直pull不下来。
为此,博主使用了鱼香ROS里的docker镜像代理,实测非常好用,几乎是傻瓜式,以下内容均为引用。
(1)首先,通过以下命令下载并运行一键安装工具:
wget http://fishros.com/install -O fishros && bash fishros (2)运行后,您将看到如下界面:
基础检查通过... =============================================================================== ======欢迎使用一键安装工具,人生苦短,三省吾身,省时省力省心!======= ======一键安装已开源,请放心使用:https://github.com/fishros/install ======= =============================================================================== ... (界面省略) 请输入[]内的数字以选择: 17 选择数字 17,进入Docker代理配置。
(3)进入Docker代理配置界面,选择 2:
请选择代理模式,如果不清楚可以选2 [1]:科学上网模式(需要本地有支持HTTP代理) [2]:服务模式(需要提供支持Docker代理的服务器地址) [3]:删除所有模式代理 [0]:quit 请输入[]内的数字以选择:2 (4)接下来选择代理加速网址,选择1:
RUN Choose Task:[请输入括号内的数字] 请选择代理加速网址 [1]:https://dockerpull.com [2]:https://docker.fxxk.dedyn.io [3]:https://ac77d18f43e44819b553040f294b8f9b.mirror.swr.myhuaweicloud.com [0]:quit 请输入[]内的数字以选择:1 系统会自动创建并写入代理配置文件,并重启Docker服务:
创建文件:/etc/docker/daemon.json 在/etc/docker//daemon.json写入了{"registry-mirrors": ["https://dockerpull.com"]},接下来为你重启Docker! Run CMD Task:[sudo systemctl daemon-reload] [-]Result:success Run CMD Task:[sudo systemctl restart docker] [-]Result:success (5)配置完成后,您可以尝试再次拉取镜像:
docker pull hello-world --- hello-world: Pulling from library/ubuntu 9ea8908f4765: Already exists Digest: sha256:0b897358ff6624825fb50d20ffb605ab0eaea77ced0adb8c6a4b756513dec6fc Status: Downloaded newer image for hello-world (6)运行hello-world镜像
sudo docker run hello-world Hello from Docker! This message shows that your installation appears to be working correctly. To generate this message, Docker took the following steps: 1. The Docker client contacted the Docker daemon. 2. The Docker daemon pulled the "hello-world" image from the Docker Hub. (amd64) 3. The Docker daemon created a new container from that image which runs the executable that produces the output you are currently reading. 4. The Docker daemon streamed that output to the Docker client, which sent it to your terminal. To try something more ambitious, you can run an Ubuntu container with: $ docker run -it ubuntu bash Share images, automate workflows, and more with a free Docker ID: https://hub.docker.com/ For more examples and ideas, visit: https://docs.docker.com/get-started/ docker安装完成!
二、使用VScode进行docker开发
1. 安装插件
在Vscode中安装如下两个插件: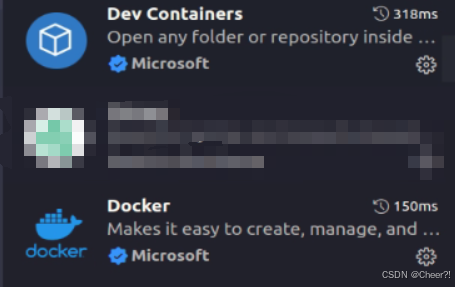
安装完成后,左侧工具栏会出现这个图标
但是进入docker后发现,存在这样一个错误: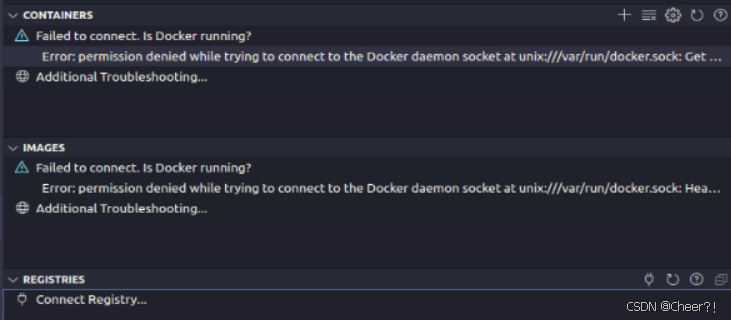
2. 修改docker服务权限
第一步:创建组
sudo groupadd docker 第二步: 添加到用户组
sudo usermod -aG docker ${USER} 第三步: 文件赋权限
sudo chmod 666 /var/run/docker.sock 第四步:重启docker服务
sudo systemctl restart docker 重启Vscode,大功告成!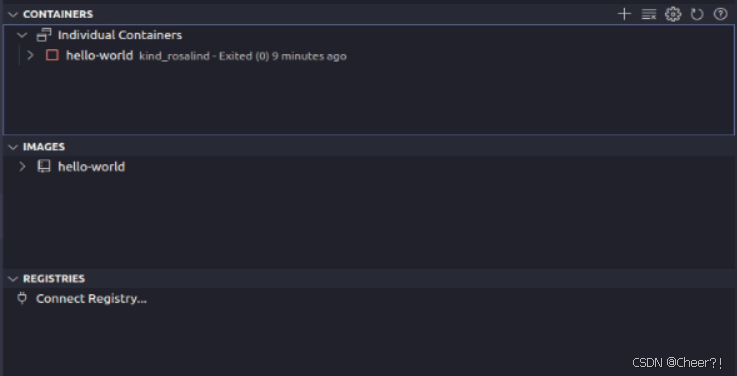
参考链接
https://docs.docker.com/engine/install/ubuntu/
