vue element-ui 中表单弹框的使用

写在最前面
感谢神仙实习单位,老师手把手教O(∩_∩)O~感谢侃哥的讲解,感谢雅欣的讲解录制。
后面对着视频又看了一遍,然后重新写了一遍,梳理流程加快后面代码速度。
注意命名,写具体的如 addView,尽量不写 add
子组件命名需要为double word,每个word用首字母大写
梳理后代码,主要为:
(子组件)E:\ui\参考代码\demo-new\src\components\detail.vue
(父组件)E:\ui\参考代码\demo-new\src\views\Home.vue
在现代Web开发中,表格和表单是用户交互中最常见的元素。无论是数据展示、编辑,还是信息提交,都离不开表格与表单的有效结合。Vue.js作为一个渐进式的JavaScript框架,配合Element-UI这样强大的组件库,可以大大简化开发流程,提高开发效率。
在本系列的第一篇文章中,我们将梳理如何在Vue.js中使用Element-UI实现表格与表单的结合:如何在父组件中通过按钮触发弹窗,并在弹窗中调用子组件的表单。
这种设计模式在实际项目中非常常见,特别是在需要对数据进行增删改查操作时,能够有效地提升用户体验和代码可维护性。
本文将分为以下几个部分:
1、环境配置与基础介绍
2、父子组件的结构与数据传递
3、使用Element-UI实现弹窗与表单
4、完整示例代码与详细解析(后面一篇博客)
准备好了吗?让我们开始吧!
零、准备工作
1.搭建 vue 环境
参考:【前端环境 3】已有代码配置 vue 环境 + 使用 vue ui 图形化界面创建 vue 项目 + vue 项目目录结构
https://blog.csdn.net/WTYuong/article/details/139917509

2.安装 element-ui 组件
npm i element-ui -S 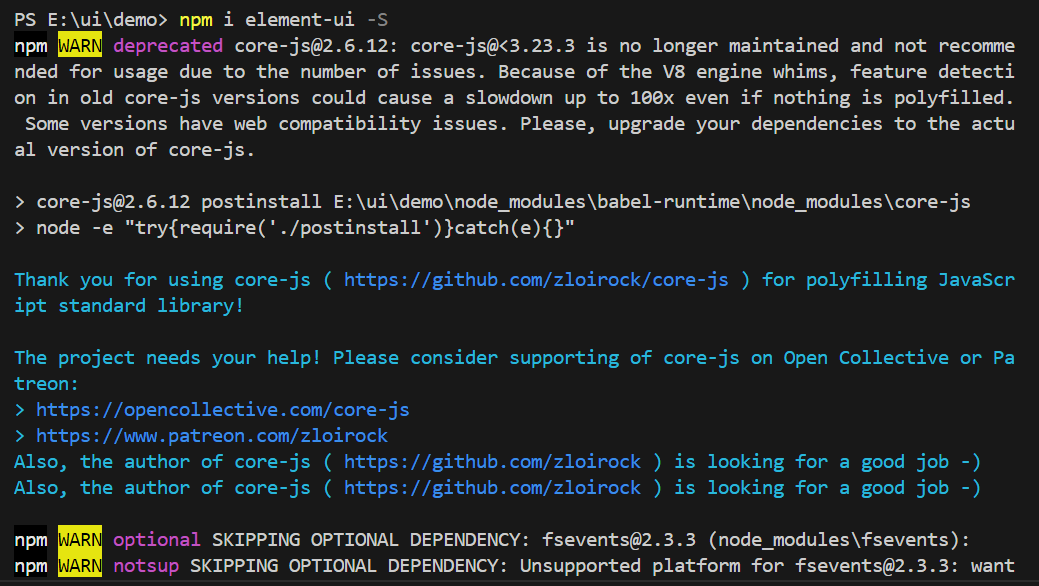
3.在 main.js 引入 element-ui 组件
import ElementUI from "element-ui"; import "element-ui/lib/theme-chalk/index.css"; Vue.use(ElementUI); 4.把 App.vue 中的页面跳转注释掉
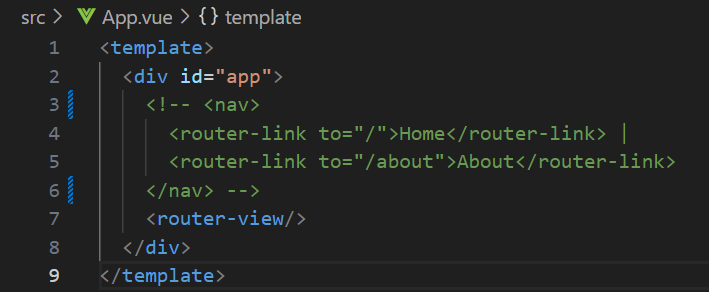
一、完成父组件-表单的前端、以及跳转逻辑
父子组件的结构与数据传递
在这个示例中,我们将创建两个组件:一个父组件和一个子组件。父组件将包含一个表格和一个触发弹窗的按钮,子组件则是弹窗中的表单。
0.事件处理与数据绑定
在父组件中,我们使用v-bind和v-on进行数据和事件的绑定:
v-bind用于将数据从父组件传递到子组件。
v-on用于监听子组件触发的事件并在父组件中处理。
1.前端 ui-固定列表格
<template> <div> <h1>This is a form page</h1> <el-table :data="tableData" border style="width: 100%"> <el-table-column fixed prop="date" label="日期" width="150"> </el-table-column> <el-table-column prop="name" label="姓名" width="120"> </el-table-column> <el-table-column prop="province" label="省份" width="120"> </el-table-column> <el-table-column prop="city" label="市区" width="120"> </el-table-column> <el-table-column prop="address" label="地址" width="300"> </el-table-column> <el-table-column prop="zip" label="邮编" width="120"> </el-table-column> <el-table-column fixed="right" label="操作" width="100"> <template slot-scope="scope"> <el-button @click="handleClick(scope.row)" type="text" size="small">查看</el-button> <el-button type="text" size="small">编辑</el-button> </template> </el-table-column> </el-table> </div> </template> <script> export default { methods: { handleClick(row) { console.log(row); } }, data() { return { tableData: [{ date: '2016-05-02', name: '王小虎', province: '上海', city: '普陀区', address: '上海市普陀区金沙江路 1518 弄', zip: 200333 }, { date: '2016-05-04', name: '王小虎', province: '上海', city: '普陀区', address: '上海市普陀区金沙江路 1517 弄', zip: 200333 }, { date: '2016-05-01', name: '王小虎', province: '上海', city: '普陀区', address: '上海市普陀区金沙江路 1519 弄', zip: 200333 }, { date: '2016-05-03', name: '王小虎', province: '上海', city: '普陀区', address: '上海市普陀区金沙江路 1516 弄', zip: 200333 }] } } } </script> 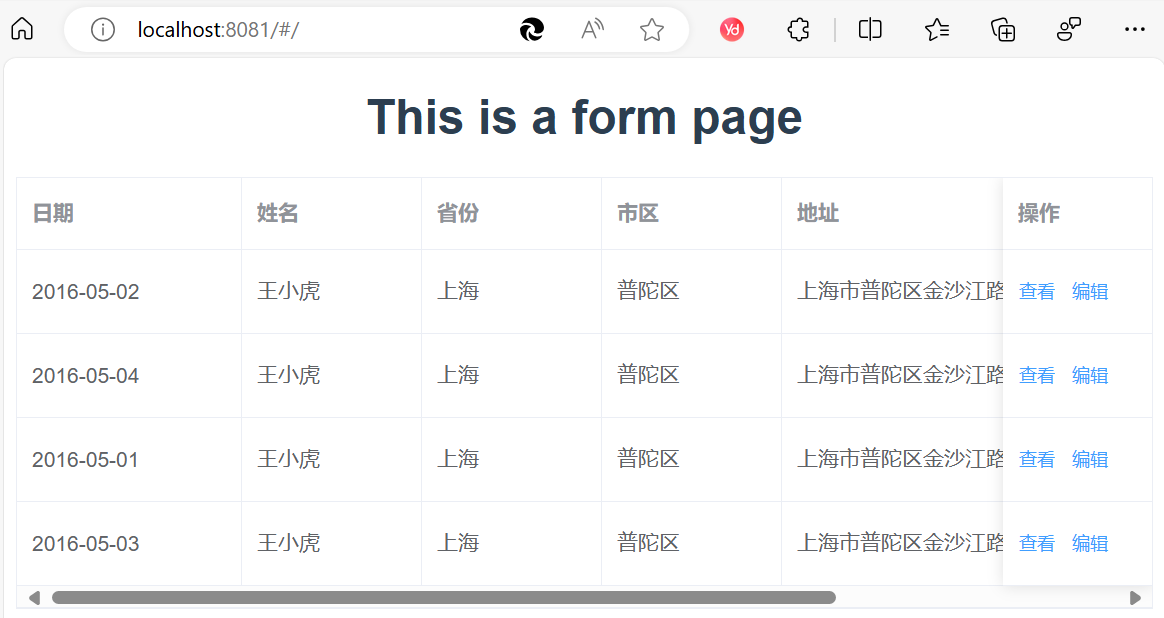
2.再写 import
注意 import 子组件
如果是公共组件,则组件写在路径下 src\components\HelloWorld.vue
如果是页面跳转组件,则在路径下 src\views\components\details.vue

<script> import details from './details.vue' export default { components: { details }, 3.写 script 的方法:新增、编辑、查看、关闭
注意父组件给子组件传值
写 methods
注:detailType参数,详见三、页面显示模式
/**弹窗在父组件 */ handleAdd() { this.detailType = "add"; this.componentKey += 1; this.dialogVisible = true; }, handleEdit(row) { this.detailType = "edit"; this.currentRow = row; this.componentKey += 1; this.dialogVisible = true; }, handleView(row) { this.currentRow = row; this.detailType = "view"; this.componentKey += 1; this.dialogVisible = true; }, handleClose() { this.dialogVisible = false; // this.$refs.childRef.ruleForm = {}; }, 注意data中的新名词定义,其中componentKey: Math.random()为给key取随机数
data() { return { detailType: "", currentRow: {}, dialogVisible: false, componentKey: Math.random(), 4.提交确认方法:handleSummit
然后接收校验方法数据
handleSubmit() { this.$refs.childRef.$refs["ruleForm"].validate((valid) => { if (valid) { const data = this.$refs.childRef.ruleForm; this.handleClose(); this.tableData.push(data); } else { return false; } }); }, 5.写 template 的弹窗,包含表单的确认和取消按钮
<el-dialog title="子组件" :visible.sync="dialogVisible" width="30%" @close="handleClose" > <!-- v-if 重新渲染子组件--> <!-- <HelloWorld v-if="dialogVisible" ref="childRef" :detail-type="detailType" :currentRow="currentRow" ></HelloWorld> --> <!-- key重新渲染子组件 --> <HelloWorld ref="childRef" :detail-type="detailType" :currentRow="currentRow" :key="componentKey" ></HelloWorld> <span slot="footer" class="dialog-footer"> <el-button @click="handleClose">取 消</el-button> <el-button type="primary" @click="handleSubmit">确 定</el-button> </span> </el-dialog> 二、完成子组件的表单
1.前端 ui-表单验证
Form 组件提供了表单验证的功能,只需要通过 rules 属性传入约定的验证规则,并将 Form-Item 的 prop 属性设置为需校验的字段名即可。
<template> <div> <!-- 父组件 --> <h1>This is a form page</h1> <el-form :model="ruleForm" :rules="rules" ref="ruleForm" label-width="100px" class="demo-ruleForm"> <el-form-item label="活动名称" prop="name"> <el-input v-model="ruleForm.name"></el-input> </el-form-item> <el-form-item label="活动区域" prop="region"> <el-select v-model="ruleForm.region" placeholder="请选择活动区域"> <el-option label="区域一" value="shanghai"></el-option> <el-option label="区域二" value="beijing"></el-option> </el-select> </el-form-item> <el-form-item label="活动时间" required> <el-col :span="11"> <el-form-item prop="date1"> <el-date-picker type="date" placeholder="选择日期" v-model="ruleForm.date1" style="width: 100%;"></el-date-picker> </el-form-item> </el-col> <el-col class="line" :span="2">-</el-col> <el-col :span="11"> <el-form-item prop="date2"> <el-time-picker placeholder="选择时间" v-model="ruleForm.date2" style="width: 100%;"></el-time-picker> </el-form-item> </el-col> </el-form-item> <el-form-item label="即时配送" prop="delivery"> <el-switch v-model="ruleForm.delivery"></el-switch> </el-form-item> <el-form-item label="活动性质" prop="type"> <el-checkbox-group v-model="ruleForm.type"> <el-checkbox label="美食/餐厅线上活动" name="type"></el-checkbox> <el-checkbox label="地推活动" name="type"></el-checkbox> <el-checkbox label="线下主题活动" name="type"></el-checkbox> <el-checkbox label="单纯品牌曝光" name="type"></el-checkbox> </el-checkbox-group> </el-form-item> <el-form-item label="特殊资源" prop="resource"> <el-radio-group v-model="ruleForm.resource"> <el-radio label="线上品牌商赞助"></el-radio> <el-radio label="线下场地免费"></el-radio> </el-radio-group> </el-form-item> <el-form-item label="活动形式" prop="desc"> <el-input type="textarea" v-model="ruleForm.desc"></el-input> </el-form-item> <el-form-item> <el-button type="primary" @click="submitForm('ruleForm')">立即创建</el-button> <el-button @click="resetForm('ruleForm')">重置</el-button> </el-form-item> </el-form> </div> </template> <script> export default { data() { return { ruleForm: { name: '', region: '', date1: '', date2: '', delivery: false, type: [], resource: '', desc: '' }, rules: { name: [ { required: true, message: '请输入活动名称', trigger: 'blur' }, { min: 3, max: 5, message: '长度在 3 到 5 个字符', trigger: 'blur' } ], region: [ { required: true, message: '请选择活动区域', trigger: 'change' } ], date1: [ { type: 'date', required: true, message: '请选择日期', trigger: 'change' } ], date2: [ { type: 'date', required: true, message: '请选择时间', trigger: 'change' } ], type: [ { type: 'array', required: true, message: '请至少选择一个活动性质', trigger: 'change' } ], resource: [ { required: true, message: '请选择活动资源', trigger: 'change' } ], desc: [ { required: true, message: '请填写活动形式', trigger: 'blur' } ] } }; }, methods: { submitForm(formName) { this.$refs[formName].validate((valid) => { if (valid) { alert('submit!'); } else { console.log('error submit!!'); return false; } }); }, resetForm(formName) { this.$refs[formName].resetFields(); } } } </script> <style></style> 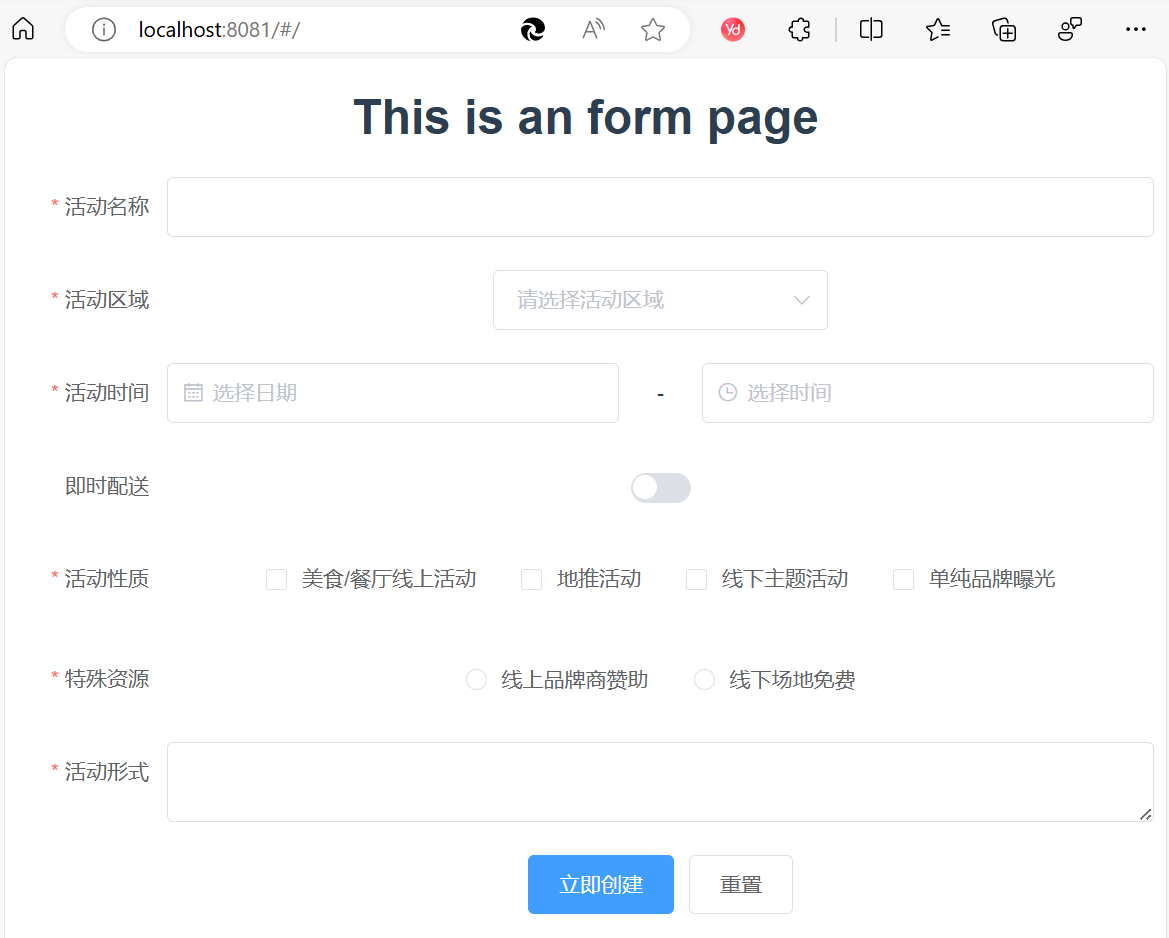
2.声明 name,方便父组件调用
<script> export default { name: 'DetailsForm', 3.必填校验 ruleForm
取消确定方法在父组件,如何校验数据?
调用子组件包含ref的ruleForm即可
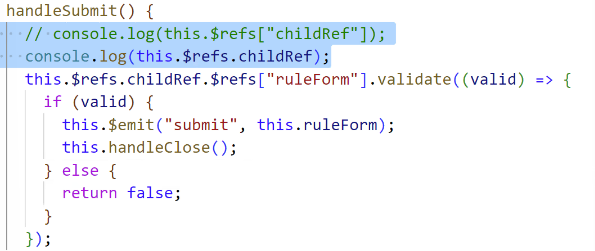
打印,由于是一个对象,所以都行
①console.log(this. r e f s [ " c h i l d R e f " ] ) ; ② c o n s o l e . l o g ( t h i s . refs [ "childRef"]); ②console.log(this. refs["childRef"]);②console.log(this.refs.childRef);
<template> <div> <el-form ref="ruleForm" label-width="100px" class="demo-ruleForm" inline :model="ruleForm" :rules="rules" :disabled="detailType === 'view'" > <el-form-item label="日期" prop="date"> <el-input v-model="ruleForm.date"></el-input> </el-form-item> <el-form-item label="姓名" prop="name"> <el-input v-model="ruleForm.name"></el-input> </el-form-item> <el-form-item label="省份" prop="province"> <el-input v-model="ruleForm.province"></el-input> </el-form-item> </el-form> </div> </template> 4.写子组件给父组件传值
() => {} 是一个使用箭头函数语法创建的空函数。在 JavaScript 和 Vue 中,这种语法用于定义一个没有参数且不执行任何操作的函数。
这里定义了一个名为 currentRow 的 prop,其类型为 Object。如果没有为 currentRow 提供值,那么它的默认值将是一个空对象,这是通过调用 () => {}(一个返回空对象的箭头函数)来实现的。
通过使用一个函数返回一个新的对象,每个组件实例将获得该对象的一个全新的、独立的副本。这样做既避免了共享状态的问题,也提供了一个安全的默认值。
<script> export default { name: "HelloWorld", props: { detailType: { type: String, default: "", }, currentRow: { type: Object, default: () => {}, }, }, 有方法写方法,不要重复写 dis 显示
传值:
① 引用子组件的地方,写一样的名称。
type传的是字符串 :type传的是变量
② 方法中写
组件的自定义事件 ref
- 一种组件间通信的方式,适用于:子组件 ===> 父组件
- 使用场景:A是父组件,B是子组件,B想给A传数据,那么就要在A中给B绑定自定义事件(事件的回调在A中)。
- 绑定自定义事件:
a. 第一种方式,在父组件中:<Demo @atguigu=“test”/> 或
b. 第二种方式,在父组件中:
<Demo ref="demo"/> ...... mounted(){ this.$refs.xxx.$on('atguigu',this.test) } c. 若想让自定义事件只能触发一次,可以使用once修饰符,或 o n c e 方法。 4. 触发自定义事件: t h i s . once方法。 4. 触发自定义事件:this. once方法。4.触发自定义事件:this.emit(‘atguigu’,数据)
5. 解绑自定义事件this. o f f ( ′ a t g u i g u ′ ) 6. 组件上也可以绑定原生 D O M 事件,需要使用 n a t i v e 修饰符。 7. 注意:通过 t h i s . off('atguigu') 6. 组件上也可以绑定原生DOM事件,需要使用native修饰符。 7. 注意:通过this. off(′atguigu′)6.组件上也可以绑定原生DOM事件,需要使用native修饰符。7.注意:通过this.refs.xxx.$on(‘atguigu’,回调)绑定自定义事件时,回调要么配置在methods中,要么用箭头函数,否则this指向会出问题!
5.验证是否传值成功
在控制台,确认是否给父组件传值成功
注意数组和对象

6.页面渲染
查看之后,点击新增(显示的是查看的数值)
①created创建时,设置表单为空,但仍存在数值
原因:加一个v-if,去刷新一下(弹窗已经加载,所以没有被设置为空)
②实例给为空行

<el-dialog title="子组件" :visible.sync="dialogVisible" width="30%" @close="handleClose" > <!-- v-if 重新渲染子组件--> <!-- <HelloWorld v-if="dialogVisible" ref="childRef" :detail-type="detailType" :currentRow="currentRow" ></HelloWorld> --> <!-- key重新渲染子组件 --> <HelloWorld ref="childRef" :detail-type="detailType" :currentRow="currentRow" :key="componentKey" ></HelloWorld> <span slot="footer" class="dialog-footer"> <el-button @click="handleClose">取 消</el-button> <el-button type="primary" @click="handleSubmit">确 定</el-button> </span> </el-dialog> 三、页面显示模式(编辑和查看)逻辑
type写在方法的最前面,方便确认和更改值
父组件赋值type方法
子组件接收,type的值
1.接收父组件的值
props:{type}
组件名应该是子组件传过去的
<script> export default { name: "HelloWorld", props: { detailType: { type: String, default: "", }, 2.测试 type
可以在最前面写{{type}}
3.refs 方法需要监听
this.$refs[ “childRef” ].init( “add” ) ;
注意子组件接受的是两个参数,所以这里应该是:
methods: { /**弹窗在子组件 */ handleAdd() { console.log(this.$refs["childRef"]); this.$refs["childRef"].init("add", {}); }, currentRow: { type: Object, default: () => {}, }, 4.子组件表单 编辑禁用
在 input 上面写一个总的 el-form
<template> <div> <el-form ref="ruleForm" label-width="100px" class="demo-ruleForm" inline :model="ruleForm" :rules="rules" :disabled="detailType === 'view'" > 不能直接写 disable=“”,要先定义 type 的 data 和 methods
init(type,row)
<script> export default { name: "HelloWorld", props: { detailType: { type: String, default: "", }, created() { if (this.detailType === "edit" || this.detailType === "view") { this.ruleForm = this.currentRow; } else { this.ruleForm = {}; } }, 5.回显数值
先打印 row 参数,看传值成功没
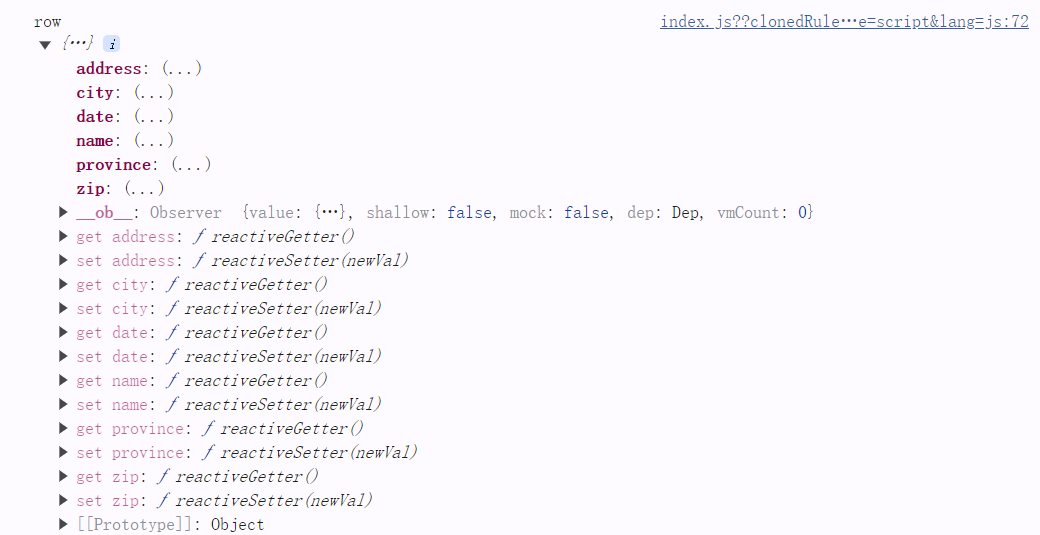
<template slot-scope="scope"> <el-button @click="handleView(scope.row)" type="text" size="small" >查看</el-button> <el-button type="text" size="small" @click="handleEdit(scope.row)" >编辑</el-button> </template> 传值:父组件先定义data,:data,
子组件打印看能不能拿到,
created方法发音,然后在props里面

<script> export default { name: "HelloWorld", currentRow: { type: Object, default: () => {}, }, }, 6.更新数据
两种方法:
① 拿到当前行的索引 index,传过去,再传回来,改数组的值
② 用 init,但是需要对 vue 生命周期比较熟悉
然后打印,看传值成功没

四、小结
希望本文对你有所帮助。如果你有任何疑问或需要进一步的帮助,请在评论区留言。祝你开发顺利!
hello,我是 是Yu欸 。如果你喜欢我的文章,欢迎三连给我鼓励和支持:👍点赞 📁 关注 💬评论,我会给大家带来更多有用有趣的文章。
原文链接 👉 ,⚡️更新更及时。
欢迎大家添加好友交流。

