
阅读量:0
本篇文章参考自RayeRen的acad-homepage.github.io,一个现代、响应式的个人学术主页。
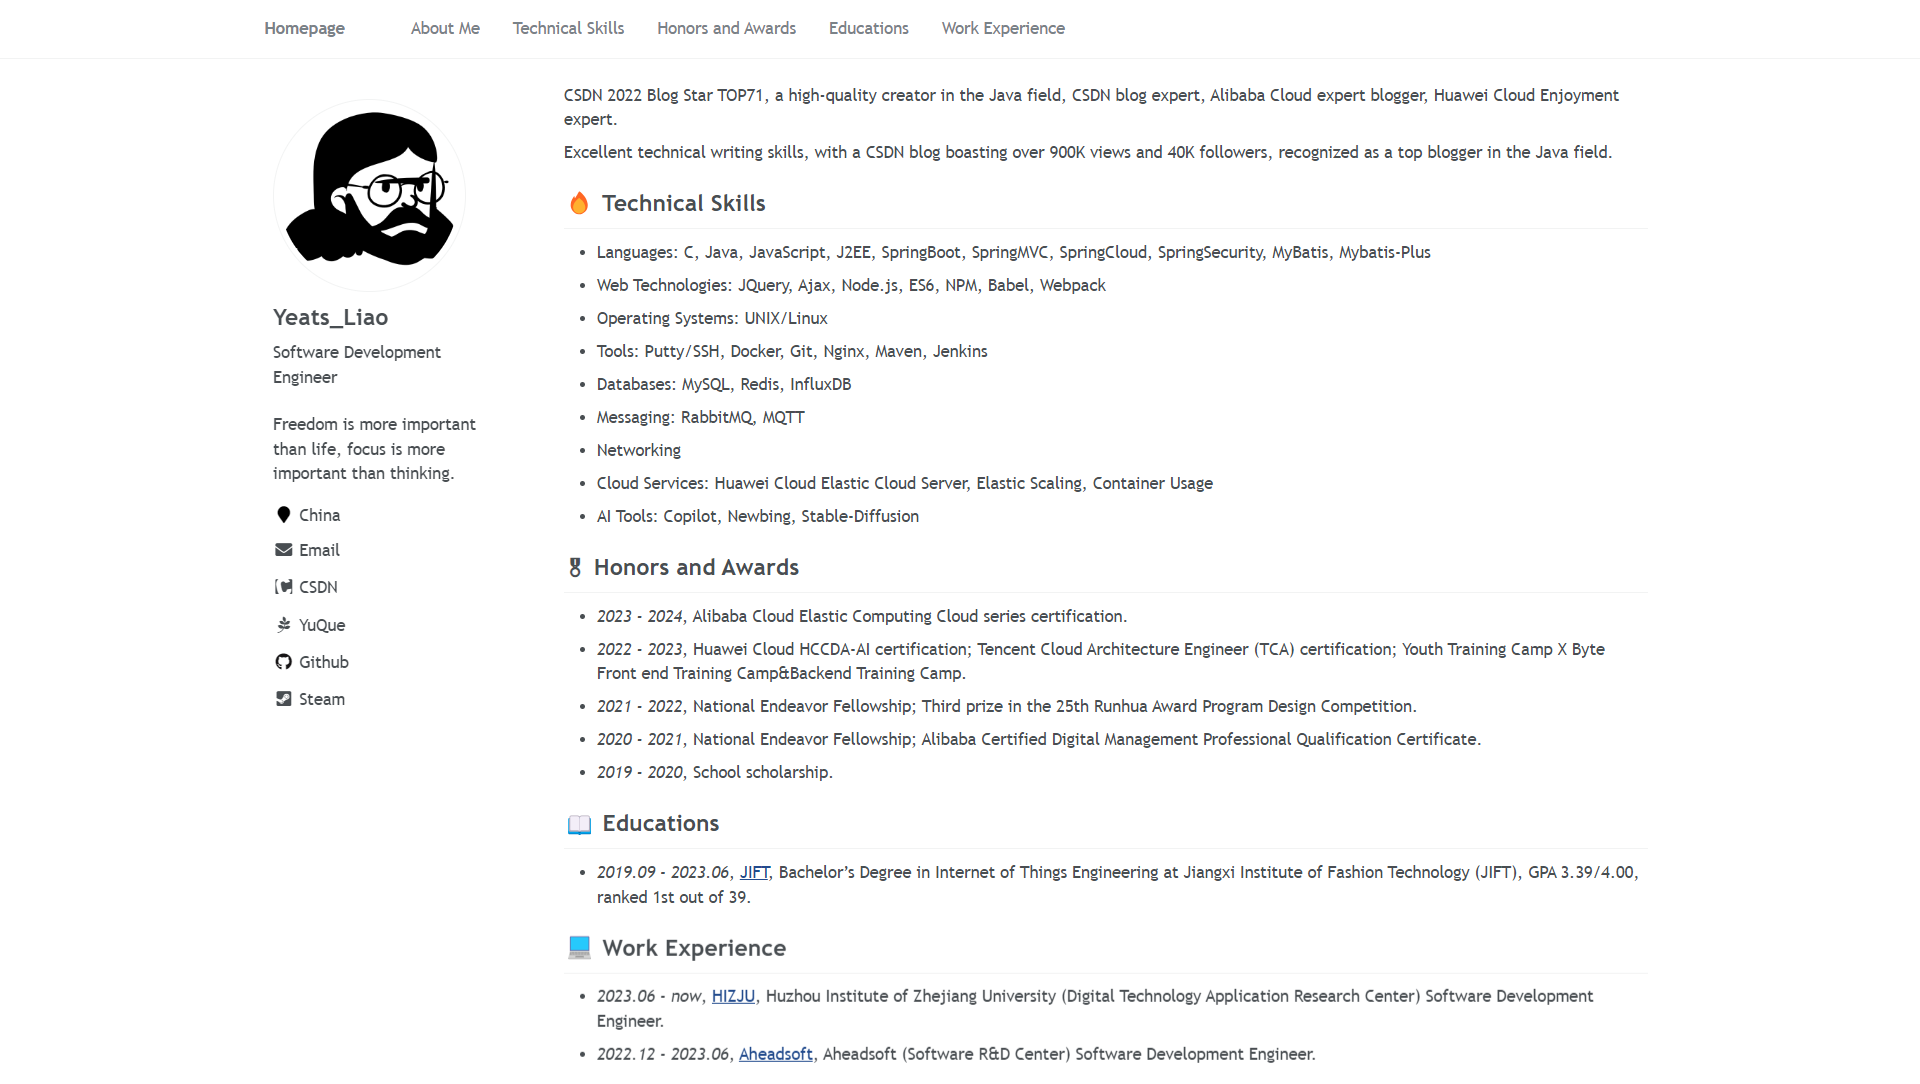
一些例子:
主要特点
- 自动更新谷歌学术引用: 借助谷歌学术爬虫和github action功能,本仓库可以自动更新作者的引用数和论文引用数。
- 支持谷歌Analytics: 你可以通过简单的配置来实现使用谷歌Analytics跟踪网页的流量。
- 响应式的: 此主页会针对不同的屏幕尺寸自动调整布局。
- 美观而简约: 此主页美观而简约,适合个人学术主页的搭建。
- 搜索引擎优化: 搜索引擎优化 (SEO) 帮助搜索引擎轻松找到您在主页上发布的信息,然后将其与类似网站进行排名,并获得排名优势。
一、快速开始
如果你只是想编辑一个页面就完成博客的搭建,下面的步骤不需要启动项目即可实现。
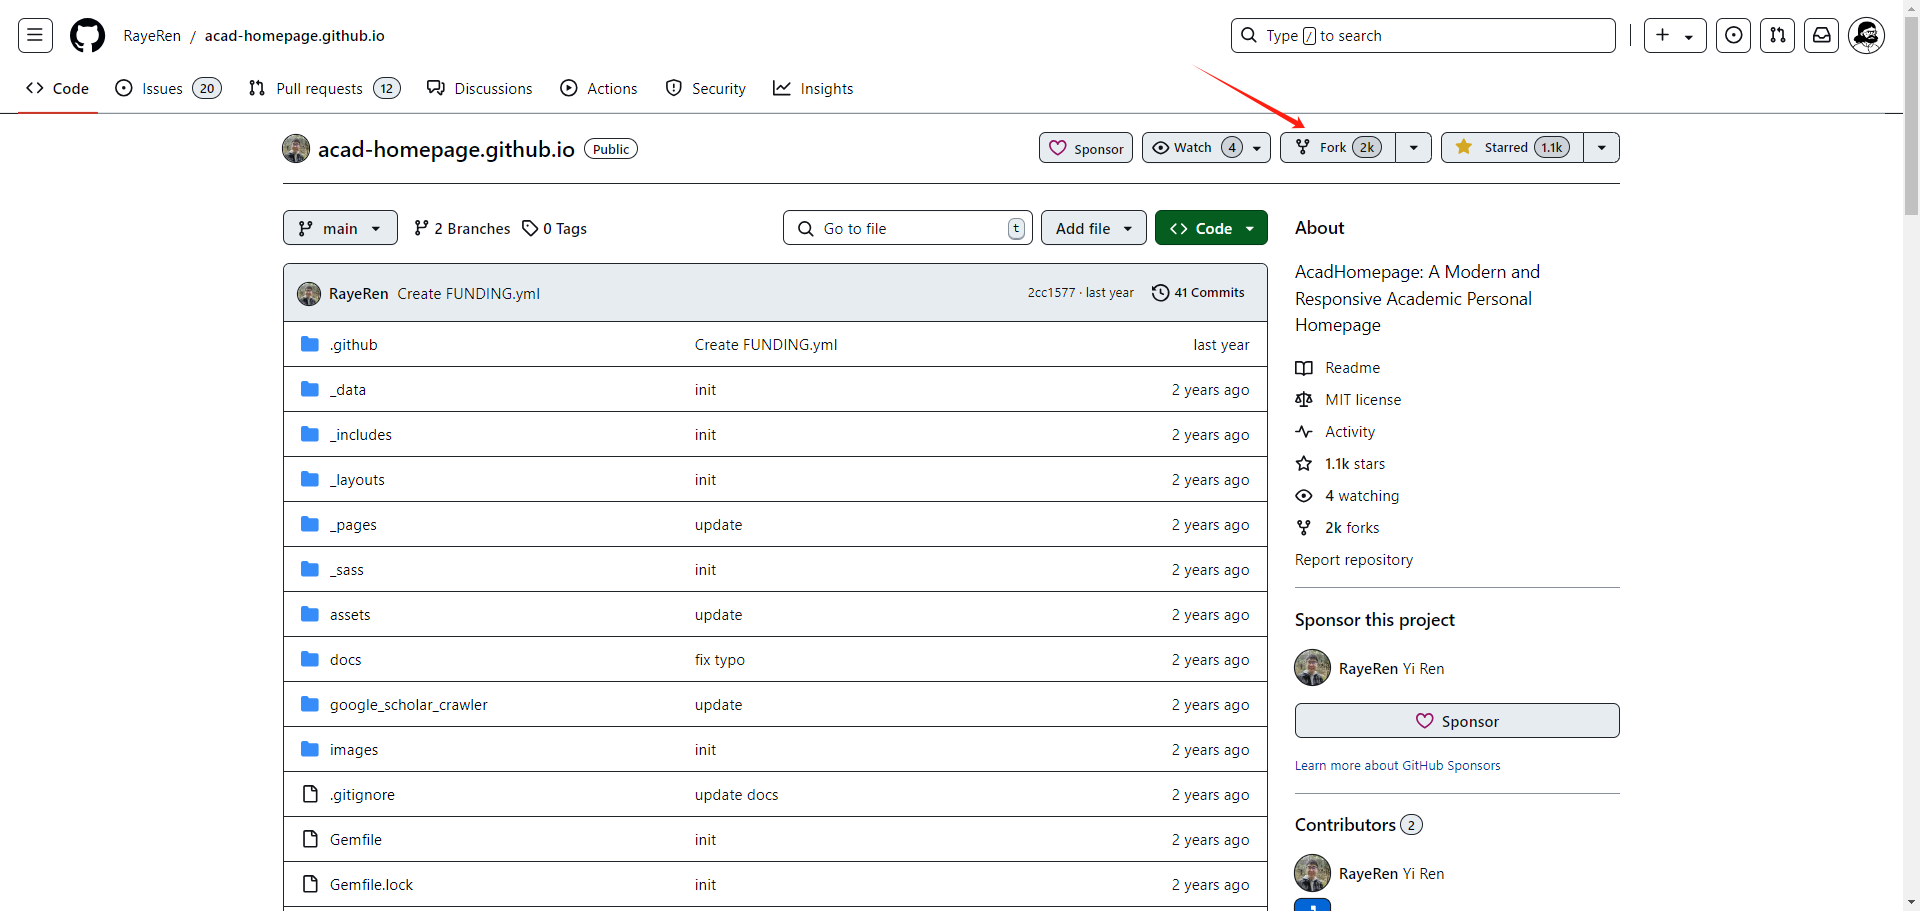
1.Fork
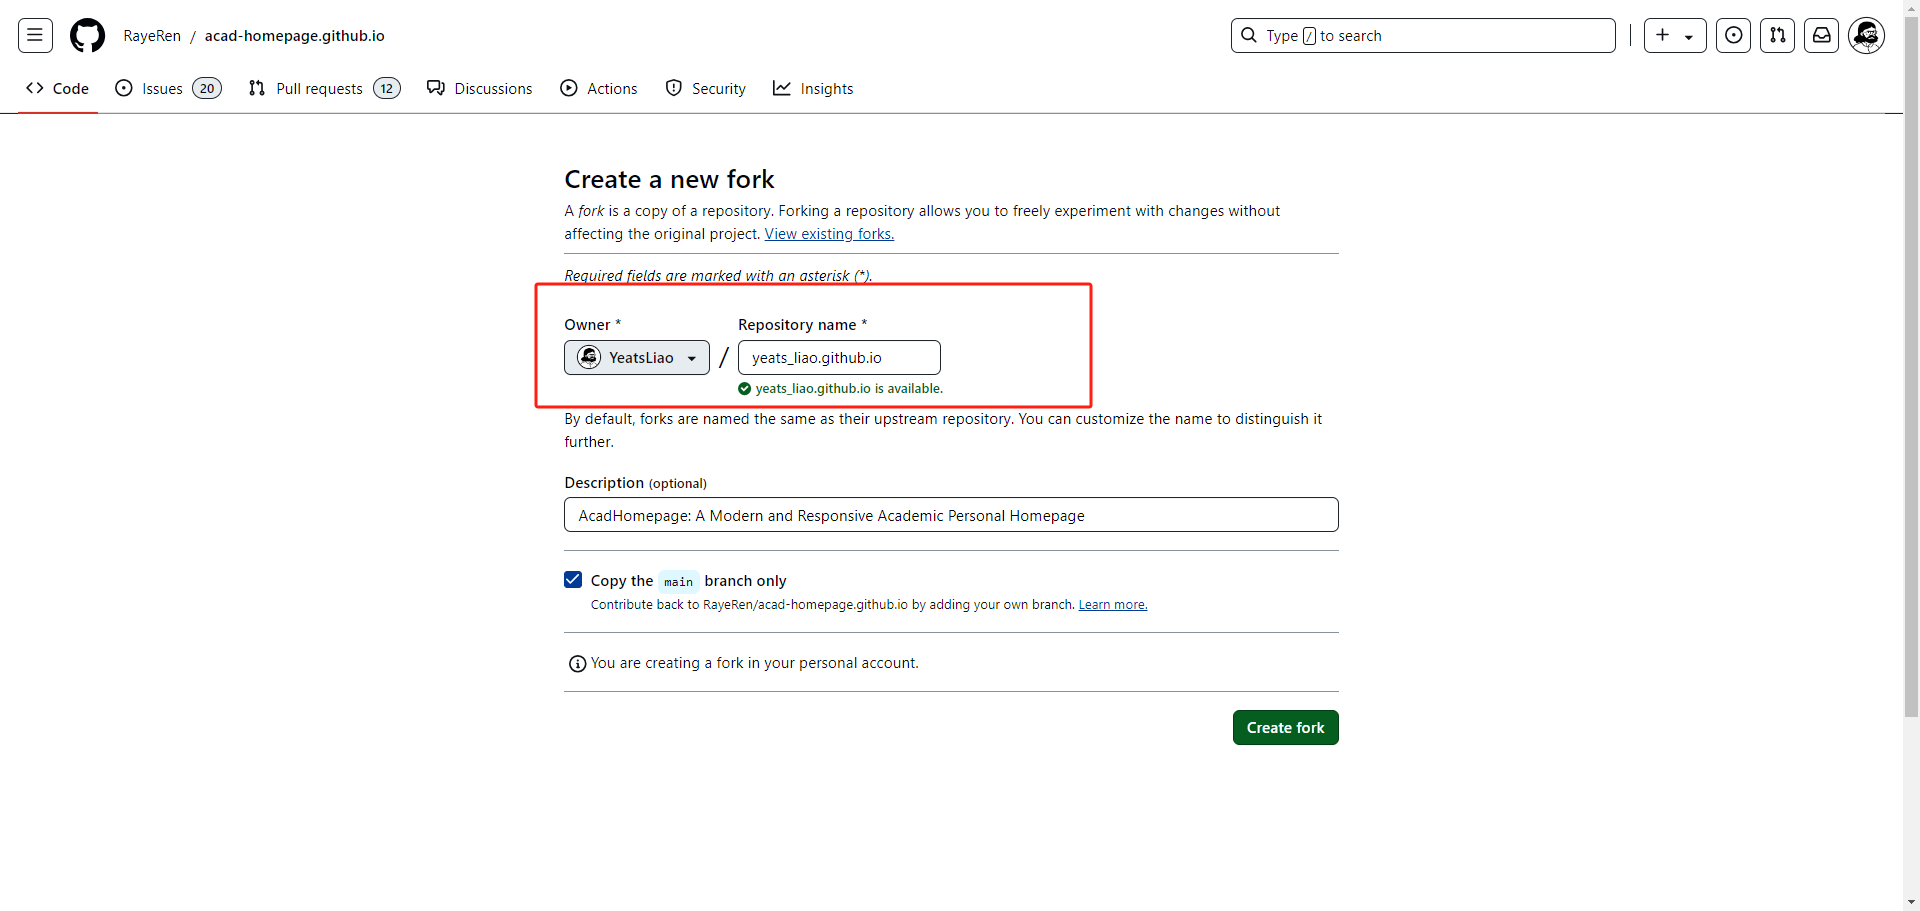
Fork本仓库到USERNAME/USERNAME.github.io,其中USERNAME是你的github用户名。
这里我填入yeatsliao.github.io
在自己的仓库中,选择Settings,Pages,Branch中选择/root,然后Save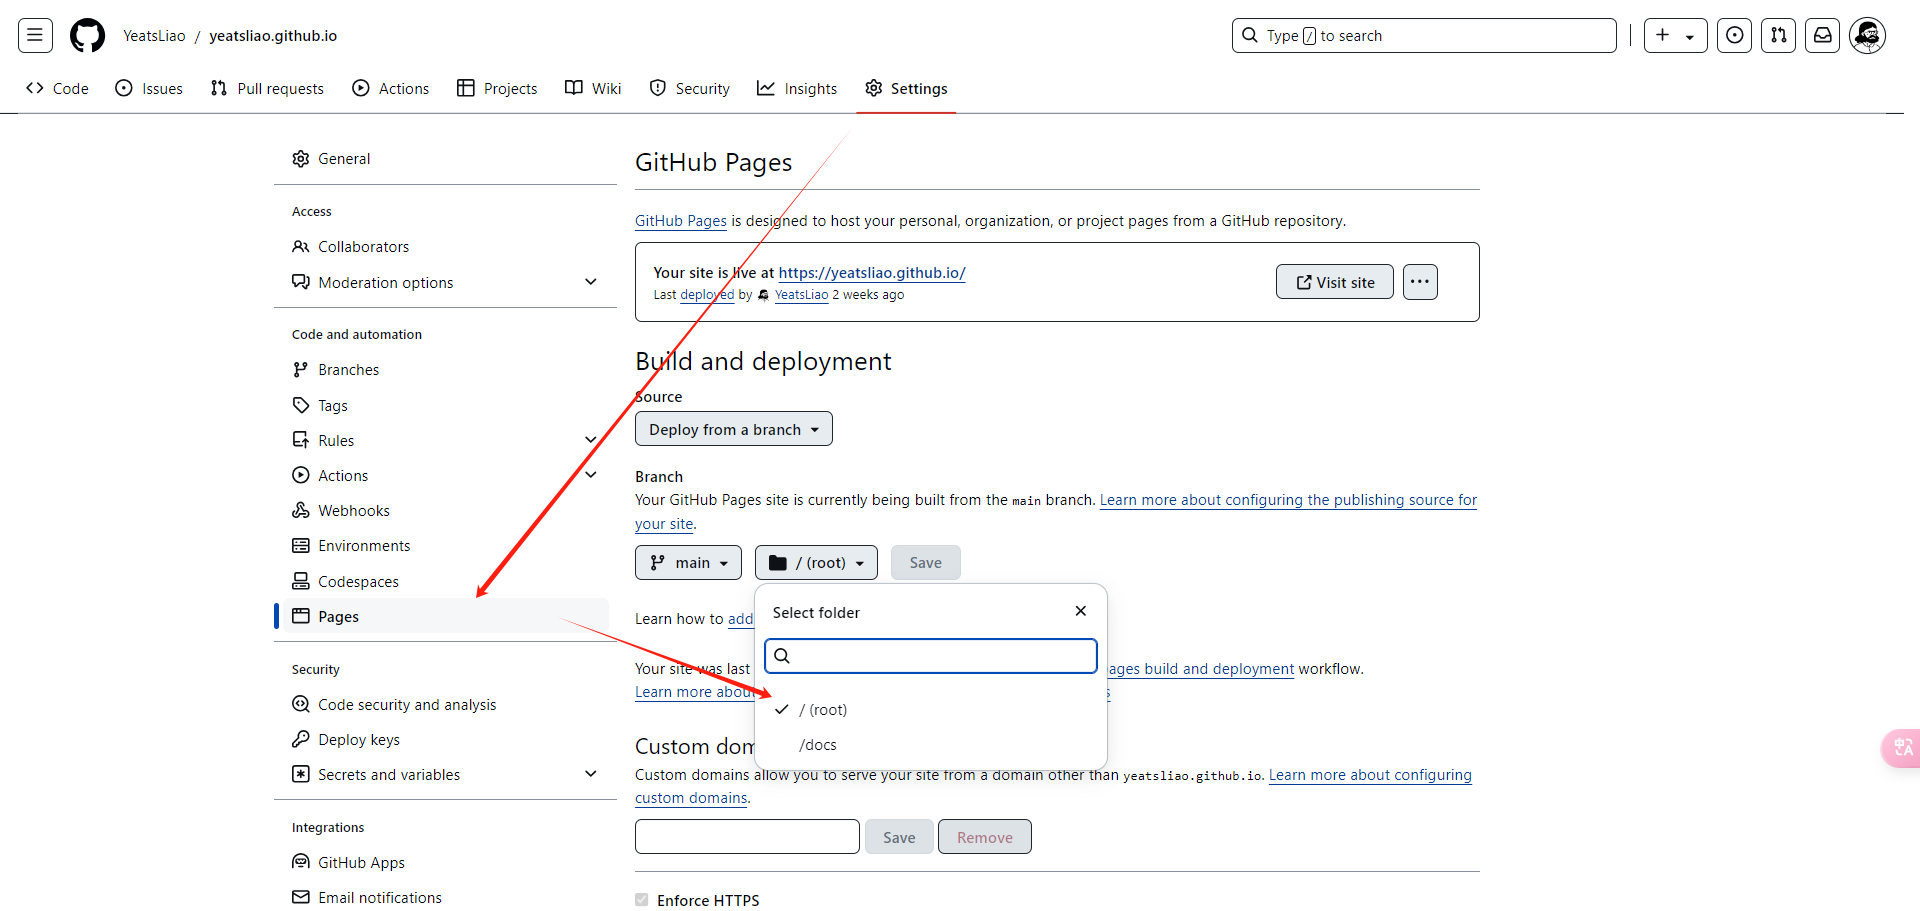
等待一会后回显示Your site is live at USERNAME/USERNAME.github.io,点击这个链接即可看到个人主页了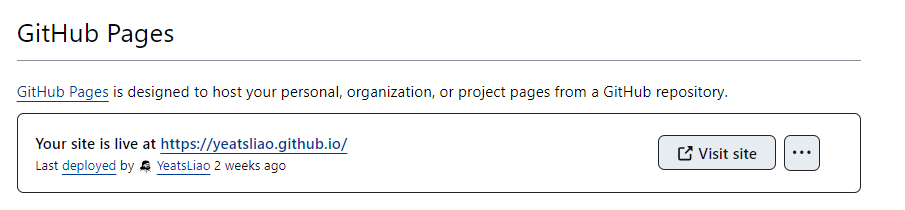
2.配置谷歌学术引用爬虫(如无可忽略)
在你的谷歌学术引用页面的url里找到你的谷歌学术ID(如无可忽略):例如,在url https://scholar.google.com/citations?user=SCHOLAR_ID中,SCHOLAR_ID部分即为你的谷歌学术ID。
在github本仓库页面的Settings -> Secrets -> Actions -> New repository secret中,添加GOOGLE_SCHOLAR_ID变量:name=GOOGLE_SCHOLAR_ID、value=SCHOLAR_ID。
在github本仓库页面的Action中,点击*“I understand my workflows, go ahead and enable them”*启用workflows by clicking *"。本action将会谷歌学术引用的统计量数据gs_data.json到本仓库的google-scholar-stats分支中。每次修改main分支的内容会触发该action。本action也会在每天08:00 UTC定时触发。
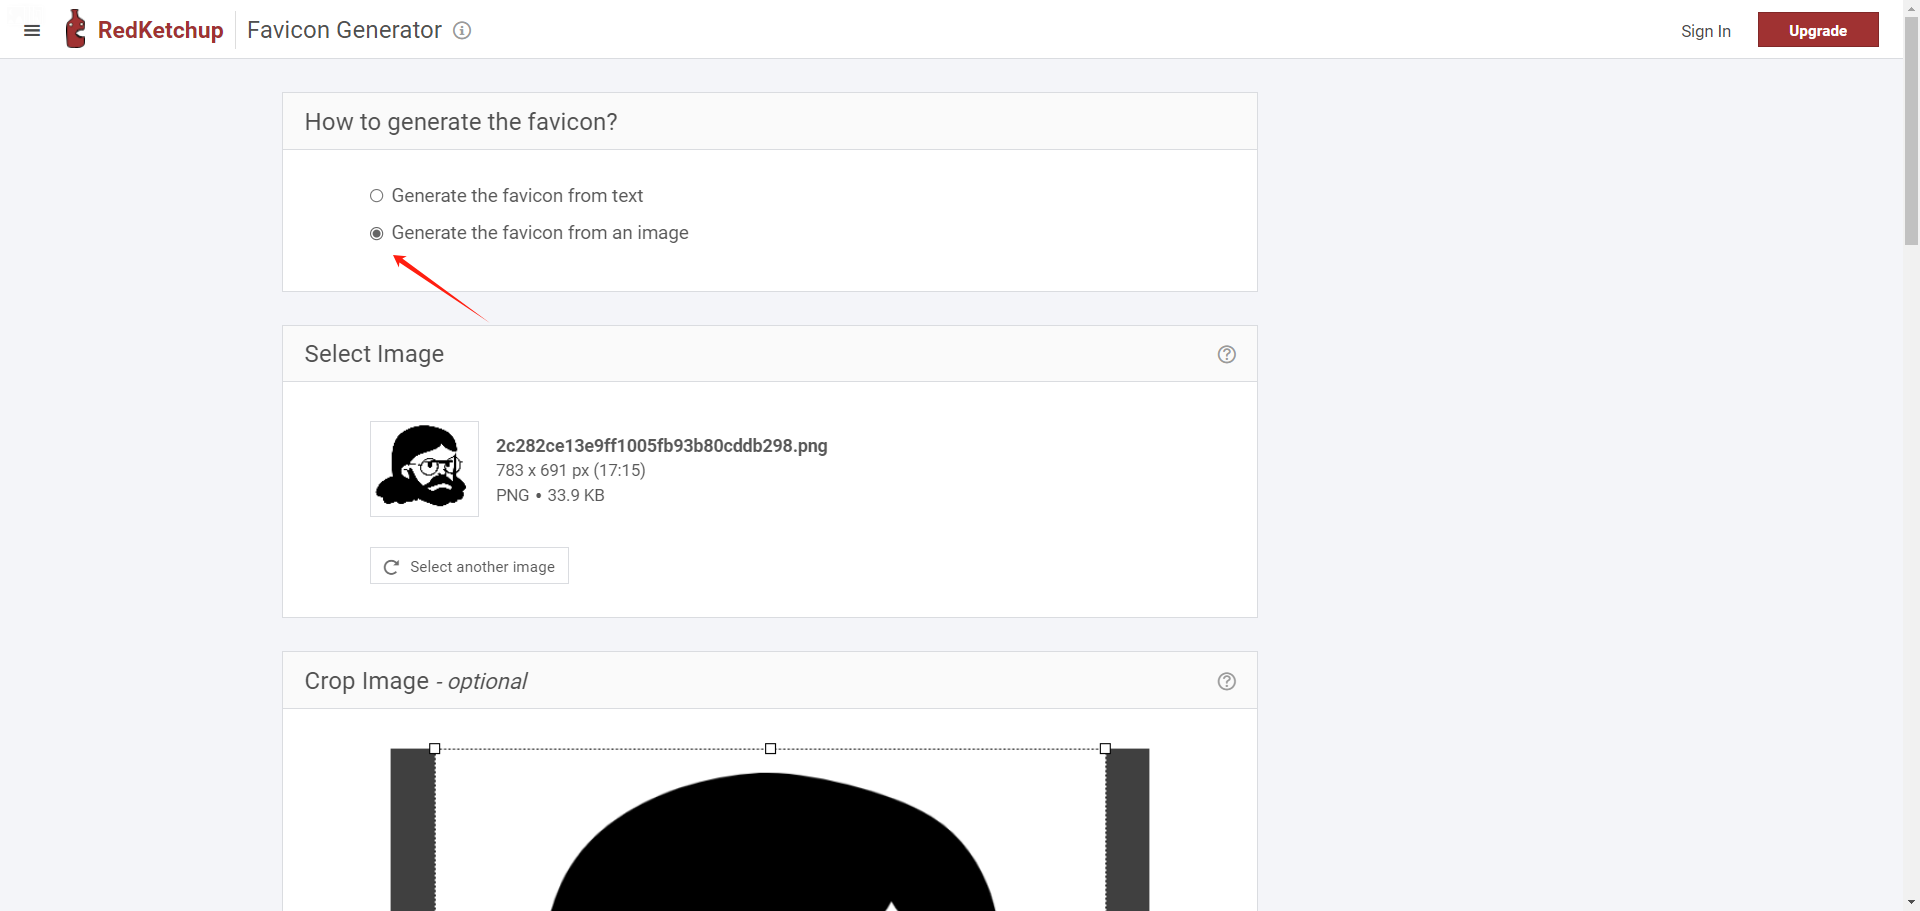
3.生成icon
使用 favicon-generator生成favicon(网页icon文件),并下载所有文件到REPO/images。
4.修改主页及侧边栏
配置文件../_config.yml,不需要的功能可以注释调,更多的配置信息在注释中有详细描述。
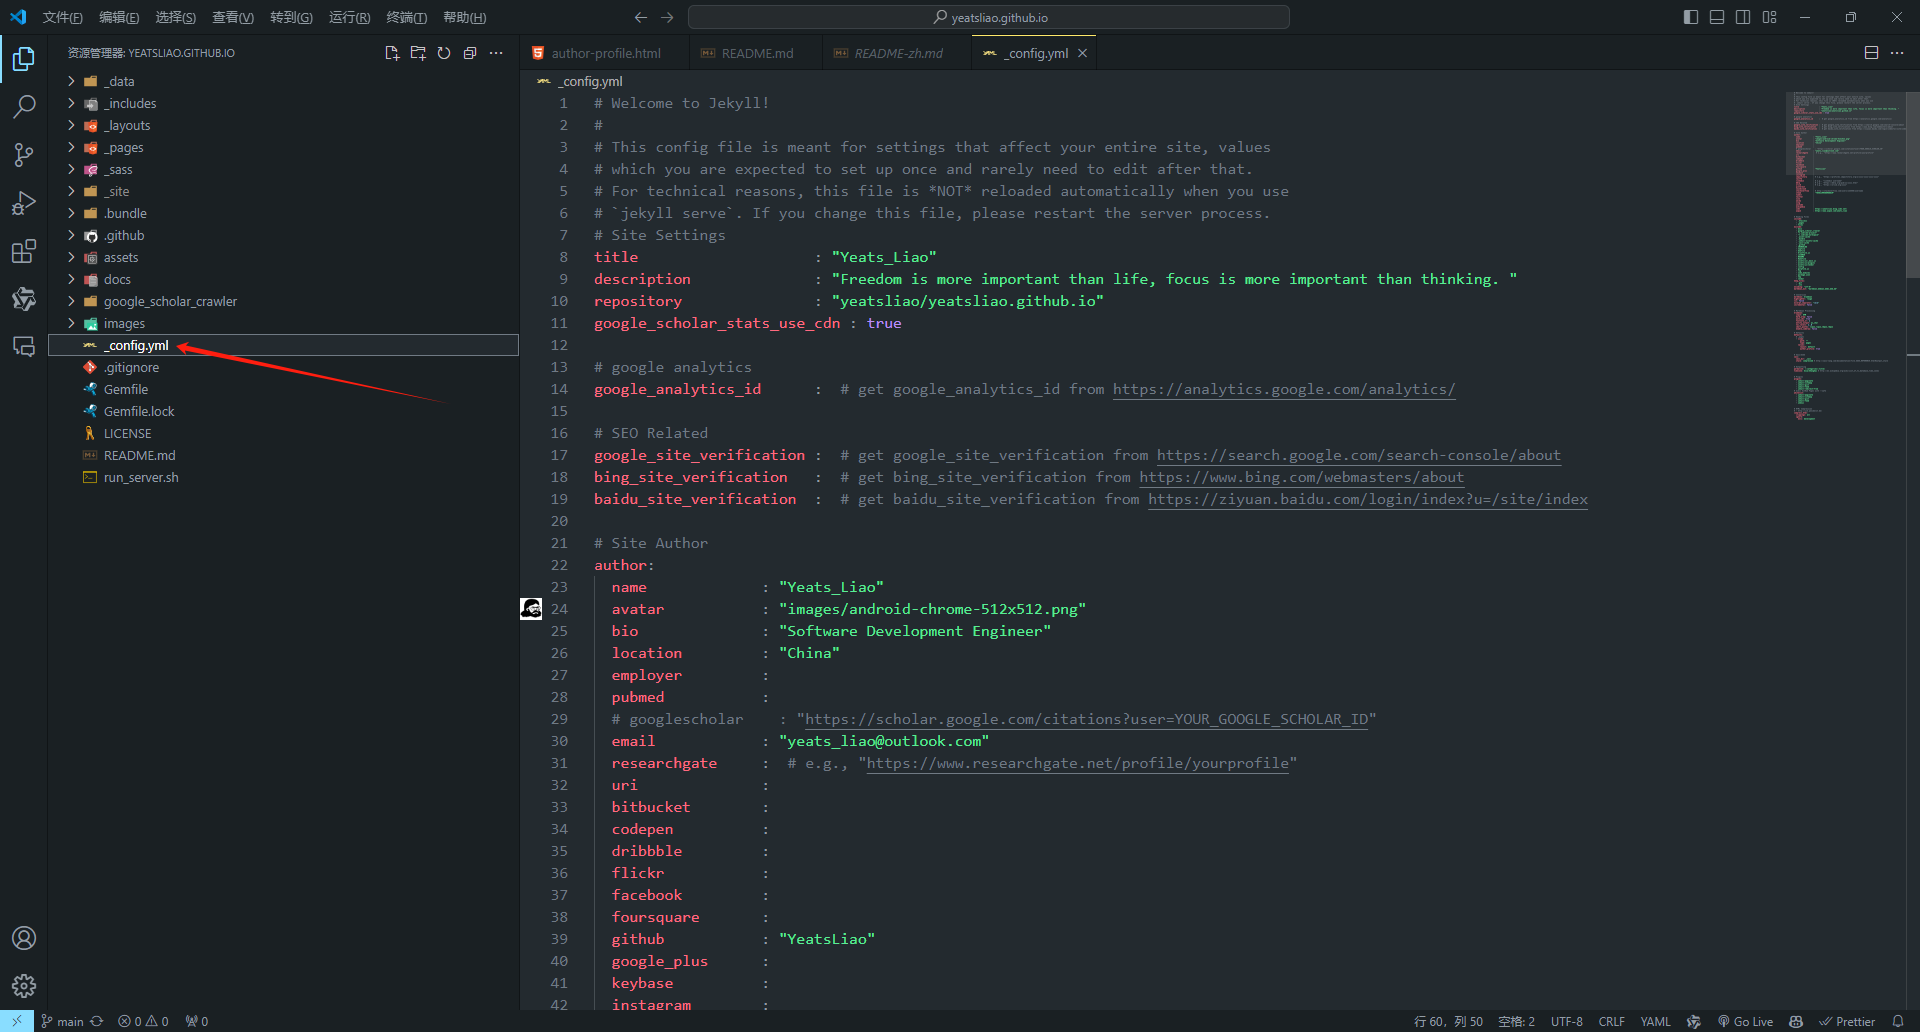
title: 主页标题
description: 主页的描述
repository: USER_NAME/REPO_NAME
google_analytics_id (可选的): 谷歌Analytics ID
SEO相关的键值 (可选的): 从搜索引擎的控制台里获得对应的ID (例如:Google, Bing and Baidu),然后粘贴到这里。
author: 主页作者信息,包括其他网页、Email、所在城市、大学等。
google_scholar_stats_use_cdn: 使用CDN读取存储于https://raw.githubusercontent.com/的google scholar引用统计数据。但是CDN有缓存,因此google_scholar_stats_use_cdn : True时,引用数据更新会有延迟。
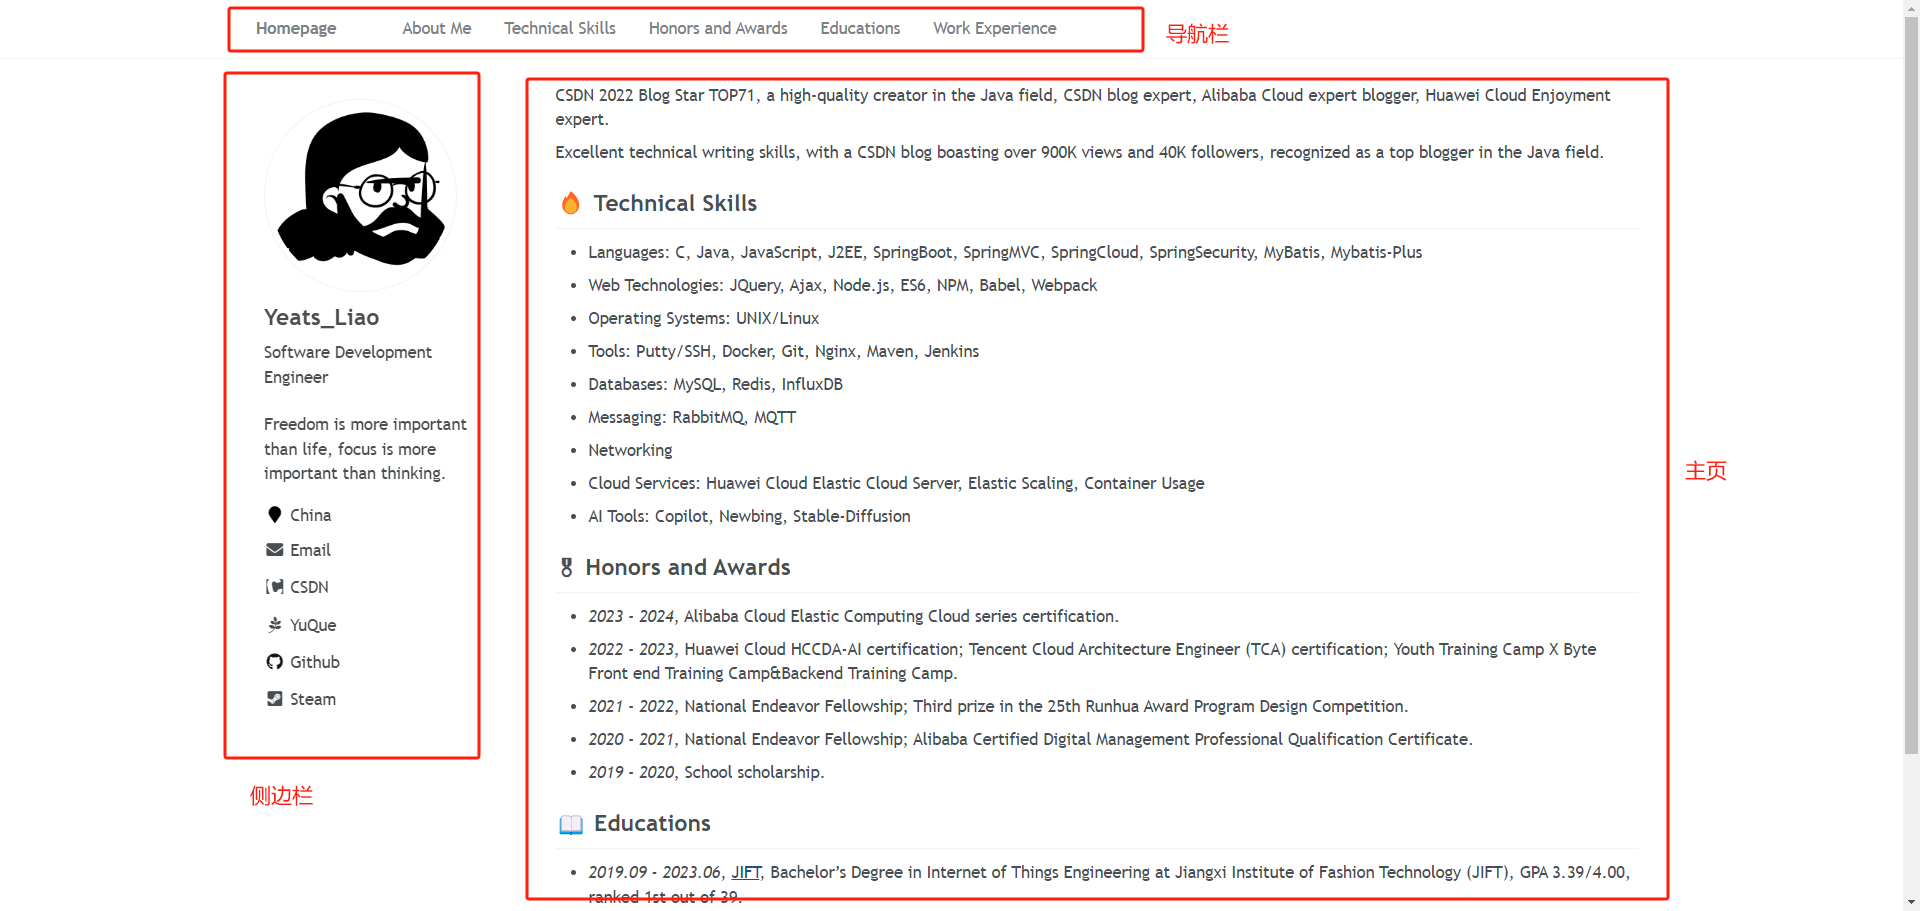
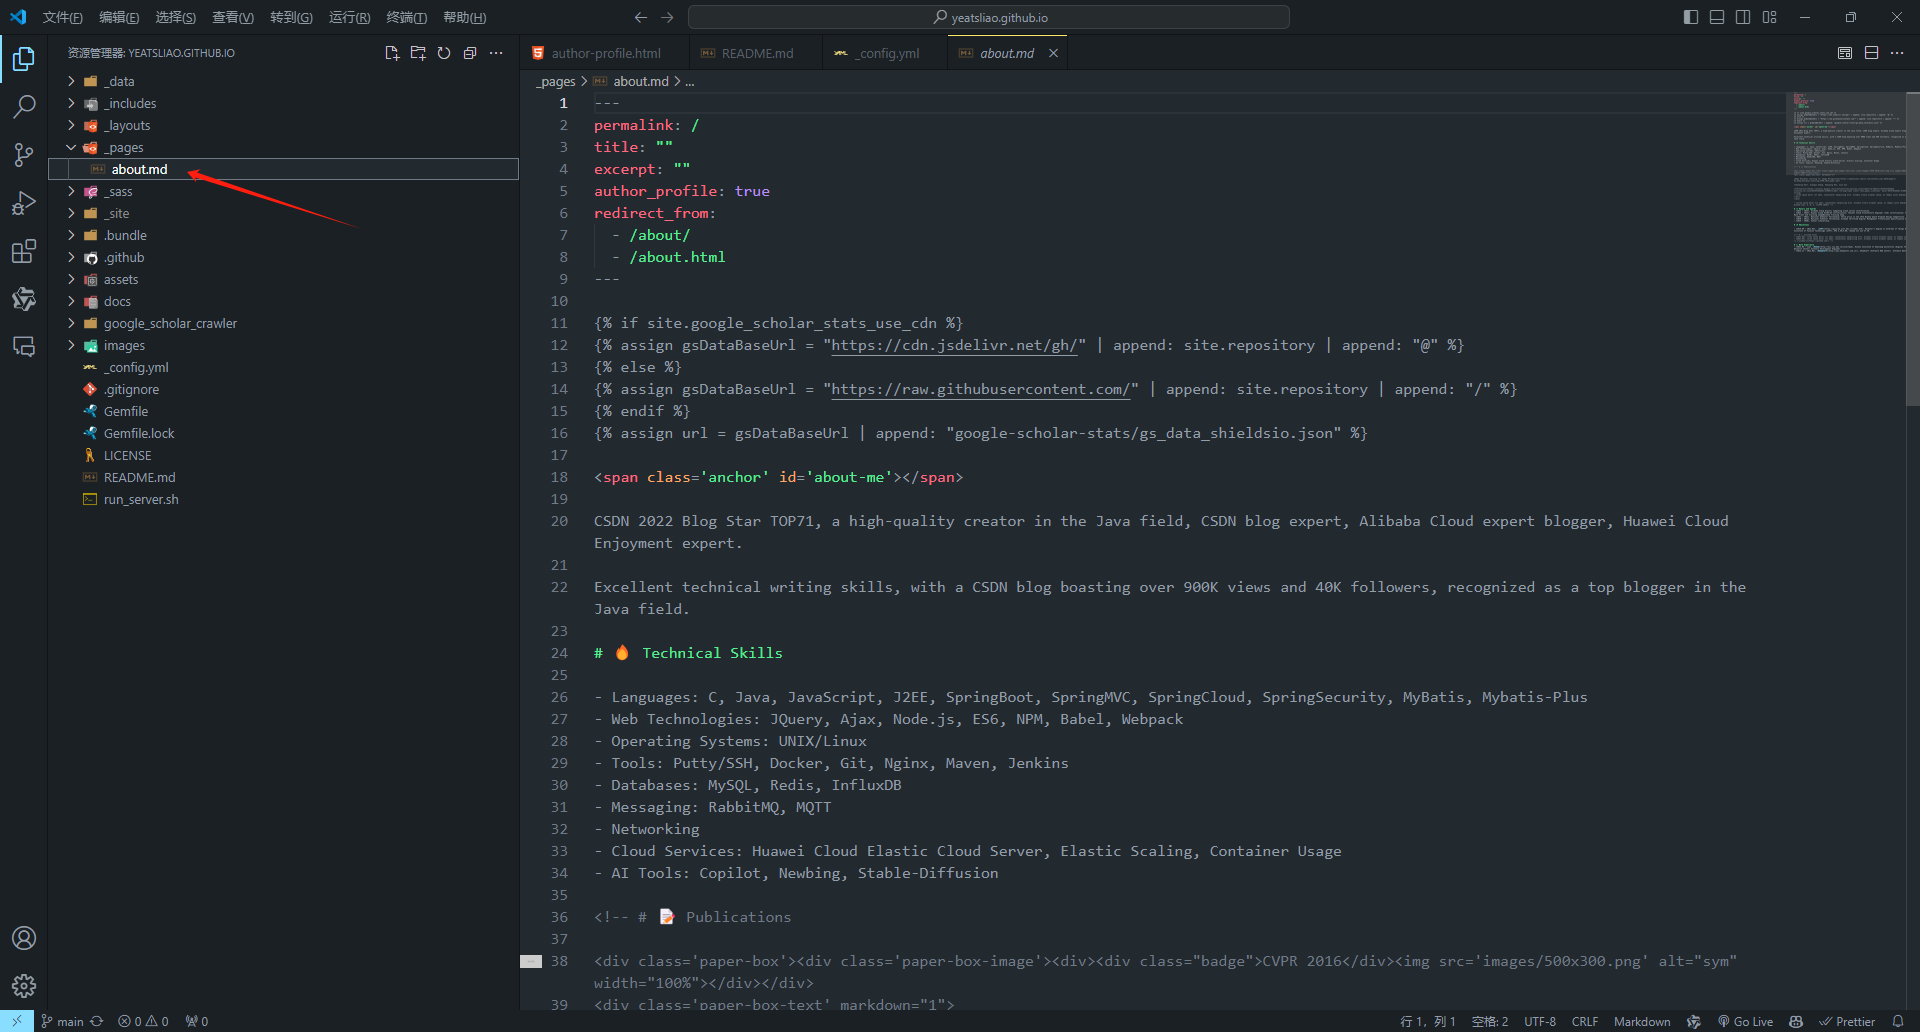
5.修改主页内容
在 ../_pages/about.md
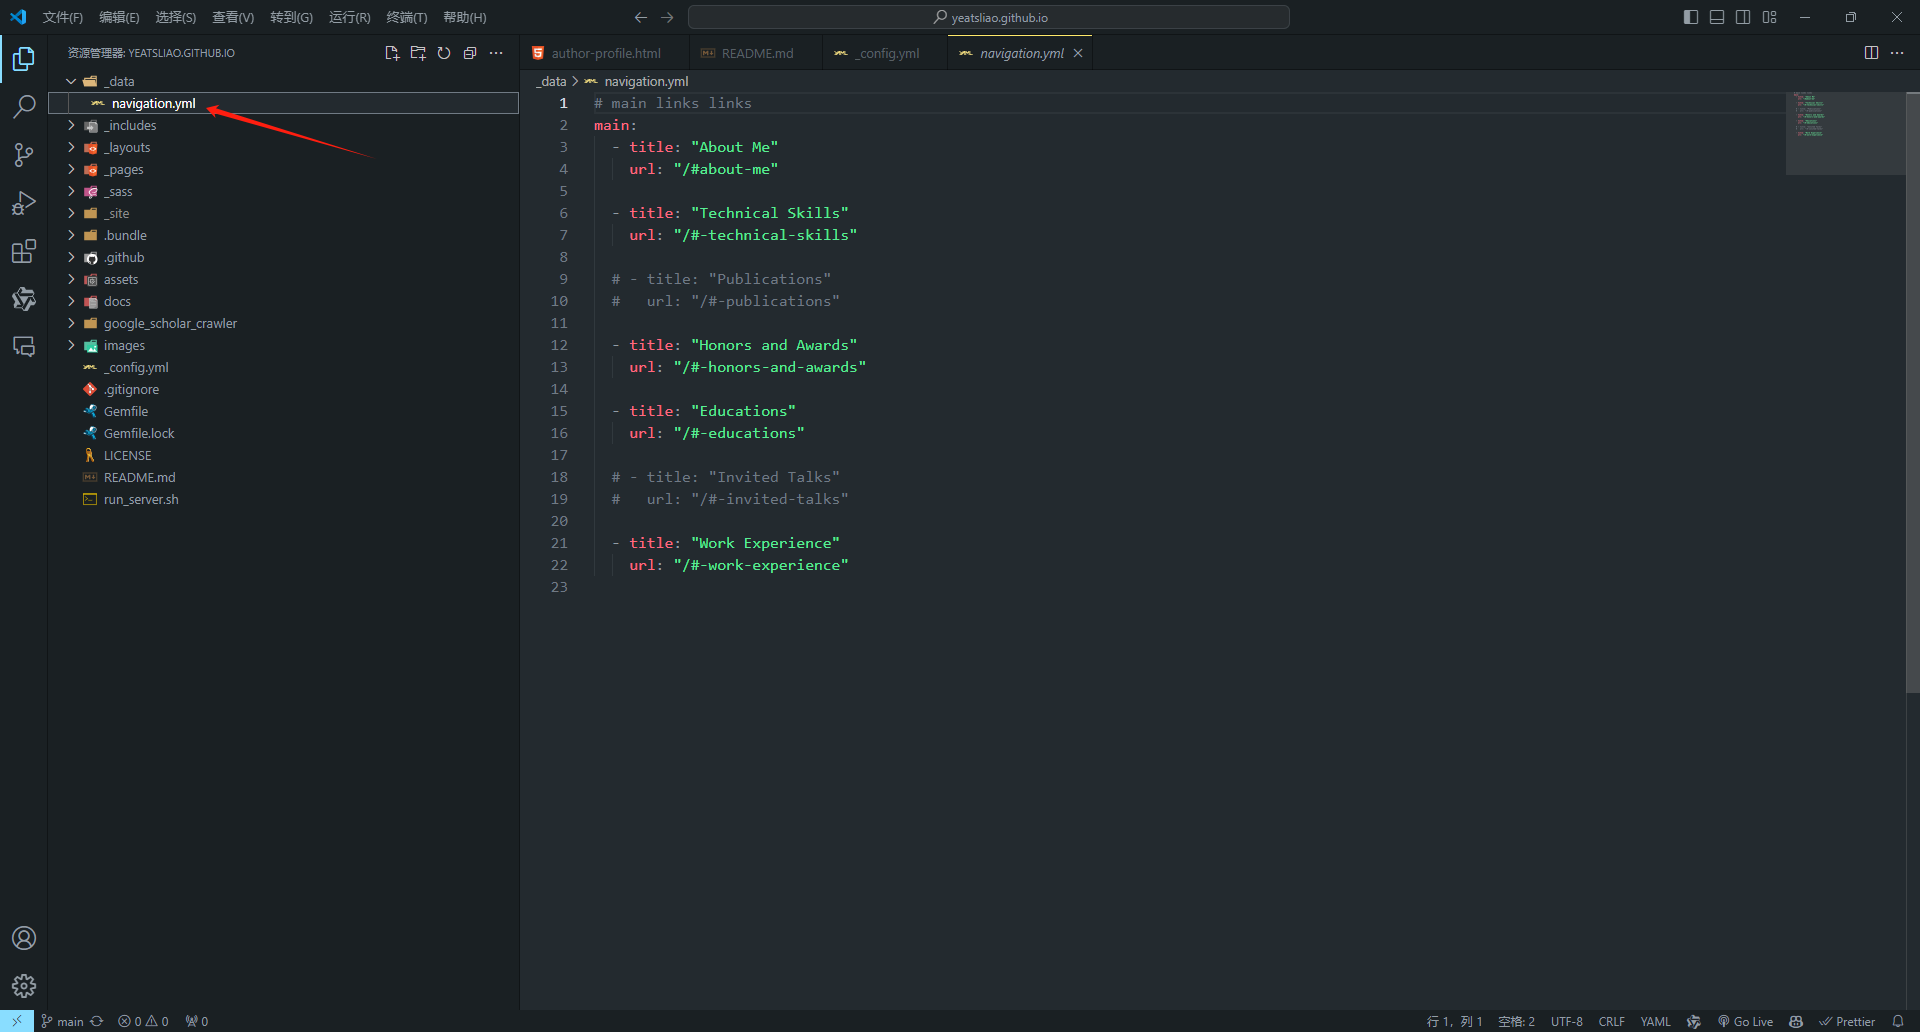
6.修改主页的导航栏
这里的url: "/#-technical-skills"对应的是 about.md中的# Technical Skills标题
修改完成后,上传你修改的内容,主页将会自动部署到https://USERNAME.github.io.
二、本地调试
1.Jekyll 介绍
Jekyll 是一个静态网站生成器,常被用于创建博客和个人网站。它将文本格式的内容(通常是 Markdown 或 Textile)转换成 HTML,从而生成静态网页。由于生成的是静态文件,所以不需要后端服务器或数据库,这使得网站加载速度快且易于维护。
Jekyll 支持自定义布局、分页、数据文件等功能,并且可以与 GitHub Pages 集成,允许你在 GitHub 上托管你的网站。它适合那些想要专注于写作和内容,而不必担心服务器管理和软件更新的用户。
Jekyll的构建环境,包括Ruby、RubyGems、GCC和Make。最简单的安装方法就是使用Bundler进行安装,Bundler是一个Ruby的包管理器,Jekyll是用Ruby写的。
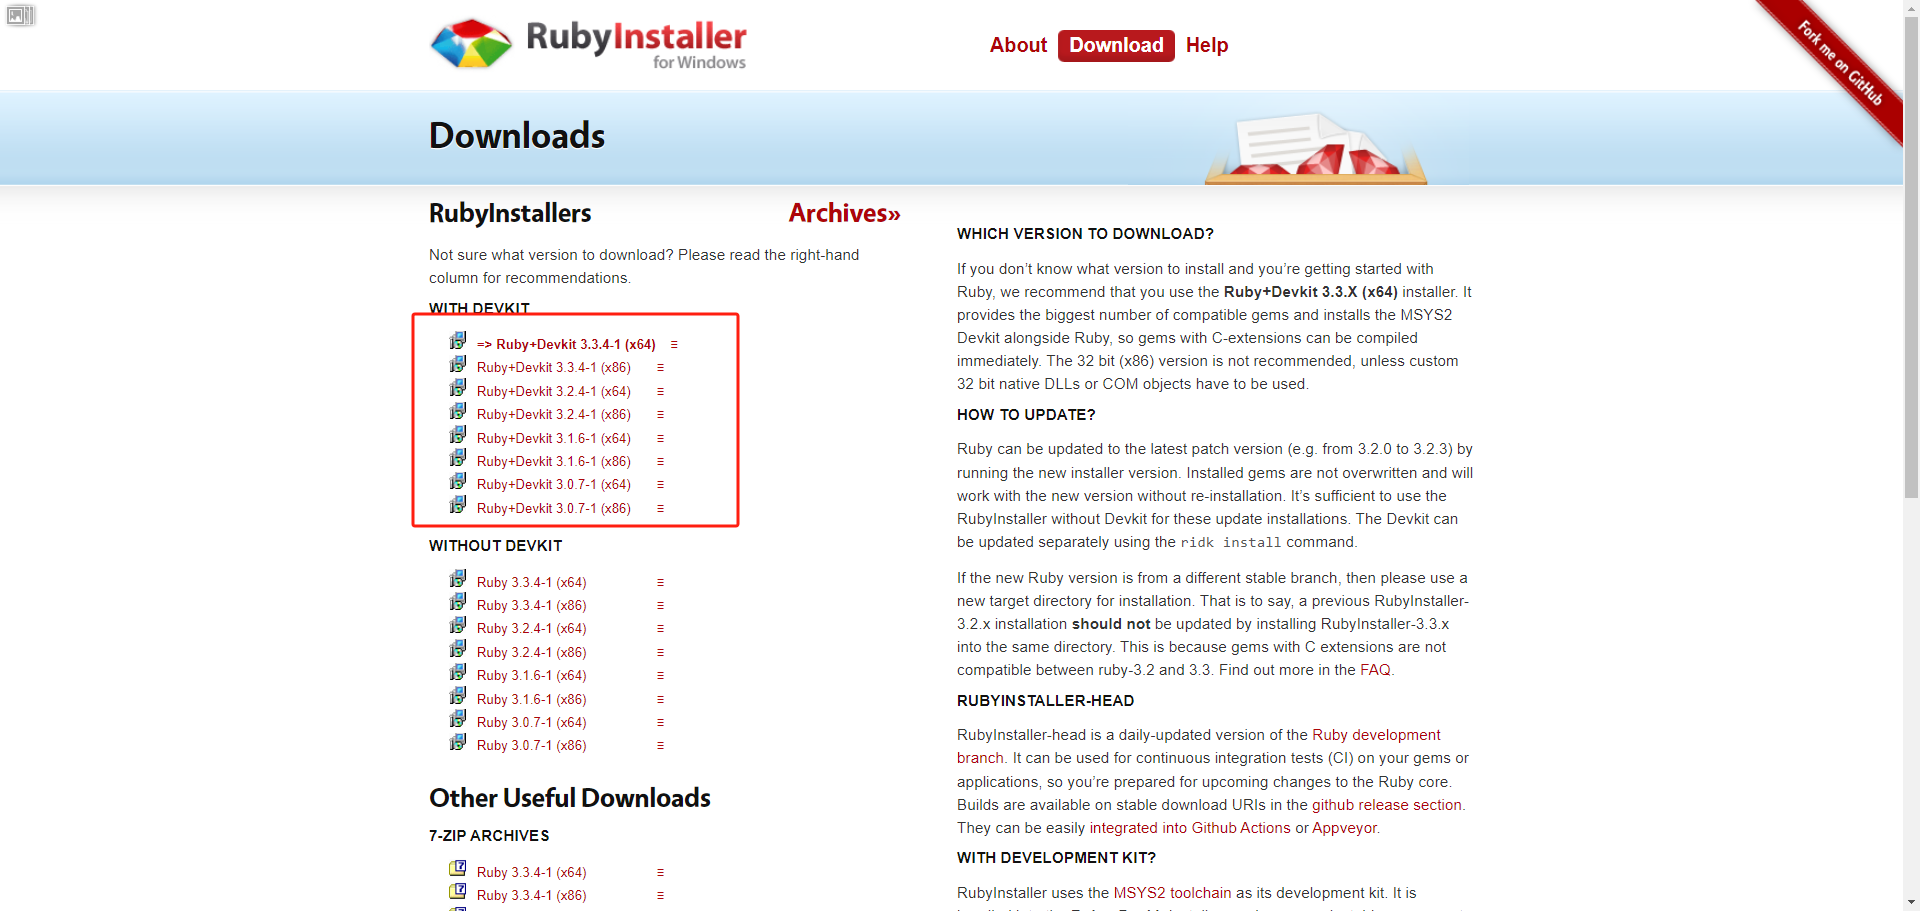
2.Ruby+Devkit安装
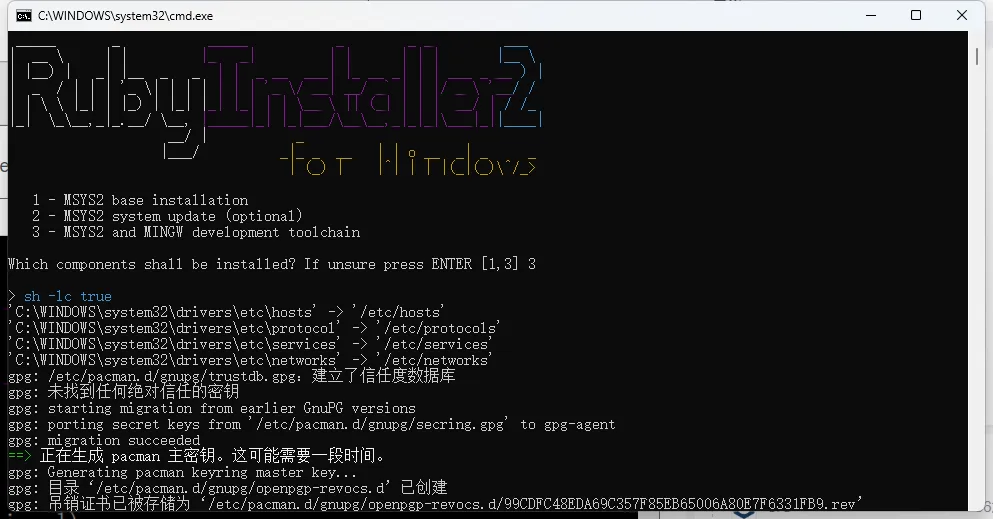
下载Ruby+Devkit的安装包https://rubyinstaller.org/downloads/,使用默认选项安装即可
安装完成后会弹出窗口,输入3 MSYS2 and MINGW development tool chain并按回车
检查是否安装成功
ruby -v gem -v 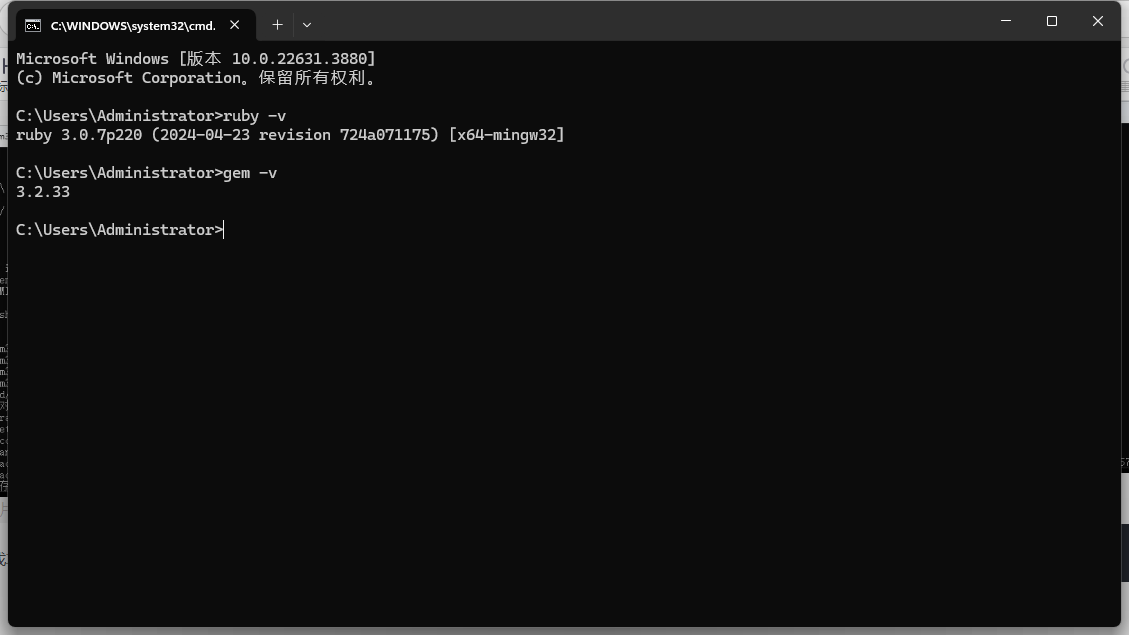
这里可能会因为网络原因导致ridk install安装失败
MSYS2 could not be found. Please run 'ridk install' or download and install MSYS2 manually from https://msys2.github.io/ 需要查找Ruby安装目录下的msys64\etc\pacman.d,编辑更新源:
Server = https://mirrors.tuna.tsinghua.edu.cn/msys2/mingw/i686 加入mirrorlist.mingw32首位
Server = https://mirrors.tuna.tsinghua.edu.cn/msys2/mingw/x86_64 加入mirrorlist.mingw64首位
Server = https://mirrors.tuna.tsinghua.edu.cn/msys2/msys/$arch 加入mirrorlist.msys首位
执行在命令行执行ridk install(如果安装时选择了不加入系统环境变量的,去Ruby安装目录的bin之下执行),一路回车至结束;
更新gem源:
gem sources --add https://mirrors.tuna.tsinghua.edu.cn/rubygems/ --remove https://rubygems.org/
3.安装Jekyll
由于bundle install/update速度过慢,需要更换国内镜像源
$ bundle config mirror.https://rubygems.org https://gems.ruby-china.com 安装,这句话会读取 Gemfile文件并执行一些安装
gem install jekyll bundler 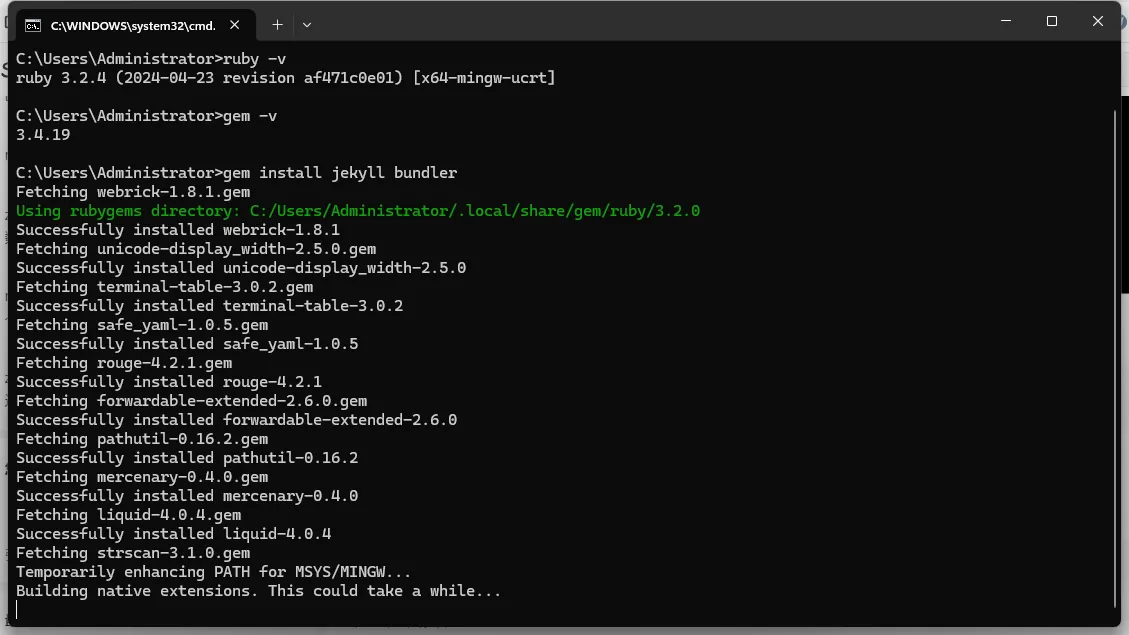
检查是否安装成功
jekyll -v 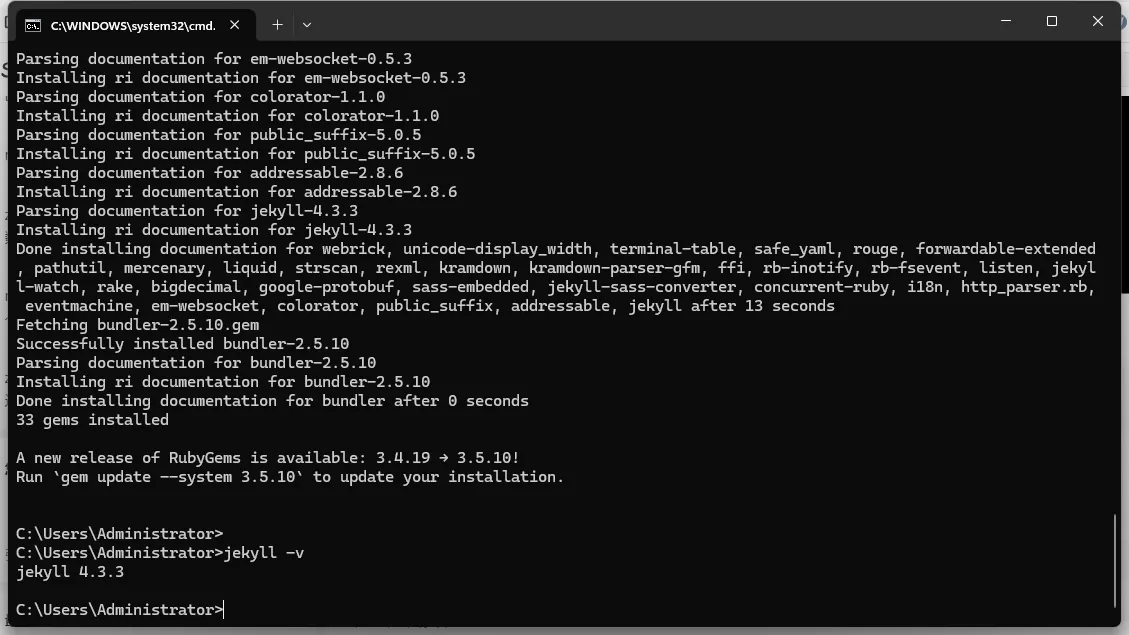
如果出现/ruby: No such file or directory说明安装的时候中断过,建议重新安装ruby,或者更新ruby 安装路径,需要编辑文件C:\Users\MyName\AppData\Local\Microsoft\WindowsApps\jekyll
从
exec "${binpath}/ruby" "-x" "$0" "$@" 到
exec "D:/Program/develop/Ruby32-x64/bin/ruby" "-x" "$0" "$@" 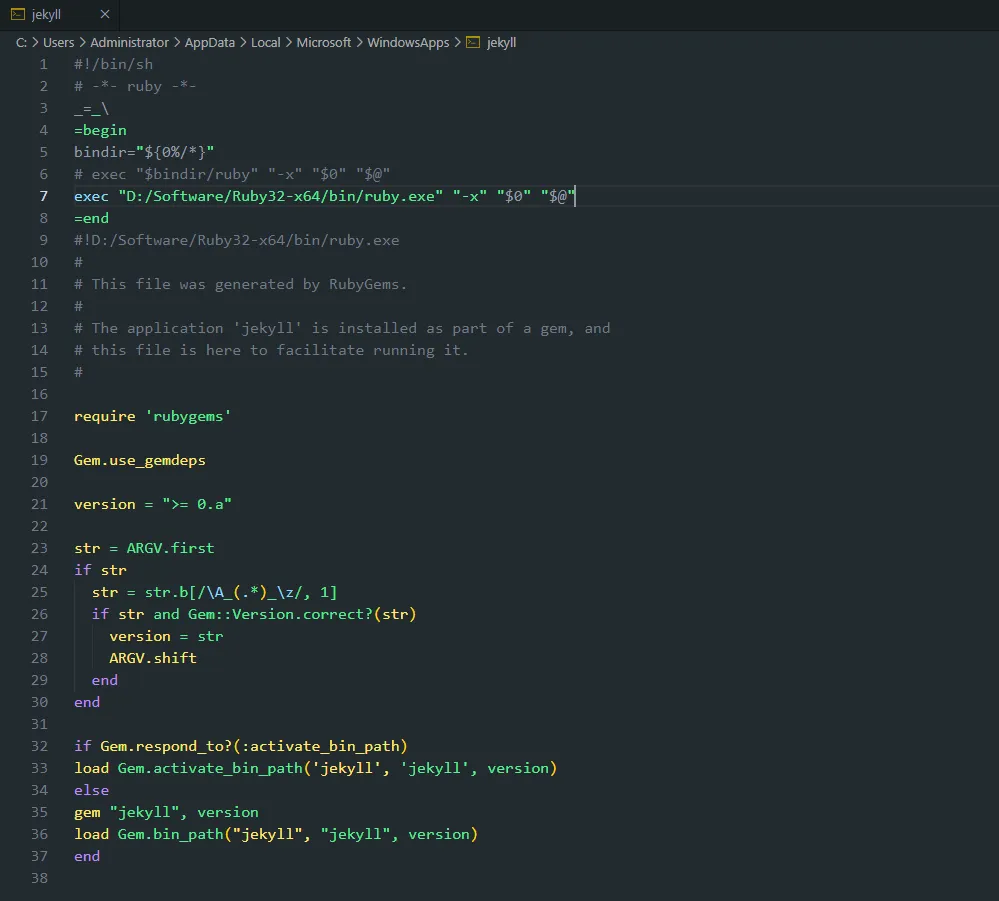
使用git clone将本项目克隆到本地。
4.安装依赖
bundle install 错误1
如果出现Error: undefined method tainted,则可能是ruby版本的问题,Liquid 4 与 Ruby 3.2 不兼容,建议安装3.2以下的版本

错误2
如果出现“ No source of timezone data could be found. (TZInfo::DataSourceNotFound) #8 ”,可能是缺少了设置
需要在Gemfile文件中,加入两个安装依赖。
gem 'tzinfo' gem 'tzinfo-data' 如果在Windwos上使用的MinGW这种系统,还可以加入后缀修饰,指定平台信息。
gem 'tzinfo-data', platforms: [:mingw, :mswin, :x64_mingw] 运行 bundle update
bundle update 错误3
如果出现Unable to load the EventMachine C extension; To use the pure-ruby reactor
转到文件夹C:\Ruby24-x64\lib\ruby\gems\2.4.0\gems\eventmachine-1.2.5-x64-mingw32\lib
打开 eventmachine.rb
在文件的第一行代码中写入require 'em/pure_ruby'
5.启动本地服务器
运行 bundle exec jekyll serve 来启动Jekyll实时重载服务器。
在浏览器里打开 http://127.0.0.1:4000。如果你修改了网页的源码,服务器会自动重新编译并刷新页面。
当你修改完毕你的页面以后, 使用git命令,commit你的改动并push到你的github仓库中。
三、参考
【保姆级教程】手把手教你用github制作学术个人主页(学者必备)https://blog.csdn.net/qd1813100174/article/details/128604858
如何使用Jekyll在GitHub Pages上搭建网站(个人博客)https://blog.csdn.net/qq_33919450/article/details/127859193
使用Jekyll + GitHub Pages搭建个人博客https://blog.csdn.net/zzy979481894/article/details/132678717
使用Github.io创建自己的博客https://blog.csdn.net/Castlehe/article/details/133999653
快速安装rubyinstaller-devkithttps://blog.csdn.net/mscf/article/details/82627951
初探Jekyll(二):常见错误https://blog.csdn.net/yq_forever/article/details/103449709
Why am I getting a ‘No such file or directory’ error when attempting to run ‘rails s’ in Git Bash on Windows?https://stackoverflow.com/questions/76325322/why-am-i-getting-a-no-such-file-or-directory-error-when-attempting-to-run-rai
Could not find gem ‘wdm (>= 0.1.0) x86-mingw32’ in any of the gem sources listed in your Gemfilehttps://pekalicious.github.io/jekyll/2019/01/06/02-could-not-find-wdm.html
Jekyll博客系统的TZINFO依赖问题https://zhuanlan.zhihu.com/p/495889464
Error: undefined method tainted? when using Ruby v3.2.0https://github.com/github/pages-gem/issues/859
Jekyll 运行的时候提示错误 cannot load such file – webrick (LoadError)https://www.cnblogs.com/huyuchengus/p/15473035.html
Updating the Bundler Version Specified in Gemfile.lockhttps://batsov.com/articles/2023/04/09/updating-the-bundler-version-specified-in-gemfile-lock/
Font Awesome图标库v5 https://fontawesome.com.cn/v5
