用例管理框架之pytest单元测试框架(上)
一、pytest用例管理框架(单元测试框架)
1.分类:
python:unittest,pytest 必须非常熟练
2.主要作用:
发现测试用例:从多个py文件里面按照一定的规则找到测试用例。
执行测试用例:按照一定的顺序执行测试用例。并生成结果。
pytest:默认从上到下,可以通过装饰器去改变规则。
unittest:默认安装ASCII顺序去执行。
判断测试结果:断言
生成测试报告:pytest-html,allure报告。
二、pytest简介
1.基于python的单元测试框架,它可以和selenium,requests,appium结合实现自动化 测试。
2.实现用例跳过skip和reruns失败用例重跑。
3.它可以结合allure-pytest插件生成allure报告。
4.很方便和jenkins实现持续集成。
5.有很多强大的插件:
pytest-html 生成html测试报告。
pytest-xdist 多线程执行测试用例。
pytest-ordering 改变测试用例的执行顺序。
pytest-rerunfailures 失败用例重跑
allure-pytest 生成allure报告。
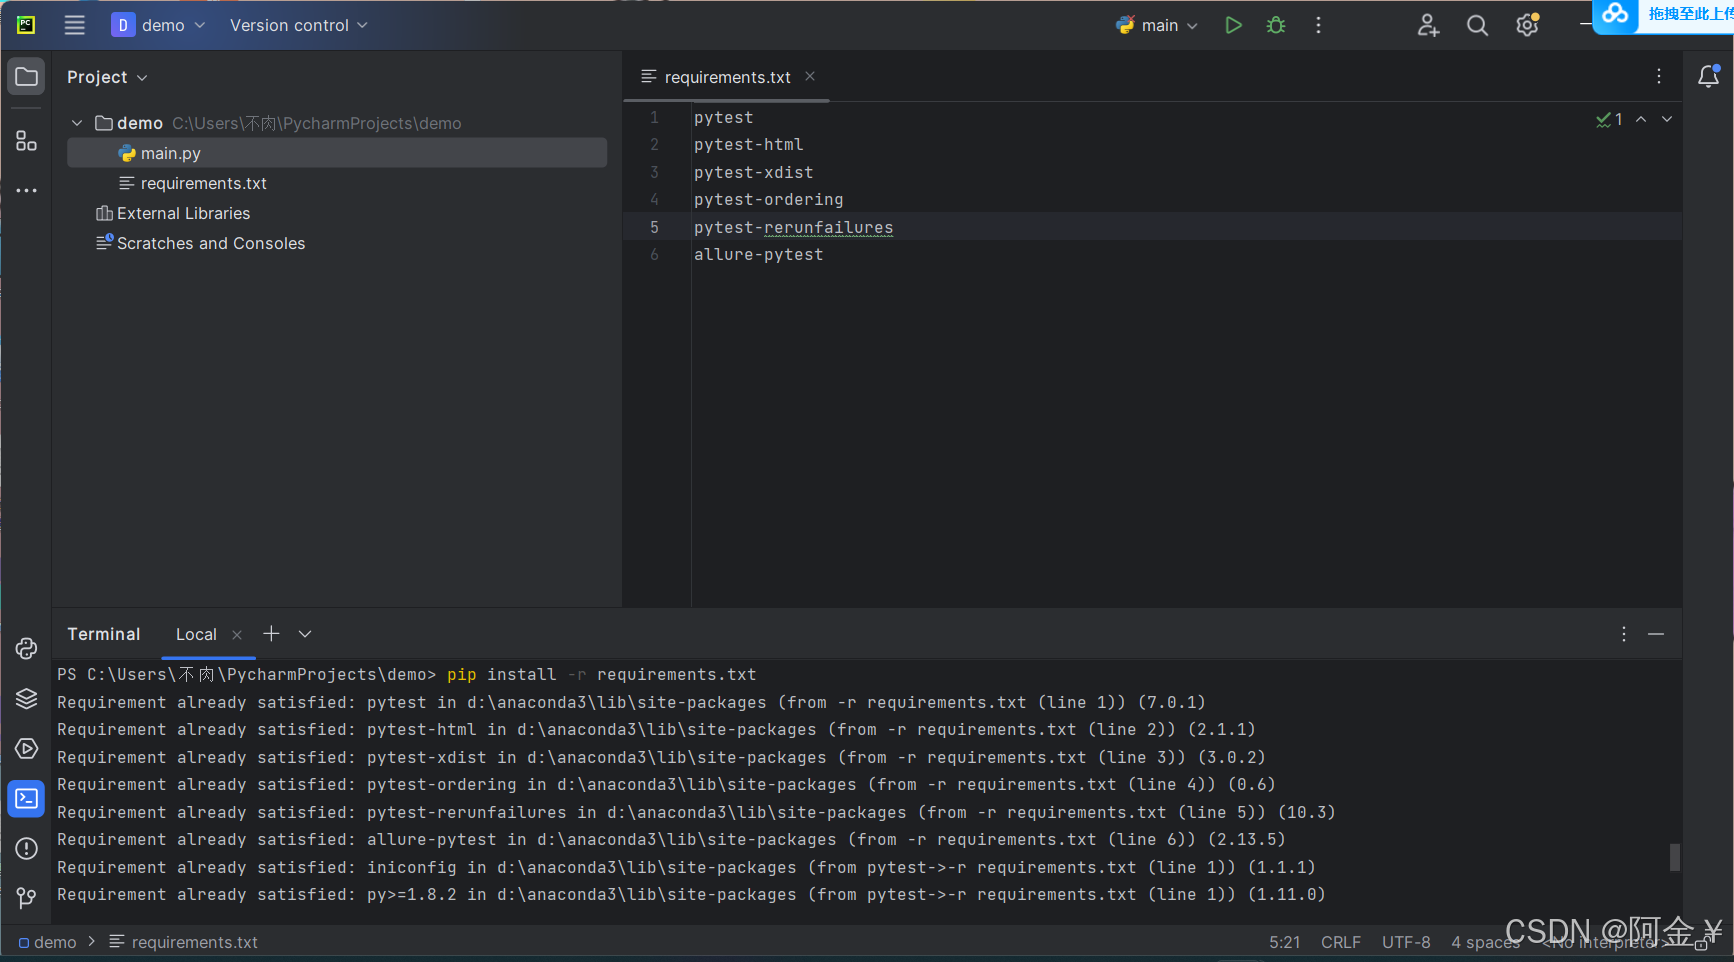
放到一个requirements.txt的文档中,如:
pytest
pytest-html
pytest-xdist
pytest-ordering
pytest-rerunfailures
allure-pytest
然后通过:pip install -r requirements.txt
报错:参数错误。 (版本不兼容)

三、pytest的最基本的测试用例的规则
1.模块名必须以test开头或者test结尾。
2.测试类必须以Test开头,并且不能带有init方法。
3.测试用例必须以test_开头。
命令规范:
模块名:一般全小写:多个英文之间用_隔开。
类名:类名一般是首字母大写
方法名:一般全小写:多个英文之间用_隔开。
四、运行方式
1.主函数方式:
import pytest if __name__=='__main__': pytest.main()
-v:输出更加详细的信息。比如文件和用例名称等。
-s:输出调试信息。打印信息等。
可以合并成:-vs
--reruns=数字:失败重跑
-x:出现1个失败就停止测试。
--maxfail=2 出现N个失败就终止测试。
--html=report.html 生成html的测试报告
-n:多线程。
-k:运行测试用例名称中包含指定字符串的用例。
pytest.main(['-vs','-k','weiwei or baili']) 两个全都运行
pytest.main(['-vs','-k','weiwei and baili'])
2.指定模块运行。
if __name__ == '__main__': pytest.main(['‐vs','testcases/test_api2.py'])指定testcases包下的test_api2.py文件运行,其余不运行
3.指定文件夹:
if __name__=='__main__': pytest.main(['-vs','testcases/'])指定运行testcases文件夹下的所有文件
4.通过node id的方式运行测试用例。
if __name__=='__main__': pytest.main(['-vs','testcases/test_api.py::TestApi::test_aaa'])运行test_api.py文件中TestApi类的test_aaa方法
2.命令行方式:
pytest
3.通过pytest.ini的配置文件运行。(不管是命令行还是主函数都会读取这个配置文件)
[pytest] 用于标记这个文件是pytest的配置文件
addopts = -vs 命令行参数,多个参数之间用空格分隔。
testpaths = testcases/ 配置搜索测试用例的范围
python_files = test_*.py 改变默认的文件搜索规则
python_classes = Test* 改变默认的类搜索规则
python_functions = test_* 改变默认的测试用例的搜索规则。
用例分组
markers =
smoke:冒烟用例
productmanage:商品管理模块
特别提示:
此文件中最好不要出现中文, 如果有中文的情况下,比如使用notpad++改成GBK的编码。
用例里面加标记
class TestApi: @pytest.mark.smoke def test_aaa(self): print("aaa") @pytest.mark.productmanage def test_bbb(self): print("bbb")执行的时候通过-m参数指定标记
addopts = ‐vs ‐m smoke五、pytest默认的执行测试用例的顺序
从上到下。
改变默认用例的执行顺序:
在用例上加标记:
@pytest.mark.run(order=1)
注意:有order装饰器的优先,相同的从上到下,然后再是没有装饰器的,负数不起作用。
六、跳过测试用例。
粒度:不想这么细。
1.无条件跳过
@pytest.mark.skip(reason="粒度不需要") @pytest.mark.smoke def test_aaa(self): print("aaa")2.有条件跳过
@pytest.mark.skipif(age>2,reason="以后的版本都不执行") @pytest.mark.productmanage def test_bbb(self): print("bbb")七、用例的前后置,固件,夹具,钩子函数
import pytest def setup_module(): print("在每个模块之前执行") def teardown_module(): print("在每个模块之后执行") class TestApi: def setup_class(self): print("在每个类之前执行,创建日志对象(创建多个日志对象,日志会出现重复),创建数据库连接吧 ") def teardown_class(self): print("在每个类之后执行,销毁日志对象,关闭数据库连接") def setup(self): print("在每个用例之前执行,web自动化:打开浏览器,加载页面,接口自动化:日志开始") def teardown(self): print("在每个用例之后执行,日志结束,关闭浏览器") @pytest.mark.smoke def test_aaa(self): print("aaa") @pytest.mark.productmanage def test_bbb(self): print("bbb") class TestApi2: def test_duo_class(self): print("多个类的情况")用例管理框架pytest之fixtrue,conftest.py,allure报告以及logo定制(上)
一、使用fixture实现部分前后置
setup/teardown
setup_class/teardown_class
语法:
@pytest.fixture(scope="作用域",params="数据驱动",autouser="自动执行",ids="自定义参数名称",name="别名")
scope="作用域"
functioin:在每个方法(测试用例)的前后执行一次。
class:在每个类的前后执行一次。
module:在每个py文件前后执行一次。
package/session:每个package前后执行一次。
1.function级别:在每个函数的前后执行
@pytest.fixture(scope="function") def execute_sql(): print("执行数据库的验证,查询数据库") yield print("关闭数据库连接")调用:
def test_bbb(self,execute_sql): print("bbb"+execute_sql)yield和return,都可以返回值,并且返回的值可以在测试用例中获取。
yield生成器,返回一个对象,对象中可以有多个值,yield后面可以接代码。
return 返回一个值,return后面不能接代码。
注意:如果加入autouse=True参数,那么表示自动使用,那么和setup、 teardown功能一致。
2.class级别:在每个类的前后执行一次。
@pytest.fixture(scope="class") def execute_sql(): print("执行数据库的验证,查询数据库") yield print("关闭数据库连接")调用:
@pytest.mark.usefixtures("execute_sql") class TestApi2: def test_duo_class(self): print("多个类的情况")3.module级别:在每个模块的前后执行一次。和setup_module和teardown_module效果 一样。
@pytest.fixture(scope="module",autouse=True) def execute_sql(): print("执行数据库的验证,查询数据库") yield print("关闭数据库连接")4.package、sesion级别,一般是和connftest.py文件一起使用。
autouse=True 自动调用
params=数据(list,tuple,字典列表,字典元祖)
def read_yaml(): return ['jerry','tom'] @pytest.fixture(scope="function",params=read_yaml()) def execute_sql(request): print(request.param) print("执行数据库的验证,查询数据库") yield request.param print("关闭数据库连接")这里的params用于传输数据(list,tuple,字典列表,字典元祖),需要在夹 具里面通过request(固定写法)接收,然后通过request.param(固定写法) 获取数据,然后再通过yield把数据返回到测试用例中,然后使用。
ids参数:它要和params一起使用,自定义参数名称。意义不大。了解即可
def read_yaml(): return ['jerry','tom'] @pytest.fixture(scope="function",params=read_yaml(),ids=['jerry','tom']) def execute_sql(request): print(request.param) print("执行数据库的验证,查询数据库") yield request.param print("关闭数据库连接")name参数:对fixtrue固件取的别名。意义不大。了解即可,用了别名后,那么真名会失效,只能使用别名。
def read_yaml(): return ['jerry','tom'] @pytest.fixture(scope="function",params=read_yaml(),ids=['jerry','tom'],name="jj") def execute_sql(request): print(request.param) print("执行数据库的验证,查询数据库") yield request.param print("关闭数据库连接")二、当fixture的级别为package,session时,那么一般和conftest.py 文件一起使用。
1.名称是固定的conftest.py,主要用于单独的存放fixture固件的。
2.级别为package,sesion时,那么可以在多个包甚至多个py文件里面共享前后置。
举例:登录。
模块:模块的共性。
3.发现conftest.py文件里面的fixture不需要导包可以直接使用。
4.conftest.py文件,可以有多个。
作用:出现重复日志,初始化一次日志对象。规避日志重复。连接数据库。关闭数据库。
注意:多个前置同时存在的优先级。
1.conftest.py为函数级别时优先级高于setup/teardown
2.conftest.py为class级别时优先级高于setup_class/teardown_class
3.conftest.py为session级别时优先级高于setup_module/teardown_module
三、pytest断言
使用的是python原生的assert
四、pytest结合allure-pytest实现生成allure报告
第一步
1.官网下载allure文件:https://github.com/allure-framework/allure2/releases
2.下载之后解压到非中文的目录
3.把bin路径配置到系统变量path中:E:\allure-2.13.7\bin (注意分号不要是中文的)
第二步:
安装allure报告:pip install allure-pytest
验证:allure --version
注意:可能需要重启pycharm。
第三步:
1.pytest.ini文件如下
[pytest] addopts = -vs ‐‐alluredir=reports/temps ‐‐clean‐alluredir testpaths = testcases/ python_files = test_*.py python_classes = Test* python_functions = test_* markers = smoke:冒烟用例 productmanage:商品管理模块加上--clean-alluredir表示:每执行一次把原来的清除。
2.all.py文件如下:
if __name__=='__main__': pytest.main() time.sleep(3) os.system("allure generate reports/temps ‐o reports/allures ‐‐clean")加上--clean表示:每执行一次把原来的清除。
1.修改allure-2.13.7\config下的allure.yml配置文件,加入:自定义logo插件。最后一 句。
plugins: - junit-xml-plugin - xunit-xml-plugin - trx-plugin - behaviors-plugin - packages-plugin - screen-diff-plugin - xctest-plugin - jira-plugin - xray-plugin2.修改插件里面的图片和样式
/* .side‐nav__brand { background: url('custom‐logo.svg') no‐repeat left center !important; margin‐left: 10px; } */ .side‐nav__brand{ background: url('logo.png') no‐repeat left center !important; margin‐left: 20px; height: 90px; background‐size: contain !important; }用例管理框架pytest之allure报告定制以及数据驱动
一、企业级allure报告定制
左边的定制:
1.史诗(项目名称): @allure.epic("项目名称:接口自动化测试项目")
2.特性(模块名称):@allure.feature("模块名称:用户管理模块")
3.分组(接口名称):@allure.story("接口名称:查询商品")
4.测试用例标题:
(1)@allure.title("测试用例标题:输入正确的条件查询成功1"),适用于一个方法对应一个用例。
(2)allure.dynamic.title("测试用例标题:输入正确的条件查询成功2"),适用于一个方法对应多个用例。也就是有数据驱动的情况。
import allure import pytest @allure.epic("项目名称:接口自动化测试项目") @allure.feature("模块名称:用户管理模块") class TestApi: @allure.story("接口名称:查询商品") @allure.title("测试用例标题:输入正确的条件查询成功1") def test_aaa(self): allure.dynamic.title("测试用例标题:输入正确的条件查询成功2") print("aaa") @allure.story("接口名称:测试接口") def test_bbb(self,user_setup): print("bbb") print(user_setup)右边的定制:
1.用例的严重程度
blocker:中断缺陷:致命bug:内存泄漏,用户数据丢失,系统奔溃。
critical:临界缺陷:严重bug:功能未实现,功能错误,重复提交
normal:一般缺陷,一般bug,条件查询有误,大数据了无响应等
minor级别:次要缺陷:提示bug,颜色搭配不好,字体排列不整齐,错别字。
trivial级别:轻微缺陷:轻微bug,没有使用专业术语,必填项无提示。建议。
@allure.severity(allure.severity_level.BLOCKER)
注意:这个装饰器可以修饰方法也可以修饰类。
2.用例描述
@allure.story("接口名称:查询商品") @allure.title("测试用例标题:输入正确的条件查询成功1") @allure.description("测试用例描述1") def test_aaa(self): allure.dynamic.title("测试用例标题:输入正确的条件查询成功2") allure.dynamic.description("测试用例描述2") print("aaa")3.测试用例连接的定制
接口地址:
Bug地址:
测试用例的地址:
@allure.story("接口名称:查询商品") @allure.title("测试用例标题:输入正确的条件查询成功1") @allure.description("测试用例描述1") @allure.link(name="接口地址",url="https://api.weixin.qq.com/cgi‐bin/token") @allure.issue("Bug地址") @allure.testcase("测试用例链接") def test_aaa(self): allure.dynamic.title("测试用例标题:输入正确的条件查询成功2") allure.dynamic.description("测试用例描述2") print("aaa")4.测试用例步骤的定制
@allure.story("接口名称:查询商品") @allure.title("测试用例标题:输入正确的条件查询成功1") @allure.description("测试用例描述1") @allure.link(name="接口地址",url="https://api.weixin.qq.com/cgi‐bin/token") @allure.issue("Bug连接") @allure.testcase("测试用例地址") def test_aaa(self): allure.dynamic.title("测试用例标题:输入正确的条件查询成功2") allure.dynamic.description("测试用例描述2") #增加步骤 for a in range(1,10): with allure.step("测试用例步骤"+str(a)+""): print("步骤"+str(a)+"执行的脚本") print("aaa")5.附件的定制
web自动化
#附件的定制:body附件内容,name=None文件名,attachment_type=None文件扩展名 with open("D:\\shu.png") as f: allure.attach(body=f.read(),name="错误截图",attachment_type=allure.attachment_type.PNG)接口自动化
allure.attach(body="https://api.weixin.qq.com/cgi‐bin/token",name="请求地址:",attachment_type=allure.attachment_type.TEXT) allure.attach(body="get",name = "请求方式:", attachment_type = allure.attachment_type.TEXT) data={ "grant_type": "client_credential", "appid": "wx6b11b3efd1cdc290", "secret": "106a9c6157c4db5f6029918738f9529d" } allure.attach(body=json.dumps(data),name="请求数据:", attachment_type = allure.attachment_type.TEXT) rep=requests.get(url="https://api.weixin.qq.com/cgi‐bin/token", params=data) allure.attach(body=rep.text,name="响应数据:",attachment_type = allure.attachment_type.TEXT)二、企业中真实的定制有哪些?
1.@allure.epic("项目名称")
2.@allure.feature("模块名称")
3.@allure.story("接口名称")
4.@allure.severity(allure.severity_level.BLOCKER) 严重程度
5.allure.dynamic.title("用例名称:测试用例名称")
6.allure.dynamic.description("用例描述:测试用例描述")
7.with allure.step("测试步骤的名称"):
print("执行测试步骤代码")
8.allure.attach(body, name, attachment_type, extension) 测试用例附件
三、allure报告如何在本地访问。
因为pycharm自带容器。tomcat,Nginx,weblogic
1.在本地搭建本地服务器。
2.通过启动服务打开allure报告。
allure open ./reports/allures (在pycharm控制台输入此命令,后面为allure报告所在地址)
四、allure中的数据驱动装饰器
@pytest.mark.parametrize(参数名,数据(list,tuple,字典列表,字典元祖))
第一种基本用法:
@allure.story("接口名称:测试接口") @pytest.mark.parametrize("args_name",["jerry","tom"]) def test_bbb(self,args_name): print("bbb") print(args_name)第二种用法:
@allure.story("接口名称:测试接口") @pytest.mark.parametrize("name,age",[["jerry","13"],["tom","14"]]) def test_bbb(self,name,age): print("bbb") print(name,age)YAML有两种数据:
-开头的代表list
键值对:key:value
YAML的格式:
- name: 获得token接口 description: 接口描述 request: method: get url: https://api.weixin.qq.com/cgi‐bin/token data: grant_type: client_credential appid: wx6b11b3efd1cdc290 secret: 106a9c6157c4db5f6029918738f9529d validate: None