阅读量:0
Hive部分
1.确保HIve已经正确安装完毕,如已正确成功安装Hive,随时随地输入Hive启动即可
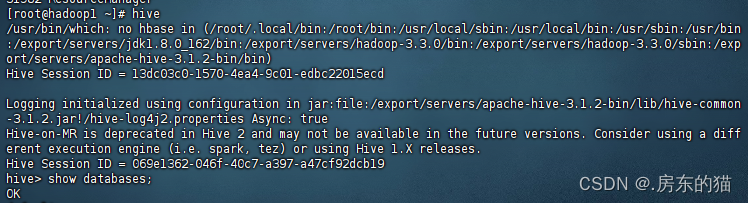
首先要确保集群成功启动,否则hive会failed;
2.启动成功之后,就可以做Hive的相关操作了,
hive启动hive thrift服务端,使用命令:
hive --service hiveserver2 &
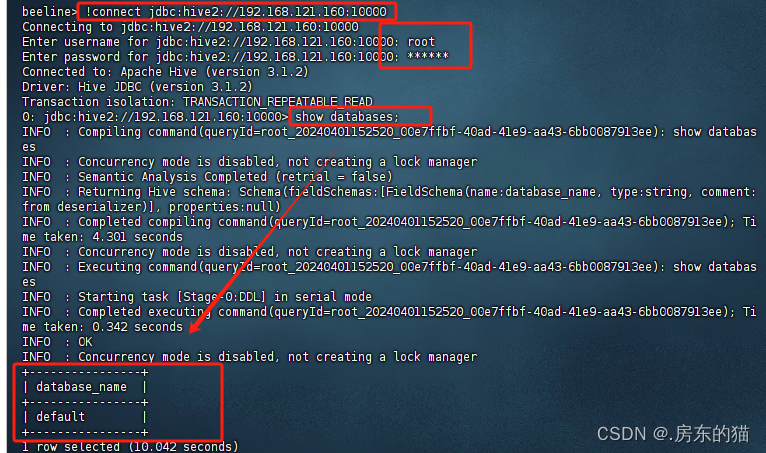
3.然后还需要在打开一个终端,输入以下命令:
--第一步 beeline --启动命令后输入 !connect jdbc:hive2://ip地址(或者主机):10000 --然后输入账号密码即可 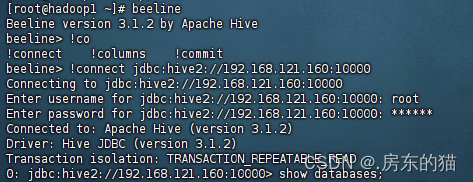
出现以下操作 -------成功!
报错
如果启动不成功 看报错解决即可,出现0:jdbc*****:10000代表成功
报错:User: root is not allowed to impersonate root (state=08S01,code=0)
beeline> !connect jdbc:hive2://localhost:10000/test Connecting to jdbc:hive2://localhost:10000/test Enter username for jdbc:hive2://localhost:10000/test: Enter password for jdbc:hive2://localhost:10000/test: 19/06/12 22:05:04 [main]: WARN jdbc.HiveConnection: Failed to connect to localhost:10000 Error: Could not open client transport with JDBC Uri: jdbc:hive2://localhost:10000/test: Failed to open new session: java.lang.RuntimeException: org.apache.hadoop.ipc.RemoteException(org.apache.hadoop.security.authorize.AuthorizationException): User: root is not allowed to impersonate anonymous (state=08S01,code=0) 这个错误表明在连接到 Hive 时,使用的用户 "root" 尝试进行用户模拟(impersonation),但是被拒绝了。这通常是由于权限设置或配置错误导致的。
要解决这个问题,您可以尝试以下几种方法:
使用具有适当权限的用户:尝试使用具有适当权限的用户进行连接,确保该用户被授权执行所需的操作。
检查 Hive 配置:检查 Hive 的配置文件,确保在配置中正确设置了用户和权限。特别是,查看 Hive 的授权策略(authorization policy)以及是否启用了用户模拟。
检查 Hadoop 用户和组:确保 Hadoop 集群中的用户和组与 Hive 中的用户和组匹配,并且具有适当的权限。
查看 Hive 日志:查看 Hive Server 2 的日志以获取更多详细信息,可能会提供有关拒绝连接的原因的线索。
重新配置用户模拟:如果确定需要使用用户模拟,并且当前配置存在问题,您可能需要重新配置 Hive 以允许用户模拟,并确保正确设置了允许用户模拟的用户和组。
解决方案 :
找到集群配置文件core_site.xml,添加以下内容即可
<property> <name>hadoop.proxyuser.root.hosts</name> <value>*</value> </property> <property> <name>hadoop.proxyuser.root.groups</name> <value>*</value> </property> hadoop.proxyuser.root.hosts配置项名称中root部分为报错User:* 中的用户名部分,根据报错需要修改;
***修改完毕记得重启集群 重新操作一遍即可
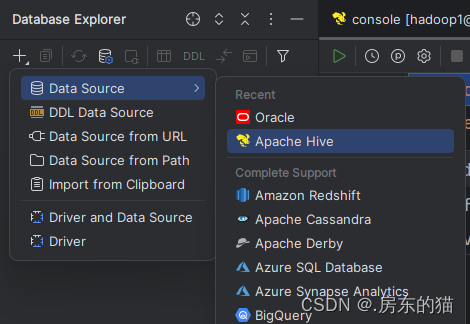
Datagrip部分
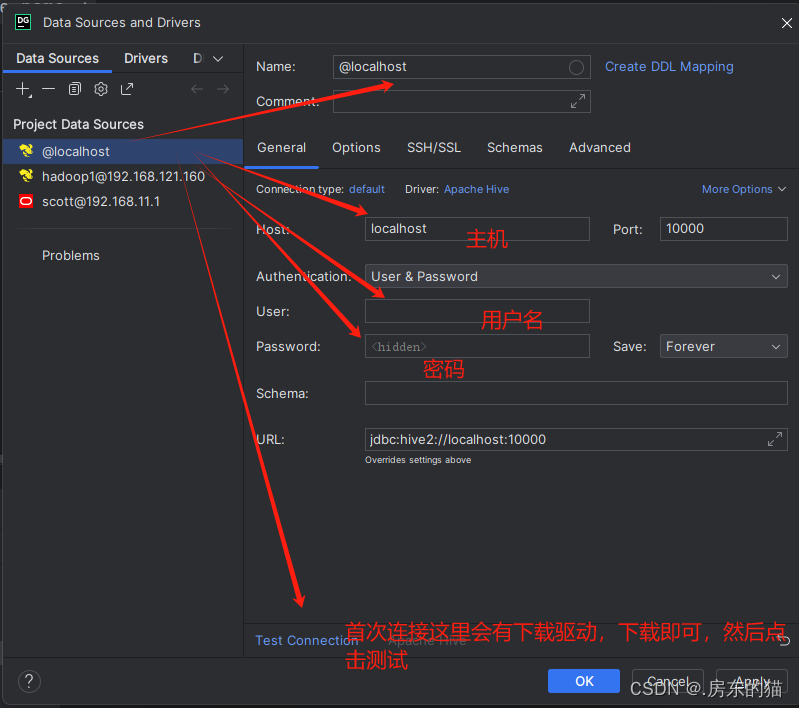
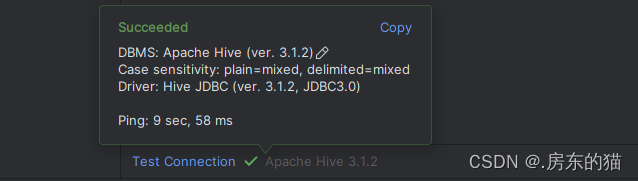
1.使用datagrip连接hive数据库操作步骤:

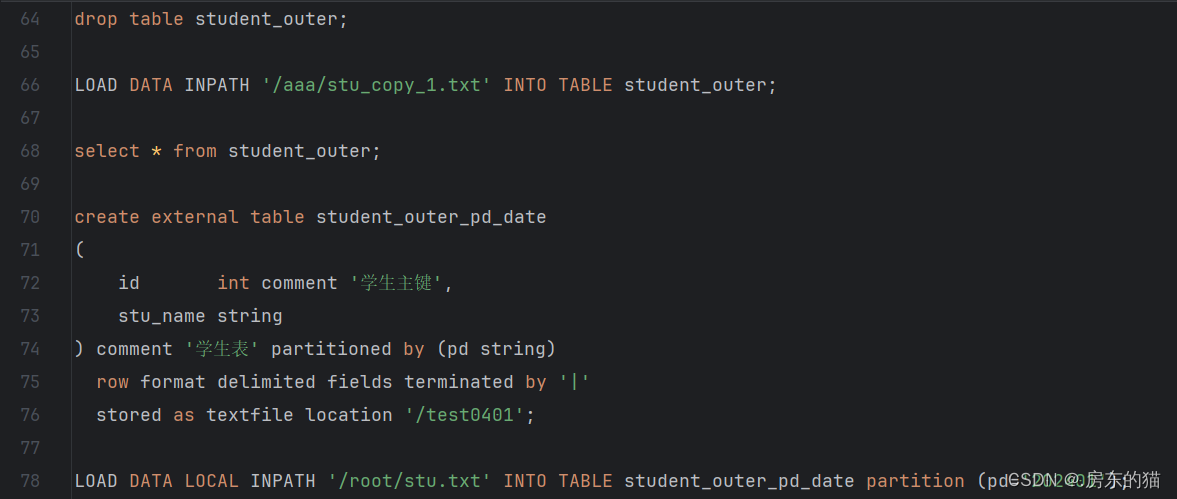
如没有项目可添加一个新项目;无需请忽略
然后即可使用:
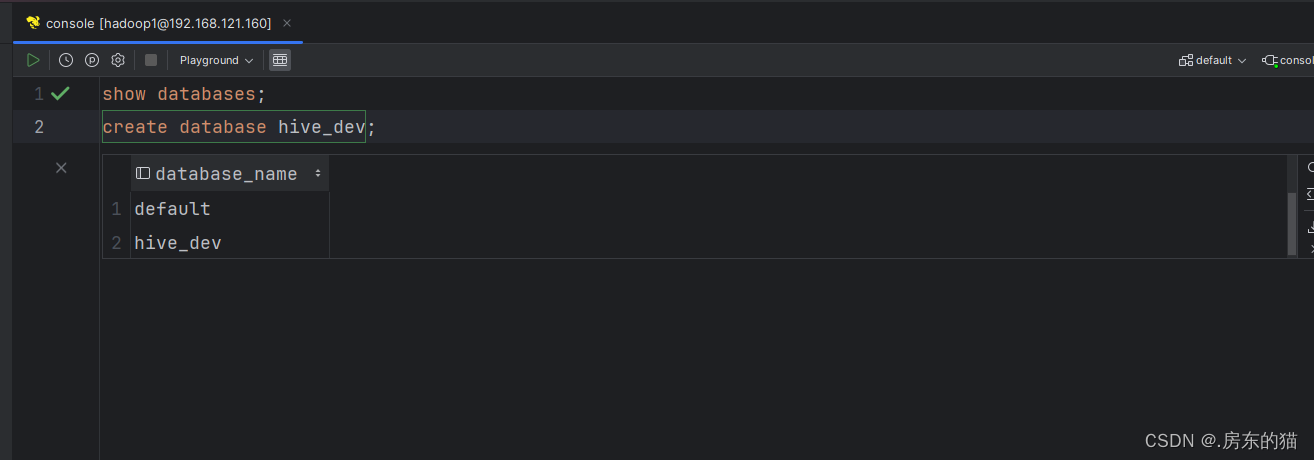
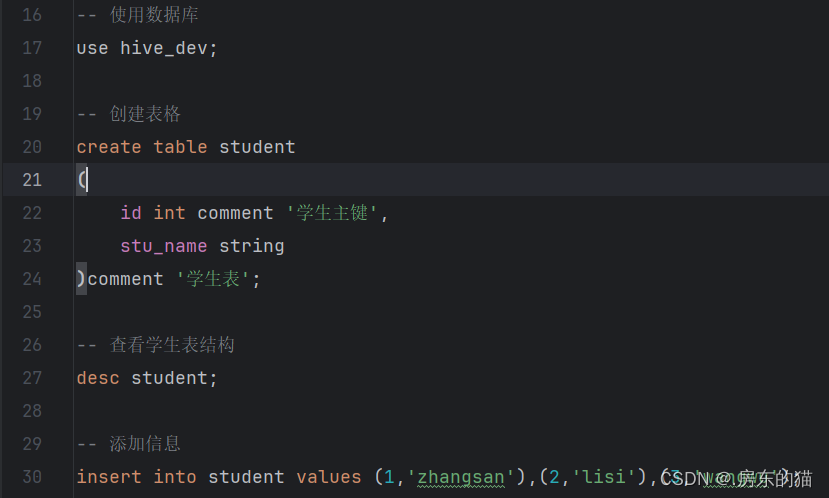
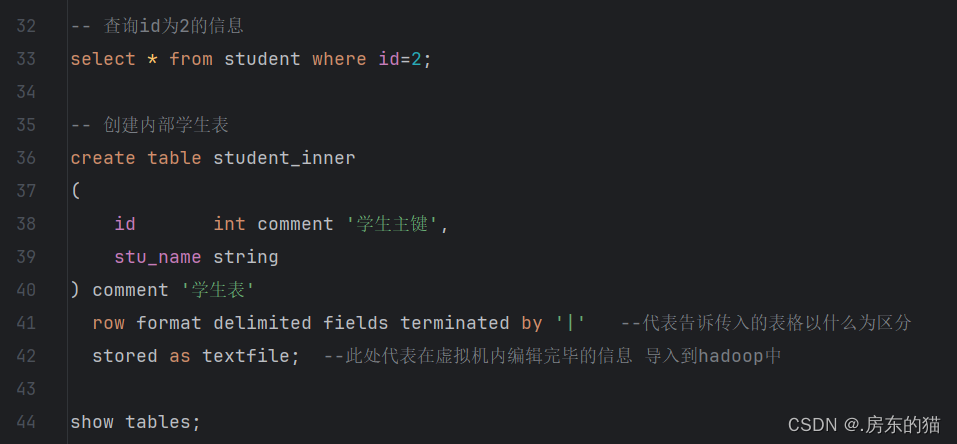
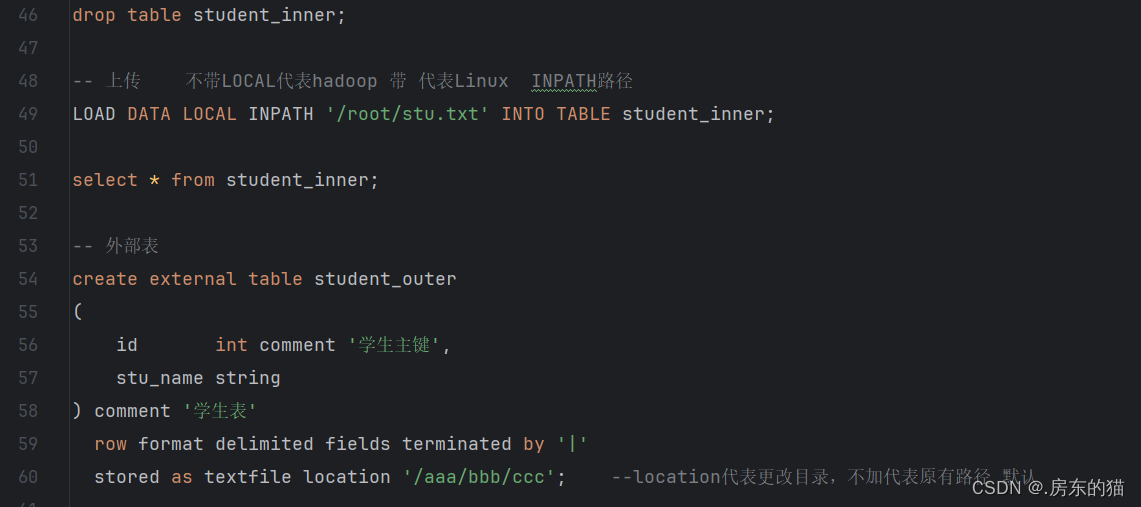
-- 显示所有数据库 show databases; -- 创建数据库 hive_dev create database hive_dev; -- 删除数据库 hive_dev drop database hive_dev; 强制删除数据库hive_test drop database hive_test cascade; -- 查看数据库结构 desc database hive_dev; -- 使用数据库 use hive_dev; -- 创建表格 create table student ( id int comment '学生主键', stu_name string )comment '学生表'; -- 查看学生表结构 desc student; -- 添加信息 insert into student values (1,'zhangsan'),(2,'lisi'),(3,'wangwu'); -- 查询id为2的信息 select * from student where id=2; -- 创建内部学生表 create table student_inner ( id int comment '学生主键', stu_name string ) comment '学生表' row format delimited fields terminated by '|' --代表告诉传入的表格以什么为区分 stored as textfile; --此处代表在虚拟机内编辑完毕的信息 导入到hadoop中 show tables; drop table student_inner; -- 上传 不带LOCAL代表hadoop 带 代表Linux INPATH路径 LOAD DATA LOCAL INPATH '/root/stu.txt' INTO TABLE student_inner; select * from student_inner; -- 外部表 create external table student_outer ( id int comment '学生主键', stu_name string ) comment '学生表' row format delimited fields terminated by '|' stored as textfile location '/aaa/bbb/ccc'; --location代表更改目录,不加代表原有路径 默认 show tables; drop table student_outer; LOAD DATA INPATH '/aaa/stu_copy_1.txt' INTO TABLE student_outer; select * from student_outer; create external table student_outer_pd_date ( id int comment '学生主键', stu_name string ) comment '学生表' partitioned by (pd string) row format delimited fields terminated by '|' stored as textfile location '/test0401'; LOAD DATA LOCAL INPATH '/root/stu.txt' INTO TABLE student_outer_pd_date partition (pd='202401'); LOAD DATA LOCAL INPATH '/root/stu1.txt' INTO TABLE student_outer_pd_date partition (pd='202402'); LOAD DATA LOCAL INPATH '/root/stu2.txt' INTO TABLE student_outer_pd_date partition (pd='202403'); select * from student_outer_pd_date where pd='202402';