阅读量:0
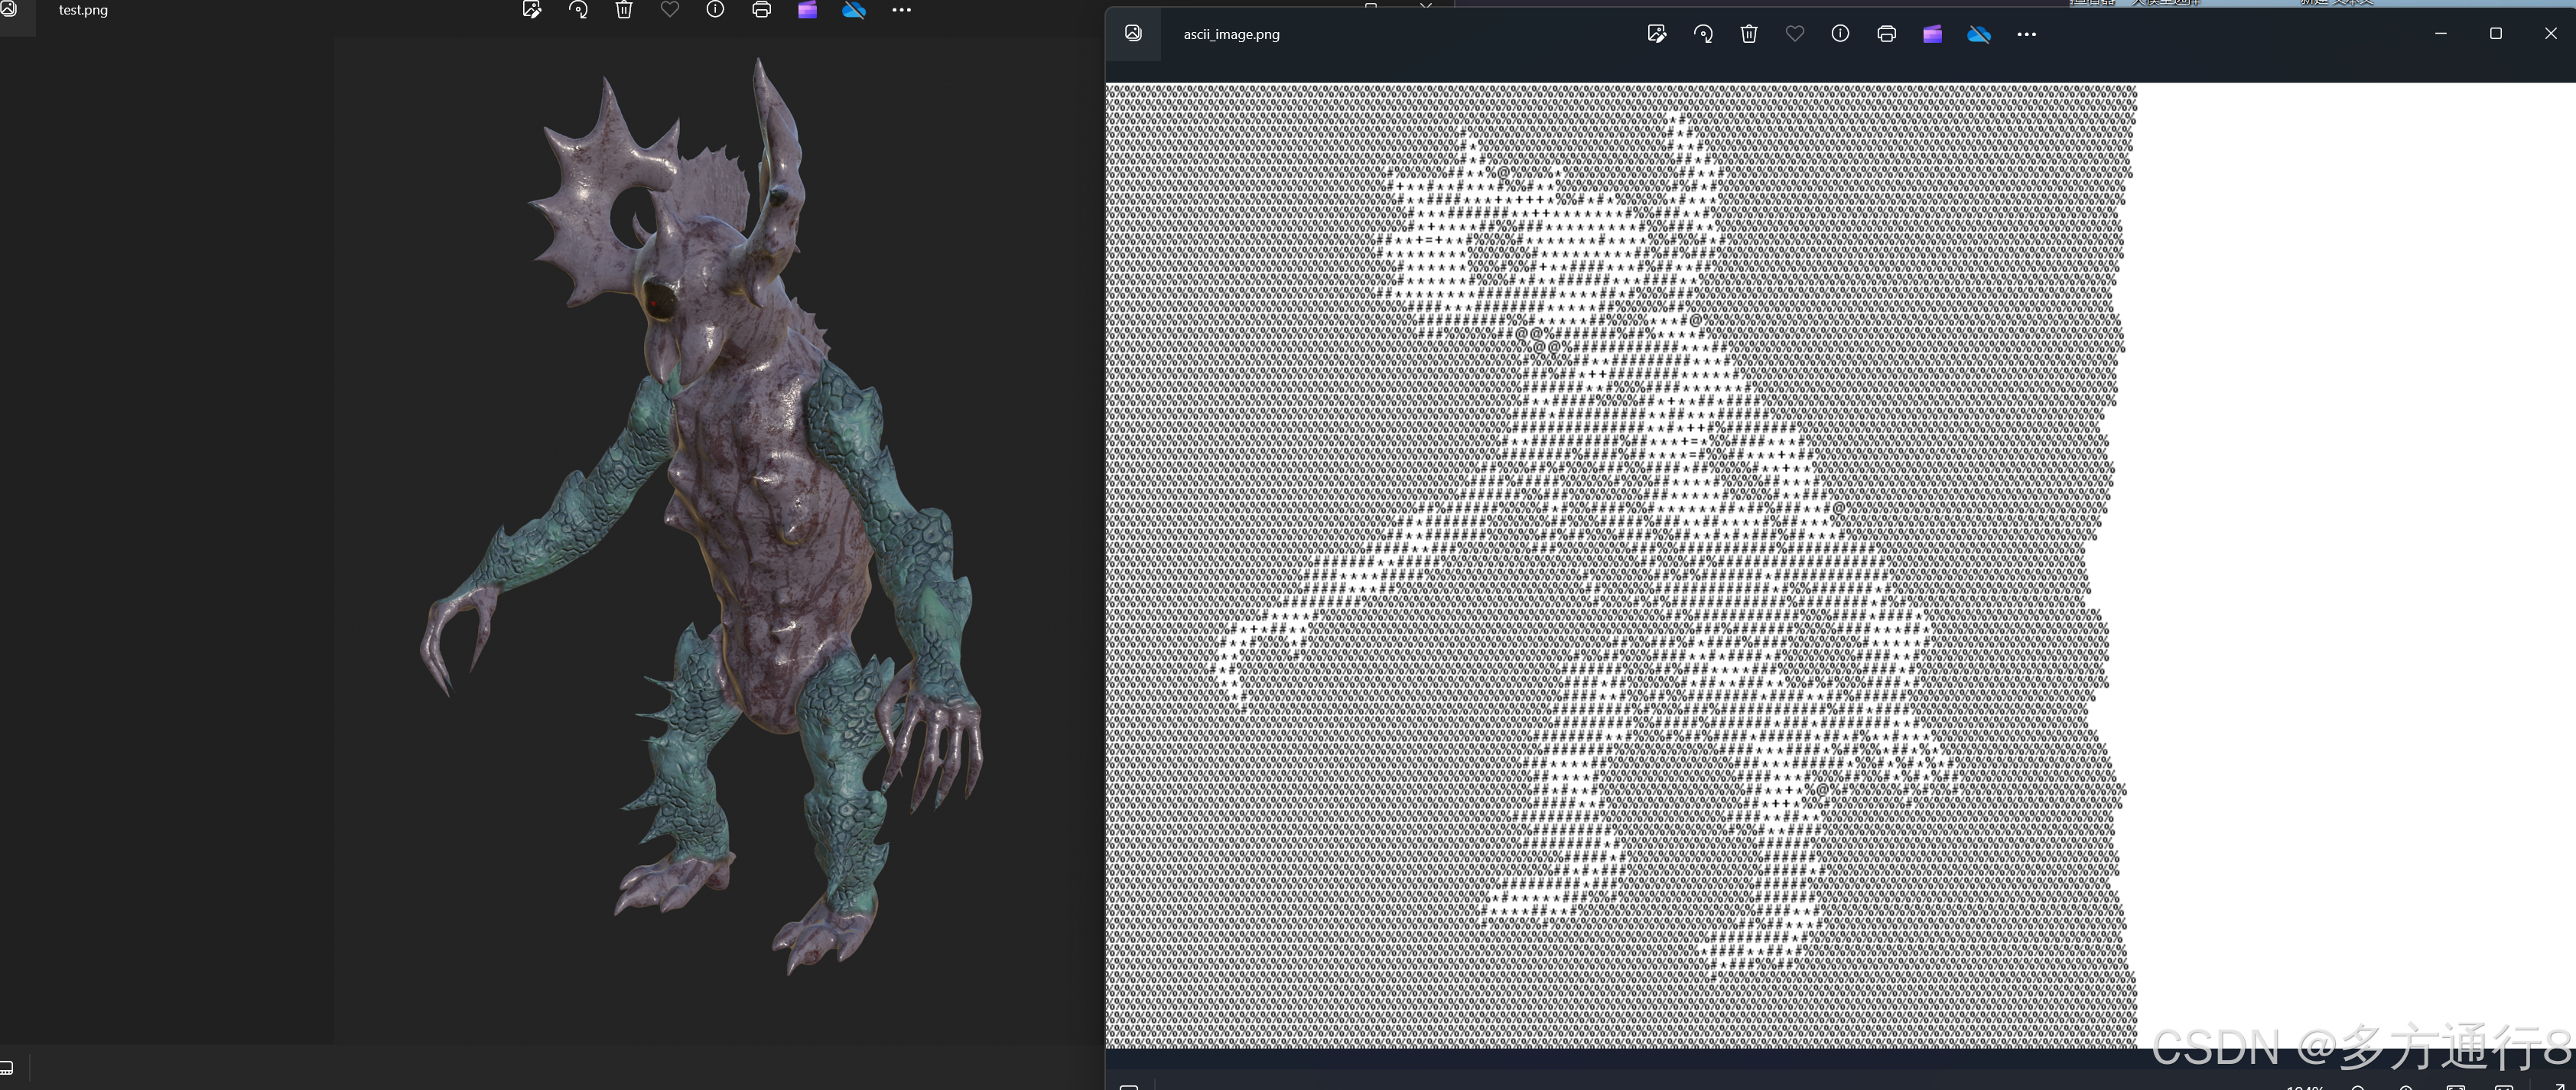
在这篇博客文章中,我们将学习如何使用Python将图像转换为ASCII艺术,并将结果保存为图像。我们将使用Pillow库来处理图像的加载、调整大小和绘制。最终的输出将是一张包含ASCII字符的图像。
所需库
首先,我们需要安装Pillow库。如果你还没有安装它,可以使用以下命令进行安装:
pip install Pillow 步骤解析
1. 导入所需库
我们首先需要导入Pillow库中的必要模块。
from PIL import Image, ImageDraw, ImageFont 2. 定义ASCII字符集
我们将使用一组ASCII字符来替代图像中的像素。这里使用了一组字符,其中包含数字和符号。
ASCII_CHARS = "123456789@%#*+=-:. " 3. 调整图像大小
我们定义了一个函数resize_image,用于根据新的宽度调整图像大小,并保持图像的纵横比。
def resize_image(image, new_width=100): width, height = image.size ratio = height / width new_height = int(new_width * ratio * 0.55) # 调整比例以适应字符高度 resized_image = image.resize((new_width, new_height)) return resized_image 4. 将图像转换为灰度
为了简化处理,我们将图像转换为灰度图像。
def grayify(image): grayscale_image = image.convert("L") return grayscale_image 5. 将像素转换为ASCII字符
这个函数将每个像素的灰度值映射到一个ASCII字符。
def pixels_to_ascii(image): pixels = image.getdata() ascii_str = "" for pixel in pixels: ascii_str += ASCII_CHARS[pixel // 32] return ascii_str 6. 从ASCII字符串创建图像
我们将ASCII字符串转换为图像。这个函数创建一个新的图像,并在上面绘制ASCII字符。
def ascii_to_image(ascii_str, img_width, char_size, output_image_path): lines = ascii_str.split('\n') # 加载字体 font = ImageFont.load_default() char_width, char_height = char_size # 计算新图像尺寸 img_height = char_height * len(lines) # 创建一个带有白色背景的新图像 new_image = Image.new("RGB", (img_width, img_height), "white") draw = ImageDraw.Draw(new_image) # 将ASCII字符绘制到图像上 x = 0 y = 0 for line in lines: draw.text((x, y), line, fill="black", font=font) y += char_height # 保存图像 new_image.save(output_image_path) 7. 将图像转换为ASCII并保存
这个函数将整个过程结合在一起。它首先加载图像,调整大小并转换为灰度。然后将图像转换为ASCII字符并保存为新的图像。
def image_to_ascii_image(image_path, output_image_path, new_width=100): try: image = Image.open(image_path) except Exception as e: print(f"无法打开图像文件 {image_path}. {e}") return resized_image = resize_image(image, new_width) gray_image = grayify(resized_image) ascii_str = pixels_to_ascii(gray_image) ascii_str_with_newlines = "\n".join([ascii_str[i:i + new_width] for i in range(0, len(ascii_str), new_width)]) img_width = new_width # 测量字符大小 test_image = Image.new("RGB", (10, 10)) draw = ImageDraw.Draw(test_image) font = ImageFont.load_default() bbox = draw.textbbox((0, 0), "@", font=font) char_width = bbox[2] - bbox[0] char_height = bbox[3] - bbox[1] # 计算最终图像的宽度 final_img_width = char_width * new_width final_img_height = char_height * len(ascii_str_with_newlines.split('\n')) ascii_to_image(ascii_str_with_newlines, final_img_width, (char_width, char_height), output_image_path) 8. 使用示例
最后,提供一个示例来演示如何使用这些函数。
image_path = "C:\\Users\\ADMIN\\Desktop\\1.png" output_image_path = "C:\\Users\\ADMIN\\Desktop\\ascii_image.png" image_to_ascii_image(image_path, output_image_path) print(f"ASCII艺术保存为图像在 {output_image_path}") 结论
通过本文,我们学会了如何使用Python将图像转换为ASCII艺术,并将结果保存为图像。这个过程涉及调整图像大小、将图像转换为灰度、将像素映射到ASCII字符,以及将ASCII字符绘制到新图像上。希望你能从中学到有用的知识,并在自己的项目中尝试这一技术!
所有代码
from PIL import Image, ImageDraw, ImageFont # 用于构建输出文本的ASCII字符 ASCII_CHARS = "123456789@%#*+=-:. " # 根据新的宽度调整图像大小 def resize_image(image, new_width=100): width, height = image.size ratio = height / width new_height = int(new_width * ratio * 0.55) # 调整比例以适应字符高度 resized_image = image.resize((new_width, new_height)) return resized_image # 将每个像素转换为灰度 def grayify(image): grayscale_image = image.convert("L") return grayscale_image # 将像素转换为ASCII字符字符串 def pixels_to_ascii(image): pixels = image.getdata() ascii_str = "" for pixel in pixels: ascii_str += ASCII_CHARS[pixel // 32] return ascii_str # 从ASCII字符串创建图像 def ascii_to_image(ascii_str, img_width, char_size, output_image_path): lines = ascii_str.split('\n') # 加载字体 font = ImageFont.load_default() char_width, char_height = char_size # 计算新图像尺寸 img_height = char_height * len(lines) # 创建一个带有白色背景的新图像 new_image = Image.new("RGB", (img_width, img_height), "white") draw = ImageDraw.Draw(new_image) # 将ASCII字符绘制到图像上 x = 0 y = 0 for line in lines: draw.text((x, y), line, fill="black", font=font) y += char_height # 保存图像 new_image.save(output_image_path) # 将图像转换为ASCII并保存为图像 def image_to_ascii_image(image_path, output_image_path, new_width=100): try: image = Image.open(image_path) except Exception as e: print(f"无法打开图像文件 {image_path}. {e}") return resized_image = resize_image(image, new_width) gray_image = grayify(resized_image) ascii_str = pixels_to_ascii(gray_image) ascii_str_with_newlines = "\n".join([ascii_str[i:i + new_width] for i in range(0, len(ascii_str), new_width)]) img_width = new_width # 测量字符大小 test_image = Image.new("RGB", (10, 10)) draw = ImageDraw.Draw(test_image) font = ImageFont.load_default() bbox = draw.textbbox((0, 0), "@", font=font) char_width = bbox[2] - bbox[0] char_height = bbox[3] - bbox[1] # 计算最终图像的宽度 final_img_width = char_width * new_width final_img_height = char_height * len(ascii_str_with_newlines.split('\n')) ascii_to_image(ascii_str_with_newlines, final_img_width, (char_width, char_height), output_image_path) # 使用示例 image_path = "C:\\Users\\ADMIN\\Desktop\\1.png" output_image_path = "C:\\Users\\ADMIN\\Desktop\\ascii_image.png" image_to_ascii_image(image_path, output_image_path) print(f"ASCII图像保存在 {output_image_path}") 效果:

