
阅读量:0
这里写目录标题
引入 : hive-2.1.0的安装包
一.安装配置hive
1.启动相关进程 , 进行解压安装
//打开虚拟机时 , 先启动所有进程[root@hadoop ~]# jps
10111 Jps[root@hadoop ~]# start-all.sh[root@hadoop ~]# jps
10544 SecondaryNameNode
10723 ResourceManager
10249 NameNode
10825 NodeManager
11212 Jps
10351 DataNode
//启动mysql[root@hadoop ~]# service mysql start
Starting MySQL SUCCESS!
[root@hadoop ~]# 2024-05-19T10:35:28.535241Z mysqld_safe A mysqmysql -uroot -p
Enter password:mysql> exit;
Bye
[root@hadoop ~]# systemctl stop firewalld //关闭防火墙[root@hadoop ~]# start-yarn.sh //启动mapreduce[root@hadoop ~]# cd /usr/soft
//解压hive的安装包[root@hadoop soft]# tar -zxvf apache-hive-2.1.0-bin.tar.gz //解压[root@hadoop soft]# ls
apache-hive-2.1.0-bin hadoop mysql5.7
apache-hive-2.1.0-bin.tar.gz jdk[root@hadoop soft]# rm -rf apache-hive-2.1.0-bin.tar.gz //删除压缩包[root@hadoop soft]# ls
apache-hive-2.1.0-bin hadoop jdk mysql5.7[root@hadoop soft]# mv apache-hive-2.1.0-bin/ hive //改名为hive[root@hadoop soft]# ls
hadoop hive jdk mysql5.7
2.相关配置
//配置环境变量[root@hadoop soft]# vim /etc/profile.d/hive.sh[root@hadoop profile.d]# cat hive.sh
HIVE_HOME=/usr/soft/hive
PATH= P A T H : PATH: PATH:HIVE_HOME/bin
CLASSPATH= C L A S S P A T H : CLASSPATH: CLASSPATH:HIVE_HOME/lib
export HIVE_HOME PATH CLASSPATH
//source一下,让环境变量的配置生效[root@hadoop profile.d]# source /etc/profile.d/hive.sh
//修改hive-site.xml 文件[root@hadoop profile.d]# cd /usr/soft/hive/conf
[root@hadoop conf]# cat hive-site.xml
- hive-site.xml 文件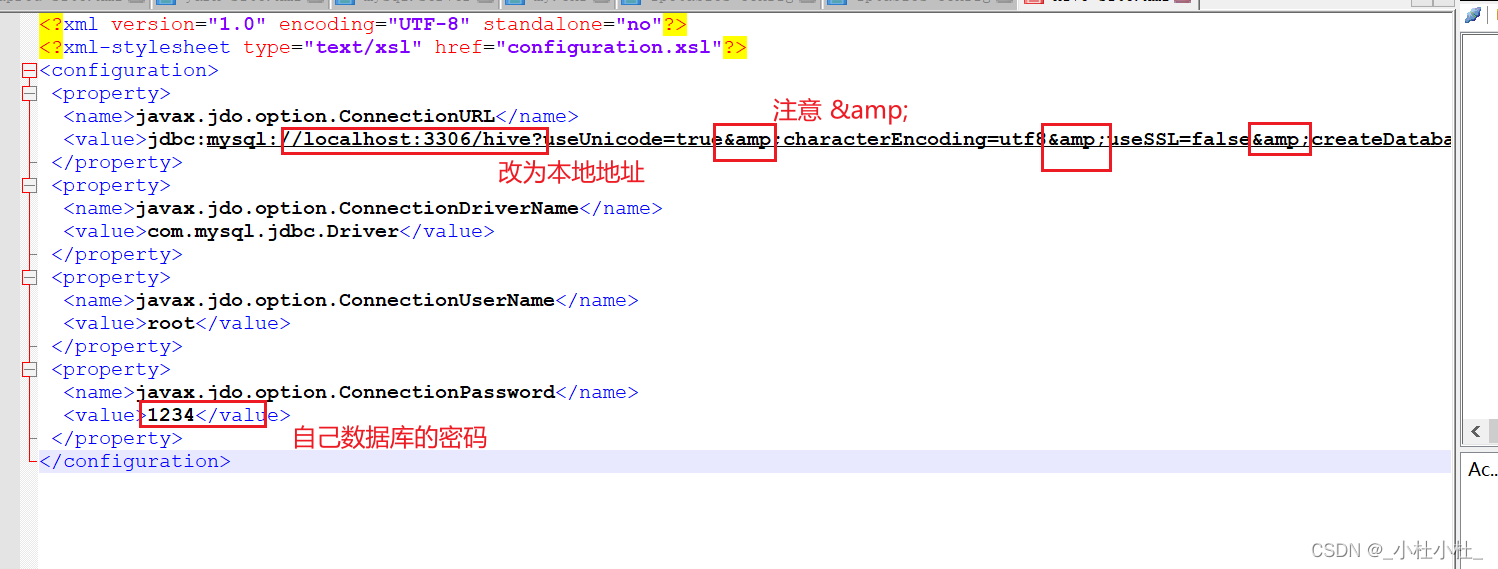
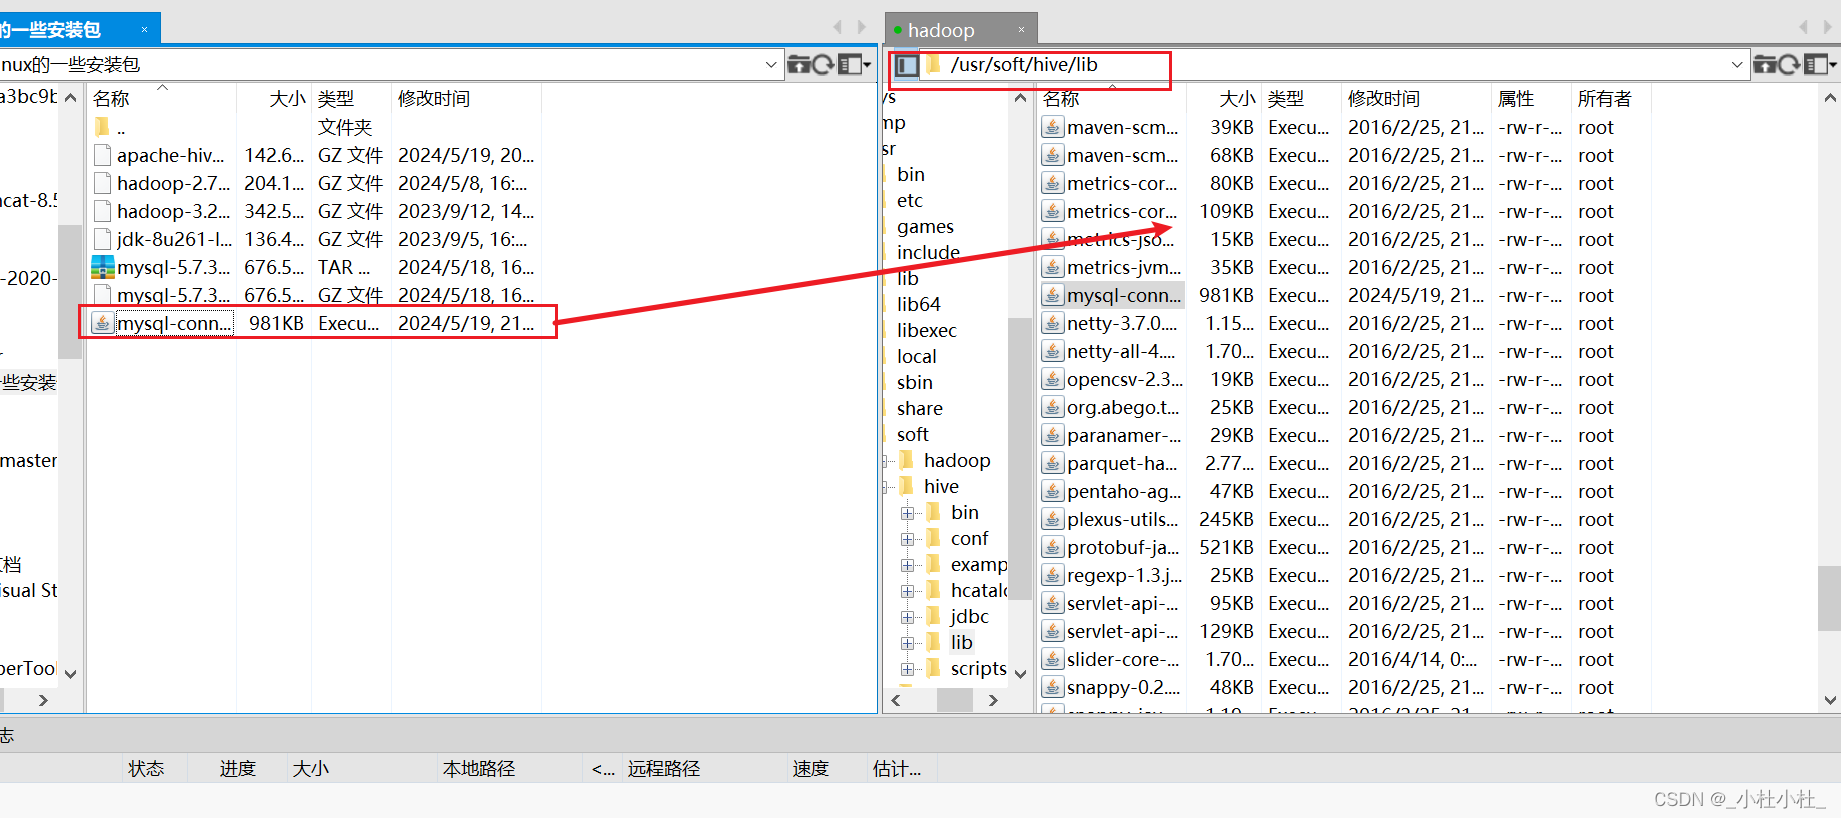
<?xml version="1.0" encoding="UTF-8" standalone="no"?> <?xml-stylesheet type="text/xsl" href="configuration.xsl"?> <configuration> <property> <name>javax.jdo.option.ConnectionURL</name> <value>jdbc:mysql://localhost:3306/hive?useUnicode=true&characterEncoding=utf8&useSSL=false&createDatabaseIfNotExist=true</value> </property> <property> <name>javax.jdo.option.ConnectionDriverName</name> <value>com.mysql.jdbc.Driver</value> </property> <property> <name>javax.jdo.option.ConnectionUserName</name> <value>root</value> </property> <property> <name>javax.jdo.option.ConnectionPassword</name> <value>1234</value> </property> </<configuration>> //在xftp中将mysql的驱动包传到 /usr/soft/hive/lib目录下
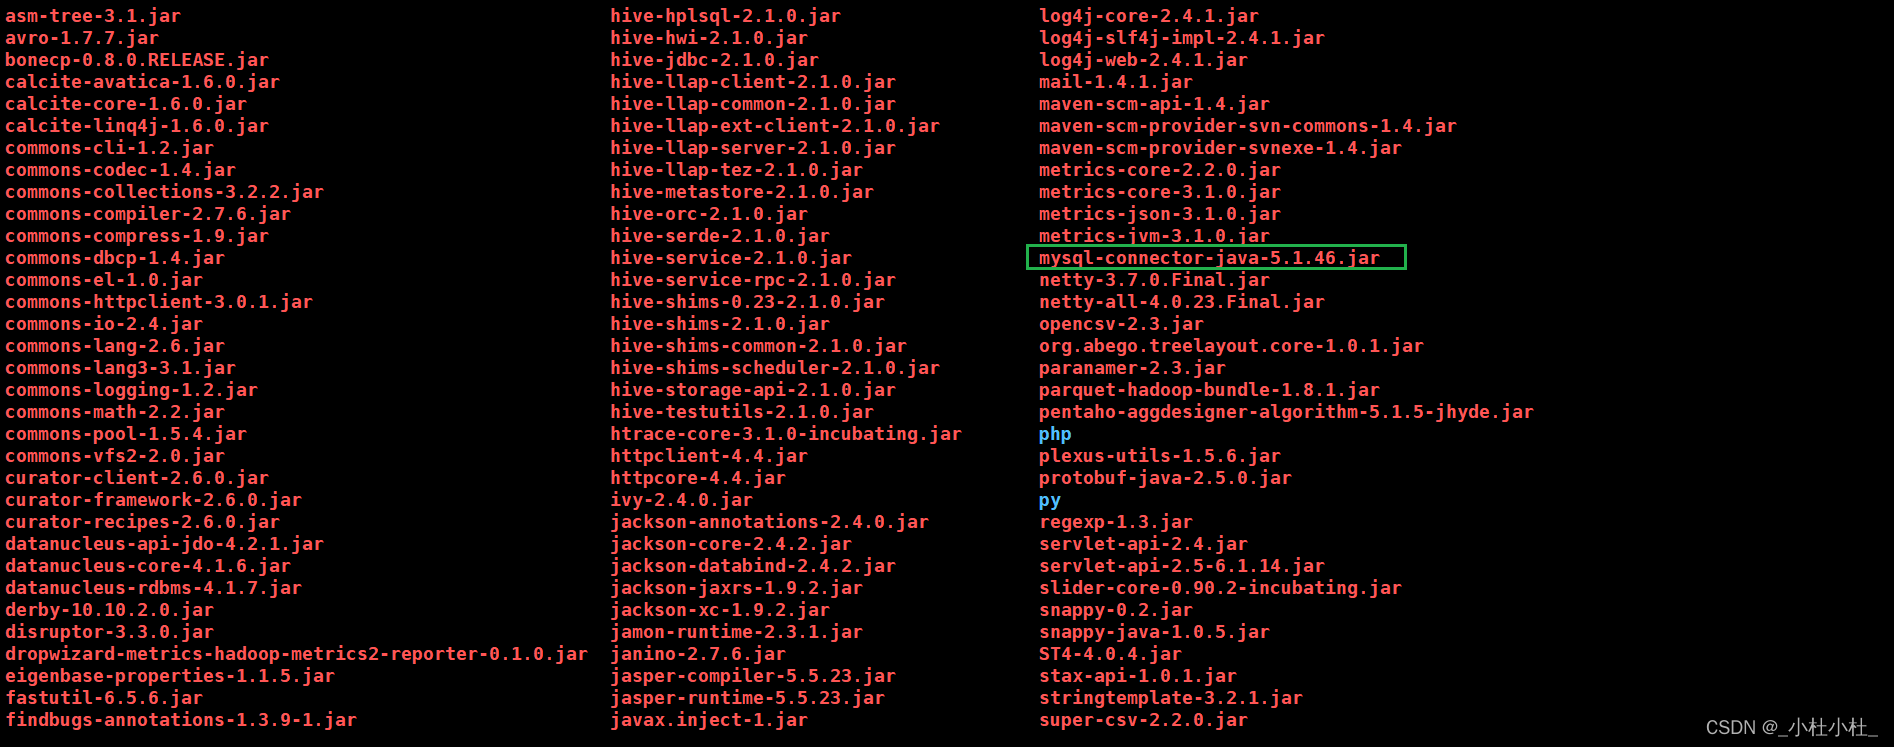
- mysql驱动包下载到 /usr/soft/hive/lib目录下
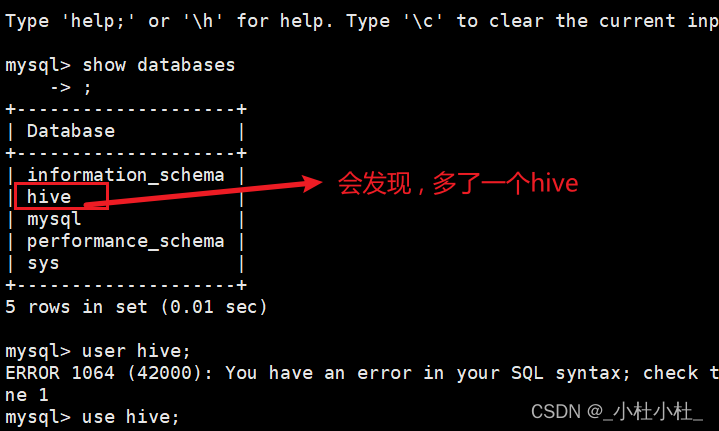
//然后初始化元数据[root@hadoop lib]# schematool -dbType mysql -initSchema
//这时数据库就会有些变动(更新了) , 我们可以查看一下
[root@hadoop lib]# mysql -uroot -p
mysql> show databases;
//…
5 rows in set (0.01 sec)mysql> use hive;mysql> show tables;
//…
57 rows in set (0.00 sec)
- 查看mysql
二.测试是否成功安装Hiv
1.导入数据
//先创建一个文件 , 存放点数据[root@hadoop ~]# cd /usr/[root@hadoop usr]# mkdir data[root@hadoop usr]# cd data[root@hadoop data]# vim student.txt[root@hadoop data]# cat student.txt
95002,刘晨,女,19,IS 95017,王风娟,女,18,IS 95018,王一,女,19,IS 95013,冯伟,男,21,CS 95014,王小丽,女,19,CS 95019,邢小丽,女,19,IS 95020,赵钱,男,21,IS 95003,王敏,女,22,MA 95004,张立,男,19,IS 95012,孙花,女,20,CS 95010,孔小涛,男,19,CS 95005,刘刚,男,18,MA 95006,孙庆,男,23,CS 95007,易思玲,女,19,MA 95008,李娜,女,18,CS 95021,周二,男,17,MA 95022,郑明,男,20,MA 95001,李勇,男,20,CS 95011,包小柏,男,18,MA 95009,梦圆圆,女,18,MA 95015,王君,男,18,MA //将文件 上传到hdfs中[root@hadoop data]# hdfs dfs -put student.txt /
[root@hadoop data]# hdfs dfs -ls /
Found 2 items
-rw-r–r-- 1 root supergroup 504 2024-05-27 09:56 /student.txt
drwx-wx-wx - root supergroup 0 2024-05-19 21:18 /tmp
2.在hive中执行数据操作
//打开hive[root@hadoop ~]# hive
hive> show databases;
OK
default
Time taken: 1.361 seconds, Fetched: 1 row(s)
//创建一个数据库hive> create database myhive;
OK
Time taken: 0.583 seconds
hive> show databases;
OK
default
myhive
Time taken: 0.022 seconds, Fetched: 2 row(s)
hive> use myhive;
OK
Time taken: 0.047 seconds
//创建一个student的表hive> create table student(id int, name string, sex string, age int, department string) row format delimited fields terminated by ",";
OK
Time taken: 0.158 seconds
//执行数据加载hive> load data inpath "/student.txt" into table student;
Loading data to table myhive.student
OK
Time taken: 0.964 seconds
//此时,数据导入到表中 , 可以使用hive进行表操作了hive> select * from student;
OK 95002 刘晨 女 19 IS 95017 王风娟 女 18 IS 95018 王一 女 19 IS 95013 冯伟 男 21 CS 95014 王小丽 女 19 CS 95019 邢小丽 女 19 IS 95020 赵钱 男 21 IS 95003 王敏 女 22 MA 95004 张立 男 19 IS 95012 孙花 女 20 CS 95010 孔小涛 男 19 CS 95005 刘刚 男 18 MA 95006 孙庆 男 23 CS 95007 易思玲 女 19 MA 95008 李娜 女 18 CS 95021 周二 男 17 MA 95022 郑明 男 20 MA 95001 李勇 男 20 CS 95011 包小柏 男 18 MA 95009 梦圆圆 女 18 MA 95015 王君 男 18 MA Time taken: 1.905 seconds, Fetched: 21 row(s) //计算平均年龄 ----> hive去调用了mapreducehive> select avg(age) from student;
WARNING: Hive-on-MR is deprecated in Hive 2 and may not be available in the future versions. Consider using a different execution engine (i.e. spark, tez) or using Hive 1.X releases. Query ID = root_20240527102934_25490751-a0bb-48aa-9f5e-79f3426a66d8 Total jobs = 1 Launching Job 1 out of 1 Number of reduce tasks determined at compile time: 1 In order to change the average load for a reducer (in bytes): set hive.exec.reducers.bytes.per.reducer=<number> In order to limit the maximum number of reducers: set hive.exec.reducers.max=<number> In order to set a constant number of reducers: set mapreduce.job.reduces=<number> Starting Job = job_1716114831307_0001, Tracking URL = http://hadoop:8088/proxy/application_1716114831307_0001/ Kill Command = /usr/soft/hadoop/bin/hadoop job -kill job_1716114831307_0001 Hadoop job information for Stage-1: number of mappers: 1; number of reducers: 1 2024-05-27 10:30:07,243 Stage-1 map = 0%, reduce = 0% 2024-05-27 10:30:21,672 Stage-1 map = 100%, reduce = 0%, Cumulative CPU 3.16 sec 2024-05-27 10:30:31,669 Stage-1 map = 100%, reduce = 100%, Cumulative CPU 5.24 sec MapReduce Total cumulative CPU time: 5 seconds 240 msec Ended Job = job_1716114831307_0001 MapReduce Jobs Launched: Stage-Stage-1: Map: 1 Reduce: 1 Cumulative CPU: 5.24 sec HDFS Read: 9204 HDFS Write: 118 SUCCESS Total MapReduce CPU Time Spent: 5 seconds 240 msec OK 19.285714285714285 Time taken: 59.164 seconds, Fetched: 1 row(s) 