阅读量:0
通过官网给出的示例自己实现了自定义的tabBar,但结果发现
无法监听页面生命周期函数
结语:原想的是实现不一样的效果(如下)

故尝试了自定义tabBar,虽然做出来了,但也发现这个做法存在不足:
在页面js文件中,需要给出以下代码:
Component({ pageLifetimes: { show() { if (typeof this.getTabBar === 'function' && this.getTabBar()) { this.getTabBar().setData({ selected: 0 // 对应tabBar的下标 }) } } }, data: { navBarHeight: getApp().globalData.navBarHeight, }, })相当于将原来的page页面更改为组件components
这样做的结果就是无法监听页面生命周期函数(至少在创建page时自带的生命周期函数均无法监听)
这是我遇到的,若有解决方案,欢迎留言告知
实现步骤
官方文档:基础能力 / 自定义 tabBar (qq.com)
1.app.json配置tabBar
"tabBar": { "custom": true, "color": "#a5abbd", "selectedColor": "#1dba73", "backgroundColor": "#ffffff", "list": [{ "pagePath": "pages/home/home", "text": "首页" },{ "pagePath": "pages/index/index", "text": "测试" }] }注意:此处path不写最前面的 /
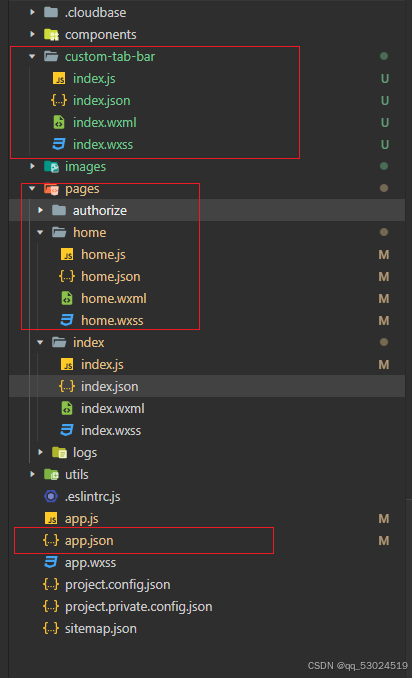
2.在项目根目录下添加文件夹custom-tab-bar,并添加组件,命名为index(下面的代码均借鉴官方demo,可自行修改)
项目文件夹如下:

index.js:
Component({ data: { selected: 0, color: "#a5abbd", selectedColor: "#1dba73", list: [{ pagePath: "/pages/home/home", iconPath: "/images/icon/home.svg", selectedIconPath: "/images/icon/home-selected.svg", text: "首页" }, { // 此处path必须加前面的/,否则在切换tabbar时,会自动拼接地址,导致传入url有误,系统没有任何效果 pagePath: "/pages/index/index", text: "测试" }] }, methods: { switchTab(e) { const data = e.currentTarget.dataset const url = data.path // wx.switchTab切换tabBar组件,可传入url,success,fail,此处简写 wx.switchTab({url}) // 完整写法 // wx.switchTab({ // url: url, // success(res){console.log(res)}, // fail(error){console.log(error)} // }) this.setData({ selected: data.index }) } } })注意:此处path必须加前面的/,否则在切换tabbar时,会自动拼接地址,导致传入url有误,系统没有任何效果
index.json:
{ "component": true }index.wxml:
<view class="tab-bar"> <view class="tab-bar-border"></view> <view wx:for="{{list}}" wx:key="index" class="tab-bar-item" data-path="{{item.pagePath}}" data-index="{{index}}" bindtap="switchTab"> <image src="{{selected === index ? item.selectedIconPath : item.iconPath}}"></image> <view style="color: {{selected === index ? selectedColor : color}}">{{item.text}}</view> </view> </view>index.wxss:
.tab-bar { position: fixed; bottom: 0; left: 0; right: 0; height: 48px; background: white; display: flex; padding-bottom: env(safe-area-inset-bottom); } .tab-bar-border { background-color: rgba(0, 0, 0, 0.33); position: absolute; left: 0; top: 0; width: 100%; height: 1px; transform: scaleY(0.5); } .tab-bar-item { flex: 1; text-align: center; display: flex; justify-content: center; align-items: center; flex-direction: column; } .tab-bar-item image { width: 27px; height: 27px; } .tab-bar-item view { font-size: 10px; }到此处应该就会出现tabBar且可点击,点击时也能切换页面
但可能出现问题:一个tabBar要点击两次才能更改样式(即tabBar与页面未连接)
解决:
在页面的js文件中:
Component({ pageLifetimes: { show() { if (typeof this.getTabBar === 'function' && this.getTabBar()) { this.getTabBar().setData({ selected: 0 // 对应tabBar的下标 }) } } }, data: { navBarHeight: getApp().globalData.navBarHeight, }, })至此,自定义tabBar便完成了,但就像我前面说的,如此修改之后,无法监听页面的生命周期函数,大家自行判断是否需要自定义tabBar,或者有更好解决方案的,欢迎评论区交流
