
阅读量:0
目录
1、创建Springboot工程
在Idea里创建Springboot工程,Language选择Java,Type选择Maven,Project SDK 选择Java8。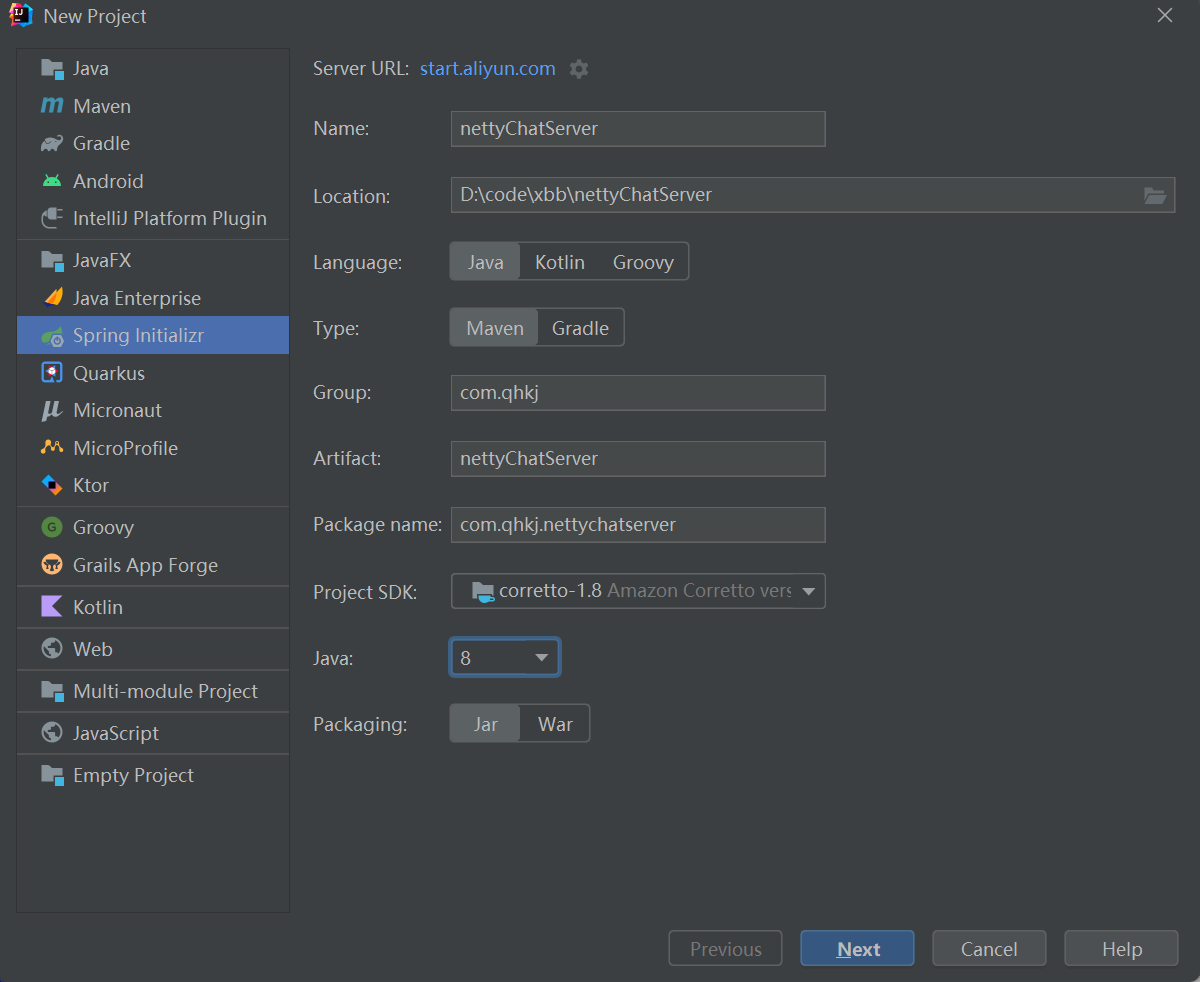
1.1、项目创建
成功创建项目,Sringboot版本 2.7.6,Java版本8。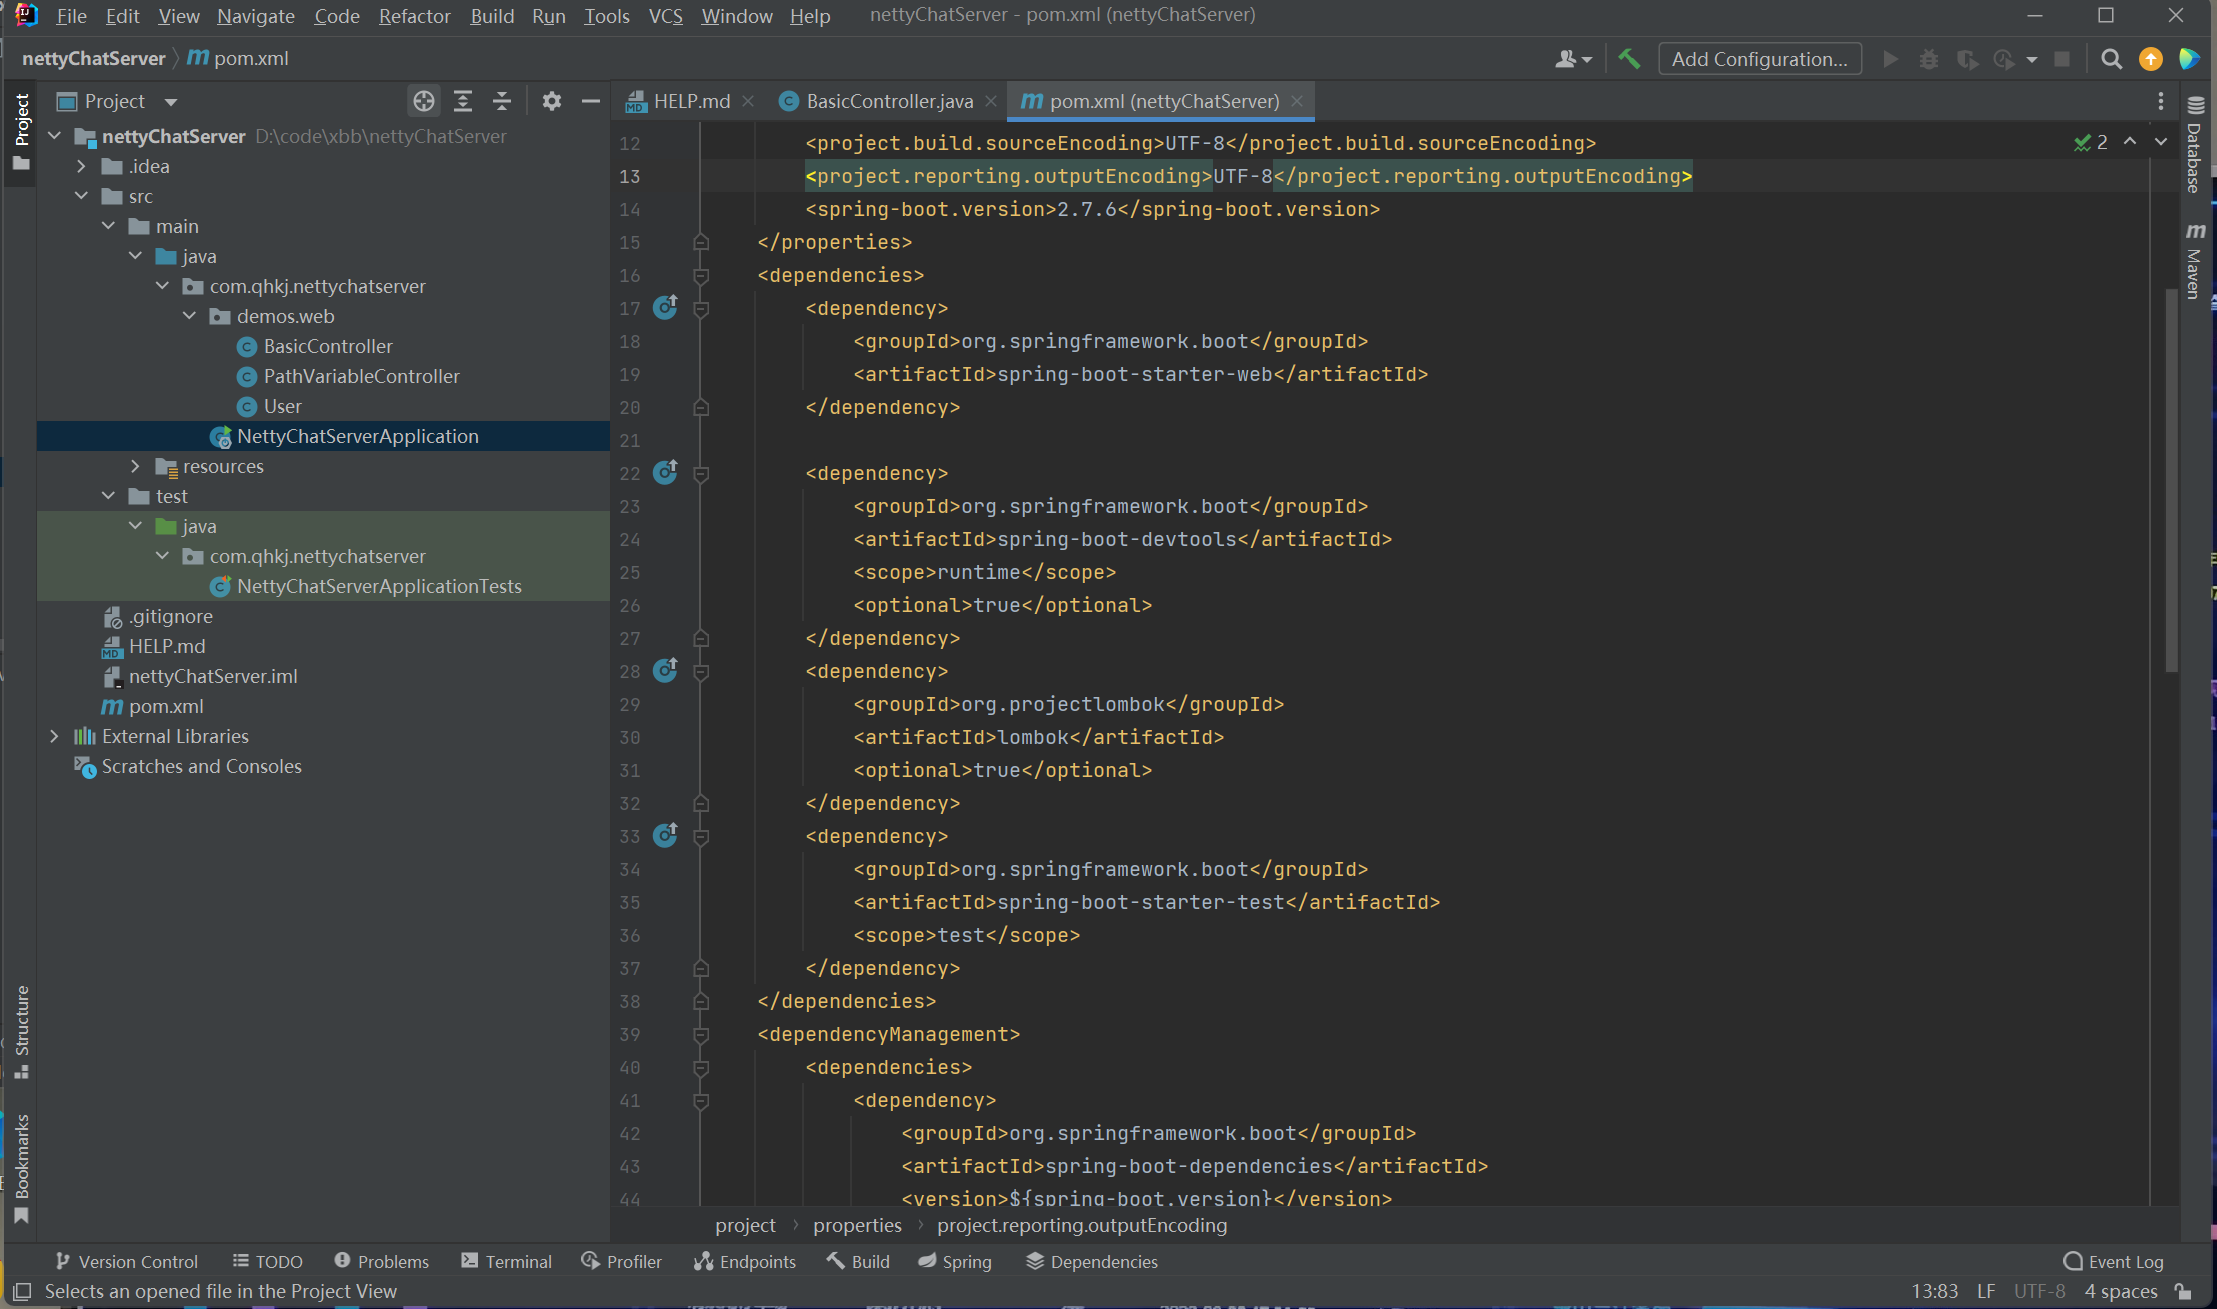
1.2、环境配置
检查Maven配置,主要检查settings.xml和本地Maven仓库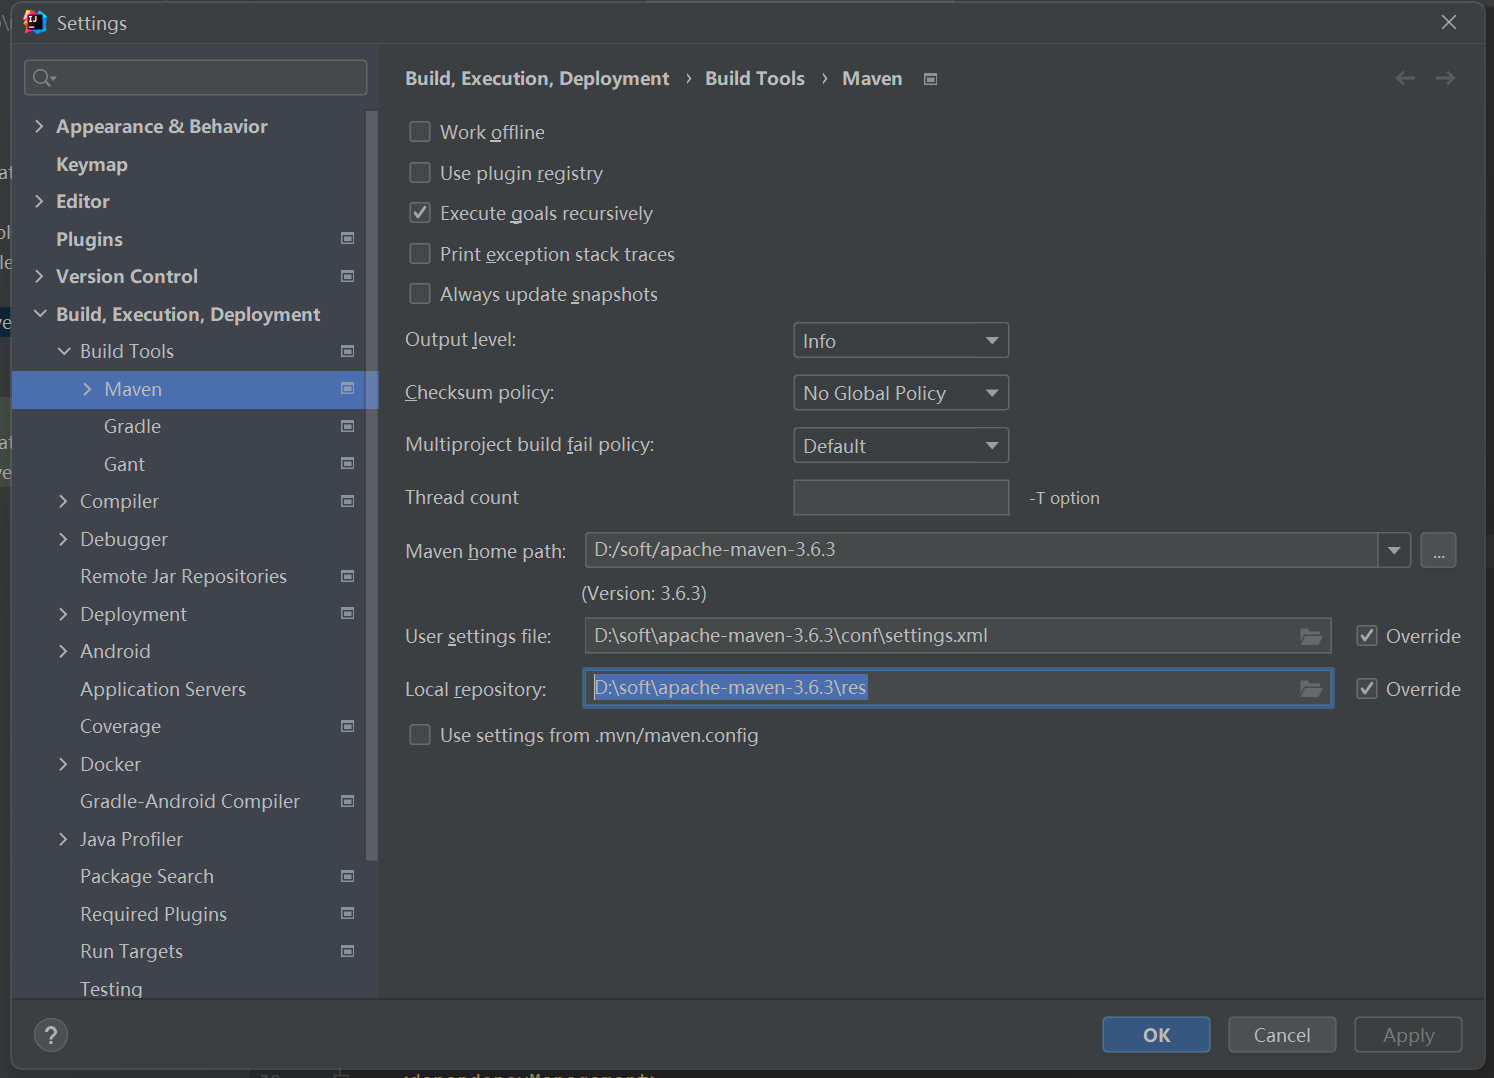
1.2.1、检查settings.xml
在settings.xml里配置上阿里云镜像
<mirrors> <mirror> <id>alimaven</id> <mirrorOf>central</mirrorOf> <name>aliyun maven</name> <url>http://maven.aliyun.com/nexus/content/repositories/central/</url> </mirror> </mirrors> 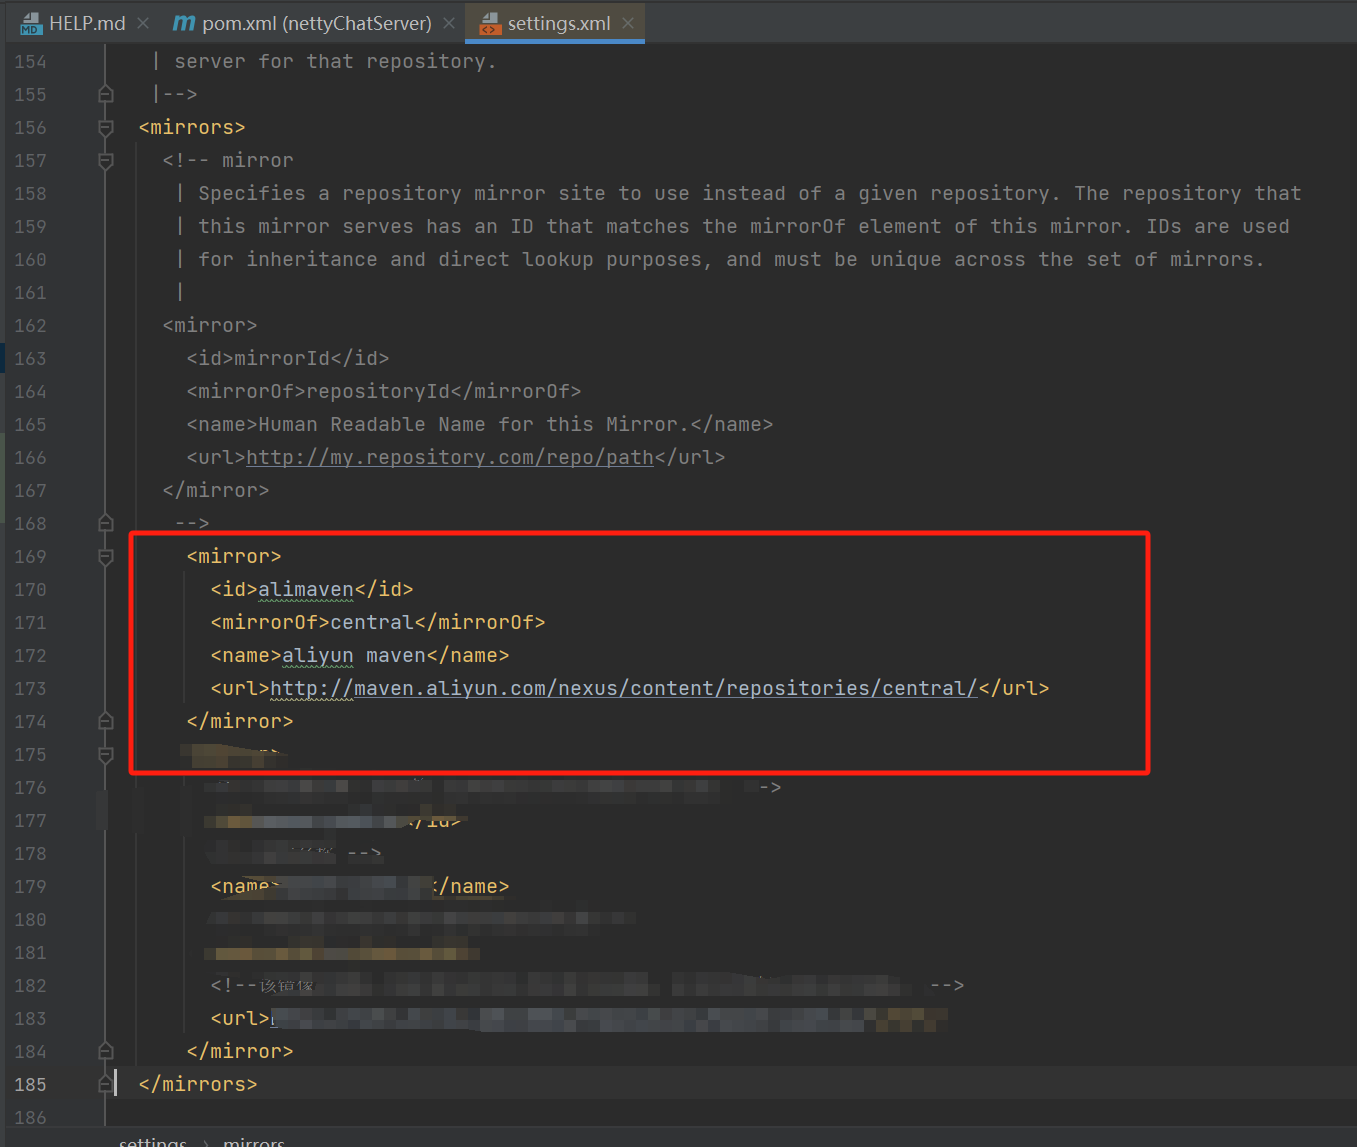
1.2.2、检查本地仓库
Maven版本3.6.3,在Maven文件夹下创建了res文件夹,做为Java工程的Maven本地仓库地址,此文件通常都在500MB以上,随着本地项目数而递增。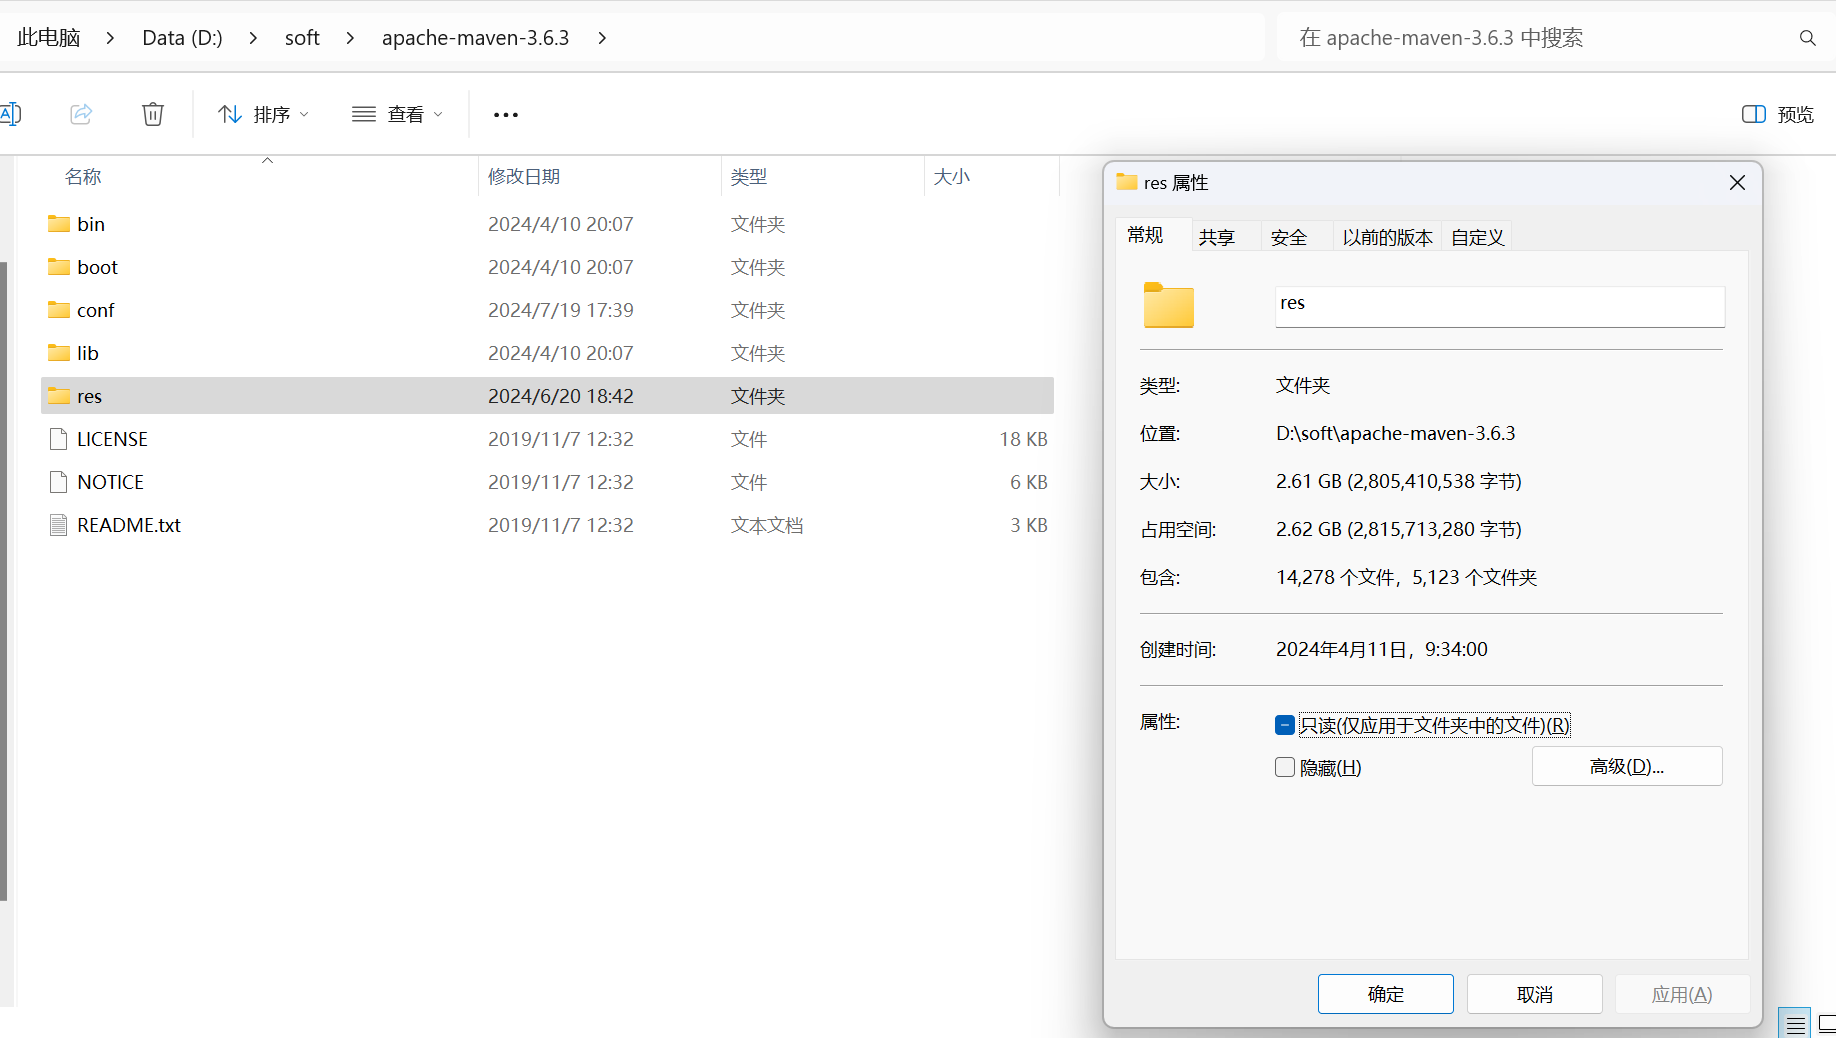
1.3、项目结构配置
打开【Project Structure】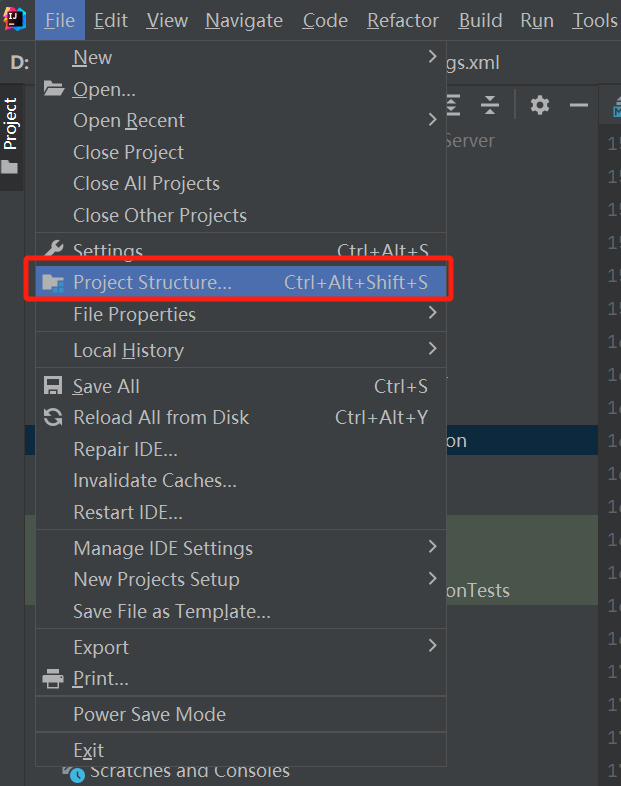
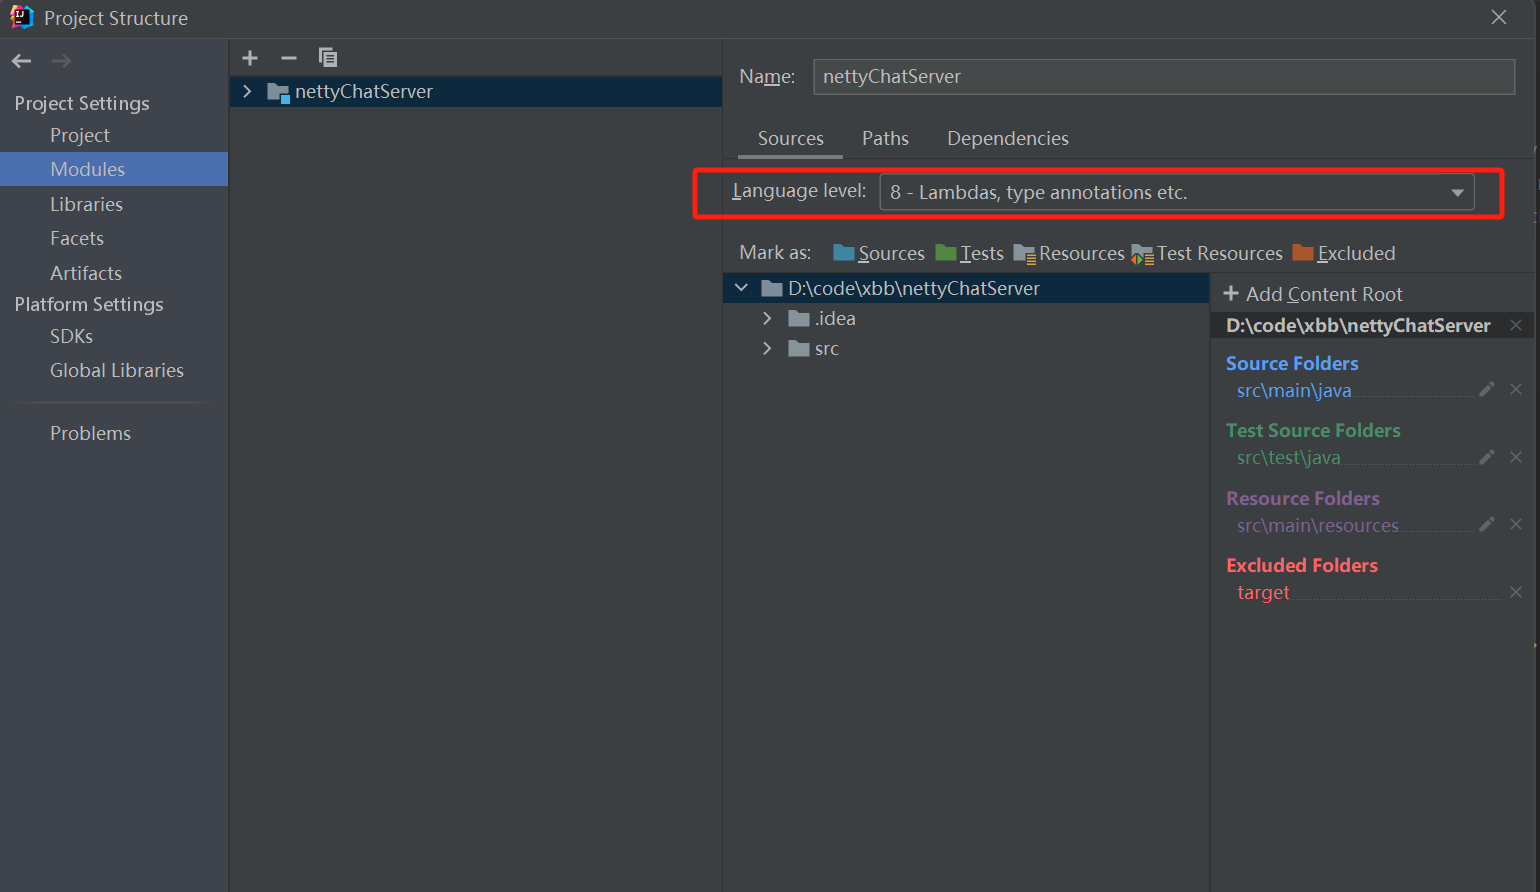
1.3.1、配置JDK
修改SDK、Language level等配置。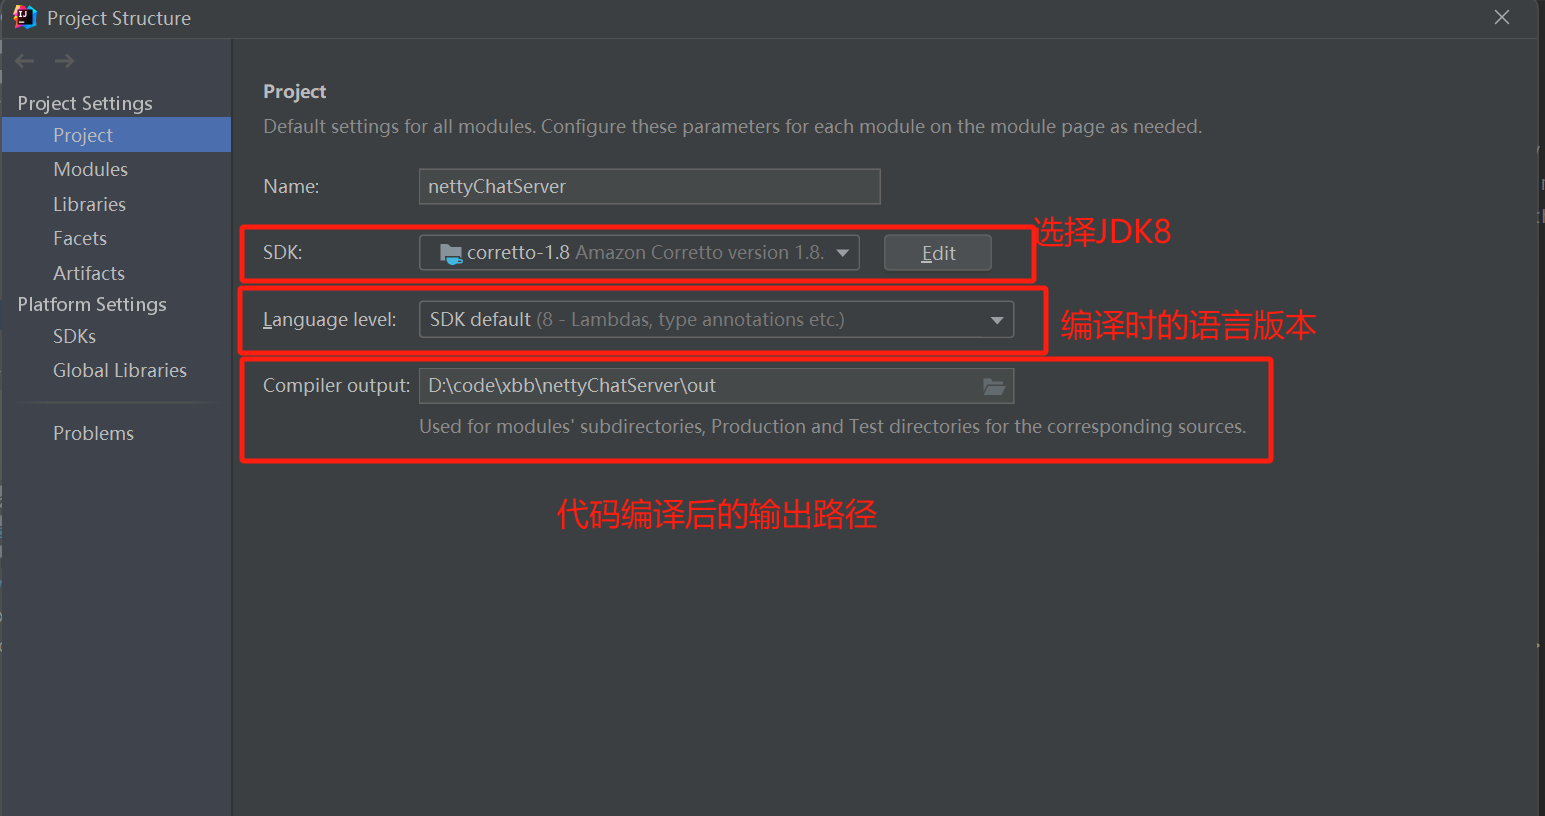
1.4、添加依赖
上述操作都是打基础,搭架子和配置环境,下一步我们需要加载netty 的相关依赖包。
在 pom.xml 文件中添加 Netty 和 Spring Boot 相关的依赖:
<dependencies> <dependency> <groupId>org.springframework.boot</groupId> <artifactId>spring-boot-starter</artifactId> </dependency> <dependency> <groupId>io.netty</groupId> <artifactId>netty-all</artifactId> <version>4.1.68.Final</version> <!-- 请根据需要选择合适的版本 --> </dependency> </dependencies> 2、构造NettyWebsocketServer
2.1、创建一个 Netty 服务器配置类
import io.netty.handler.codec.http.websocketx.WebSocketServerProtocolHandler; import org.springframework.context.annotation.Configuration; import io.netty.channel.socket.nio.NioServerSocketChannel; import io.netty.handler.codec.http.HttpObjectAggregator; import io.netty.handler.codec.http.HttpServerCodec; import io.netty.handler.stream.ChunkedWriteHandler; import io.netty.handler.timeout.IdleStateHandler; import io.netty.channel.nio.NioEventLoopGroup; import io.netty.channel.socket.SocketChannel; import io.netty.bootstrap.ServerBootstrap; import javax.annotation.PostConstruct; import lombok.extern.slf4j.Slf4j; import io.netty.channel.*; @Slf4j @Configuration public class NettyWebsocketServer { //bossGroup 连接线程组,主要负责接受客户端连接 EventLoopGroup bossGroup = new NioEventLoopGroup(1); private EventLoopGroup workerGroup = new NioEventLoopGroup(); private ChannelFuture channelFuture; @PostConstruct public void start() throws InterruptedException { try { ServerBootstrap b = new ServerBootstrap(); b.group(bossGroup, workerGroup) .channel(NioServerSocketChannel.class) .option(ChannelOption.SO_BACKLOG, 128) .childOption(ChannelOption.SO_KEEPALIVE, true) .childHandler(new ChannelInitializer<SocketChannel>() { @Override protected void initChannel(SocketChannel socketChannel) throws Exception { ChannelPipeline pipeline = socketChannel.pipeline(); // 因为使用 HTTP 协议,所以需要 HTTP编码器,解码器 pipeline.addLast(new HttpServerCodec()); // 以块方式,添加 chunkedWriter 处理器 pipeline.addLast(new ChunkedWriteHandler()); /** * 1. http数据在传输中是分段的,HttpObjectAggregator 可以把多个段聚合起来 * 2. 这就是为什么当浏览器发送大量数据时,就会发出多次 http请求的原因 */ pipeline.addLast(new HttpObjectAggregator(8192)); // 保存用户ip // pipeline.addLast(new HttpHeadersHandler()); pipeline.addLast(new WebSocketServerProtocolHandler("/chat")); pipeline.addLast(new IdleStateHandler(60, 5, 0)); pipeline.addLast(new ChatHandler()); //添加自定义handler } }); // Bind and start to accept incoming connections. channelFuture = b.bind(9091).sync(); if(channelFuture.isSuccess()) { log.info("netty启动成功"); } // 对通道关闭进行监听 channelFuture.channel().closeFuture().sync(); } finally { if (channelFuture != null && channelFuture.isSuccess()) { System.out.println("Netty server started on port 9091"); } else { System.err.println("Netty server failed to start"); } } } } 2.2、添加自定义handler
创建一个自定义的 ChannelHandler 来处理客户端的请求:
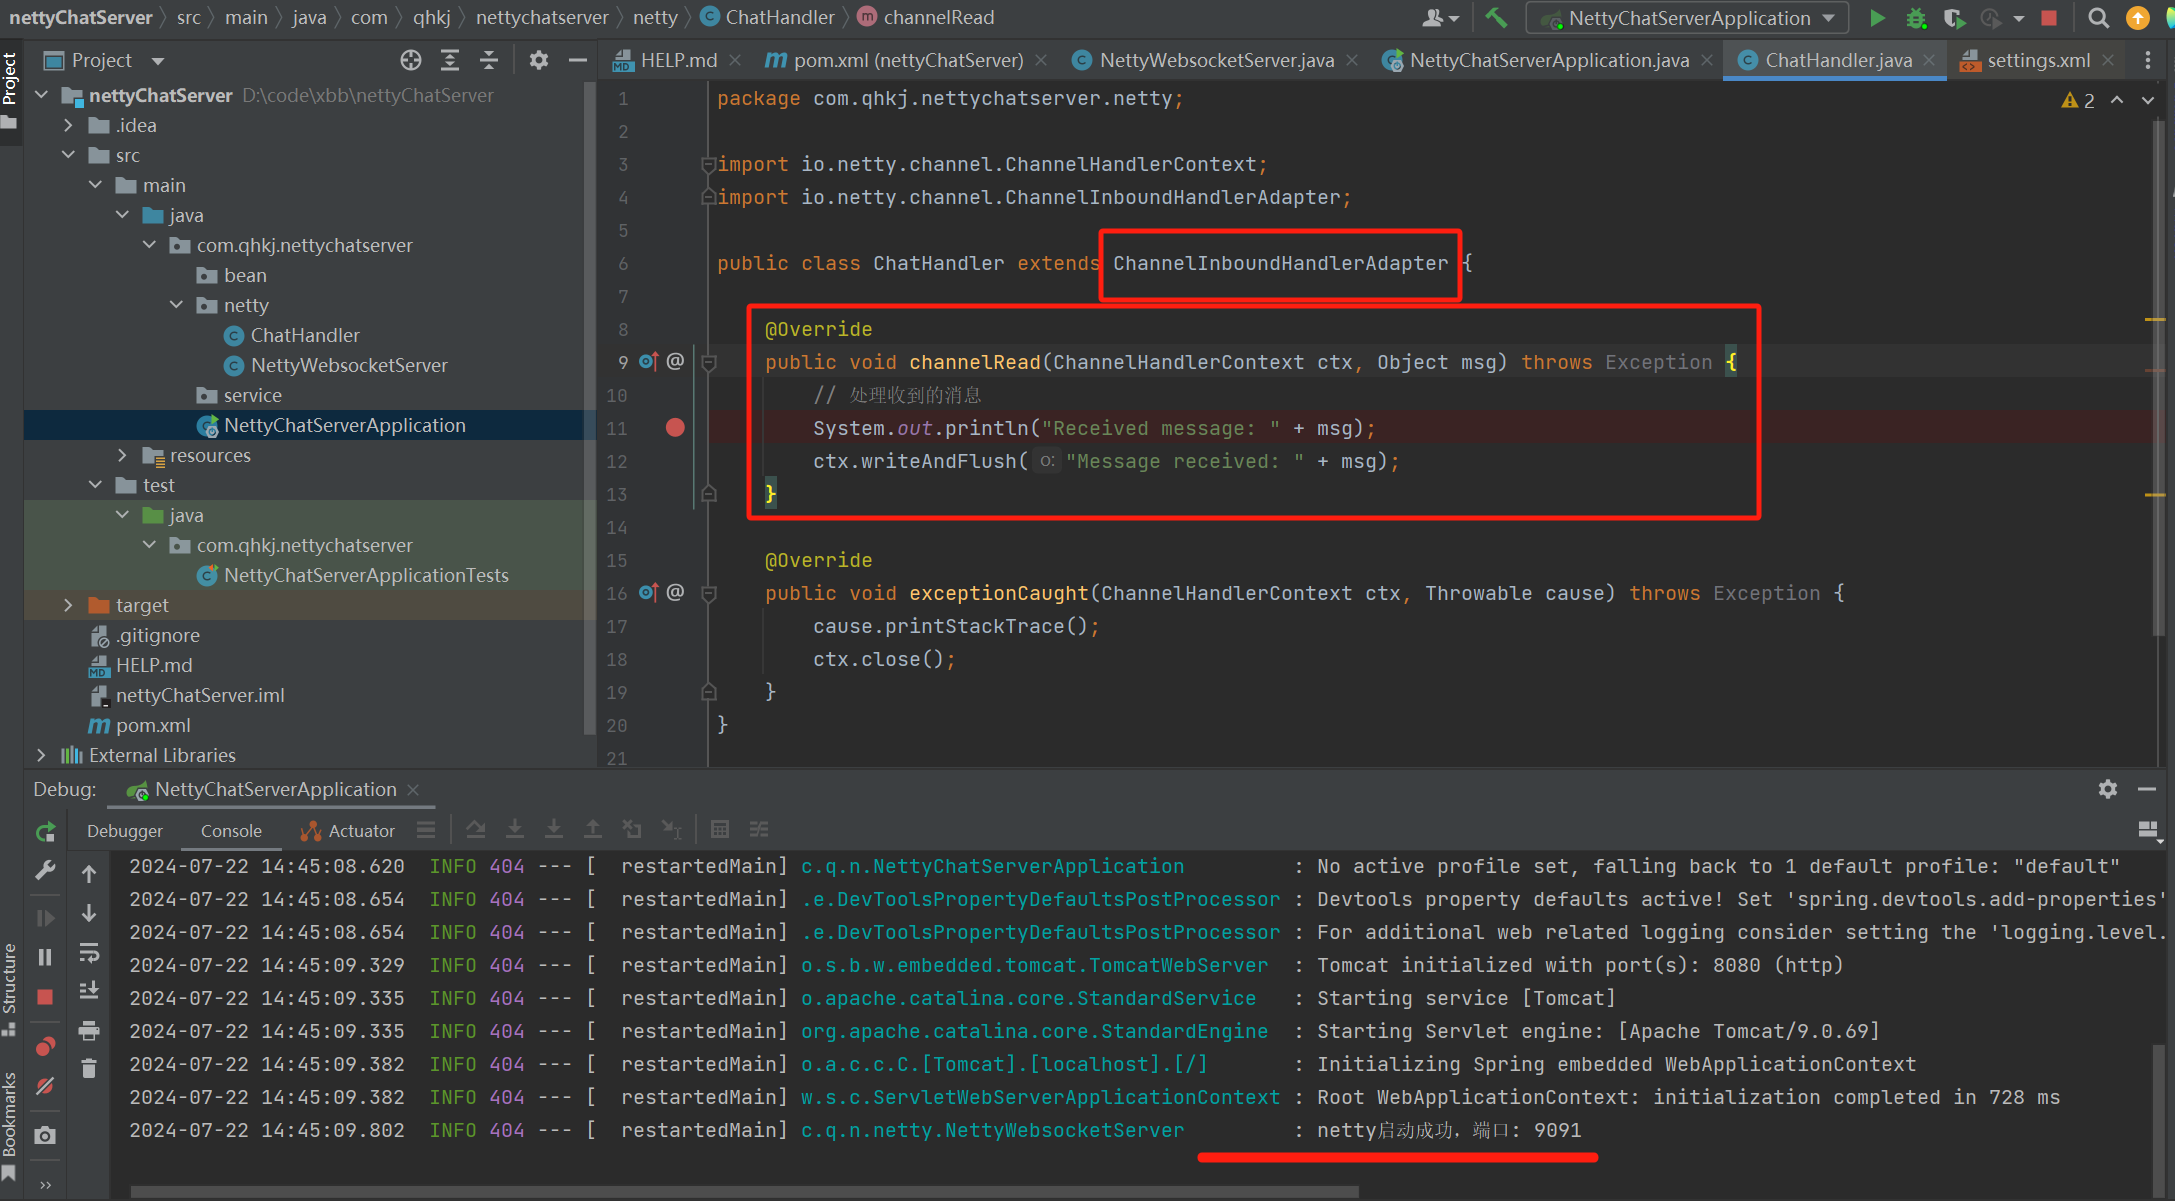
import io.netty.channel.ChannelHandlerContext; import io.netty.channel.ChannelInboundHandlerAdapter; public class ChatHandler extends ChannelInboundHandlerAdapter { @Override public void channelRead(ChannelHandlerContext ctx, Object msg) throws Exception { // 处理收到的消息 System.out.println("Received message: " + msg); ctx.writeAndFlush("Message received: " + msg); } @Override public void exceptionCaught(ChannelHandlerContext ctx, Throwable cause) throws Exception { cause.printStackTrace(); ctx.close(); } } 3、使用ApiFox调试
3.1、启动服务
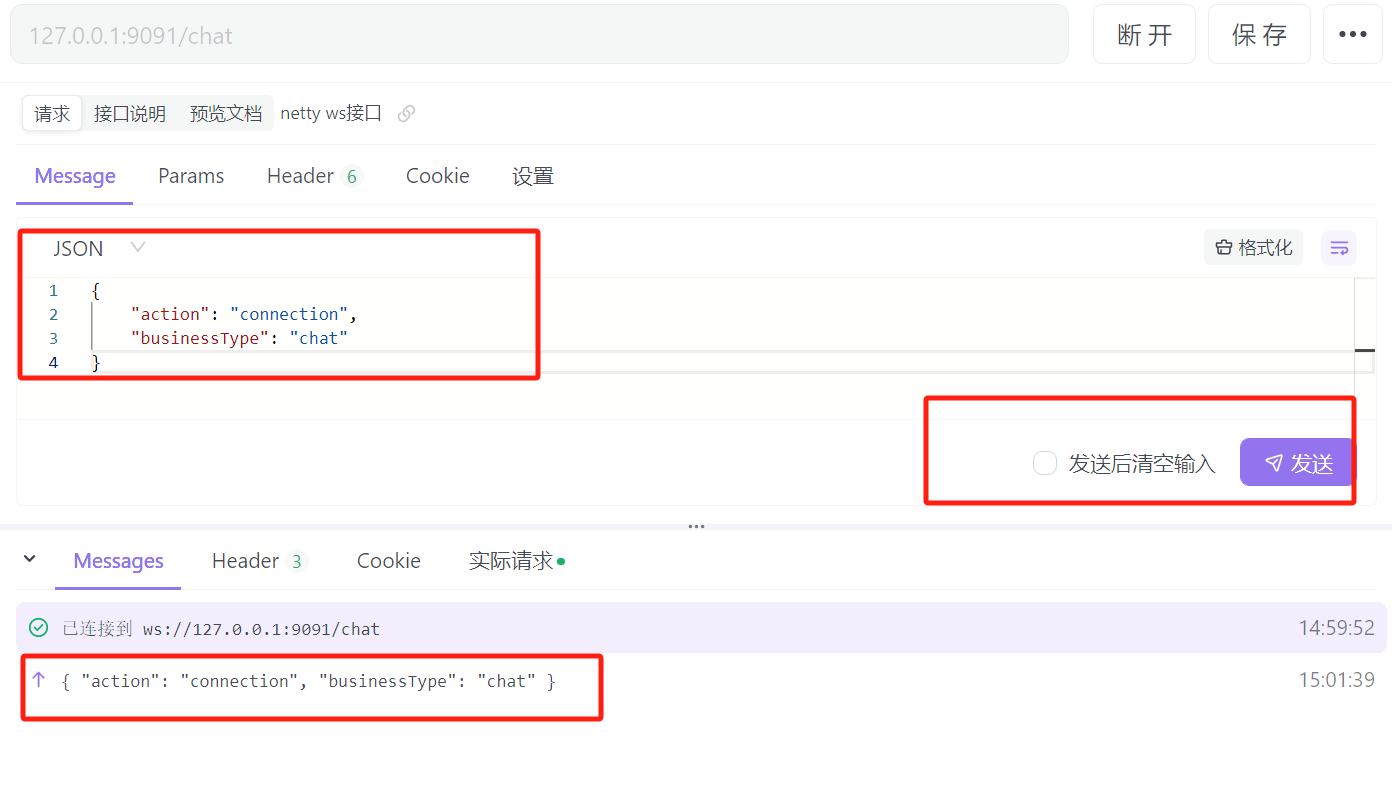
3.2、添加Apifox WebSocket接口

输入ws接口地址,成功连接上netty服务
3.3、客户端发送数据
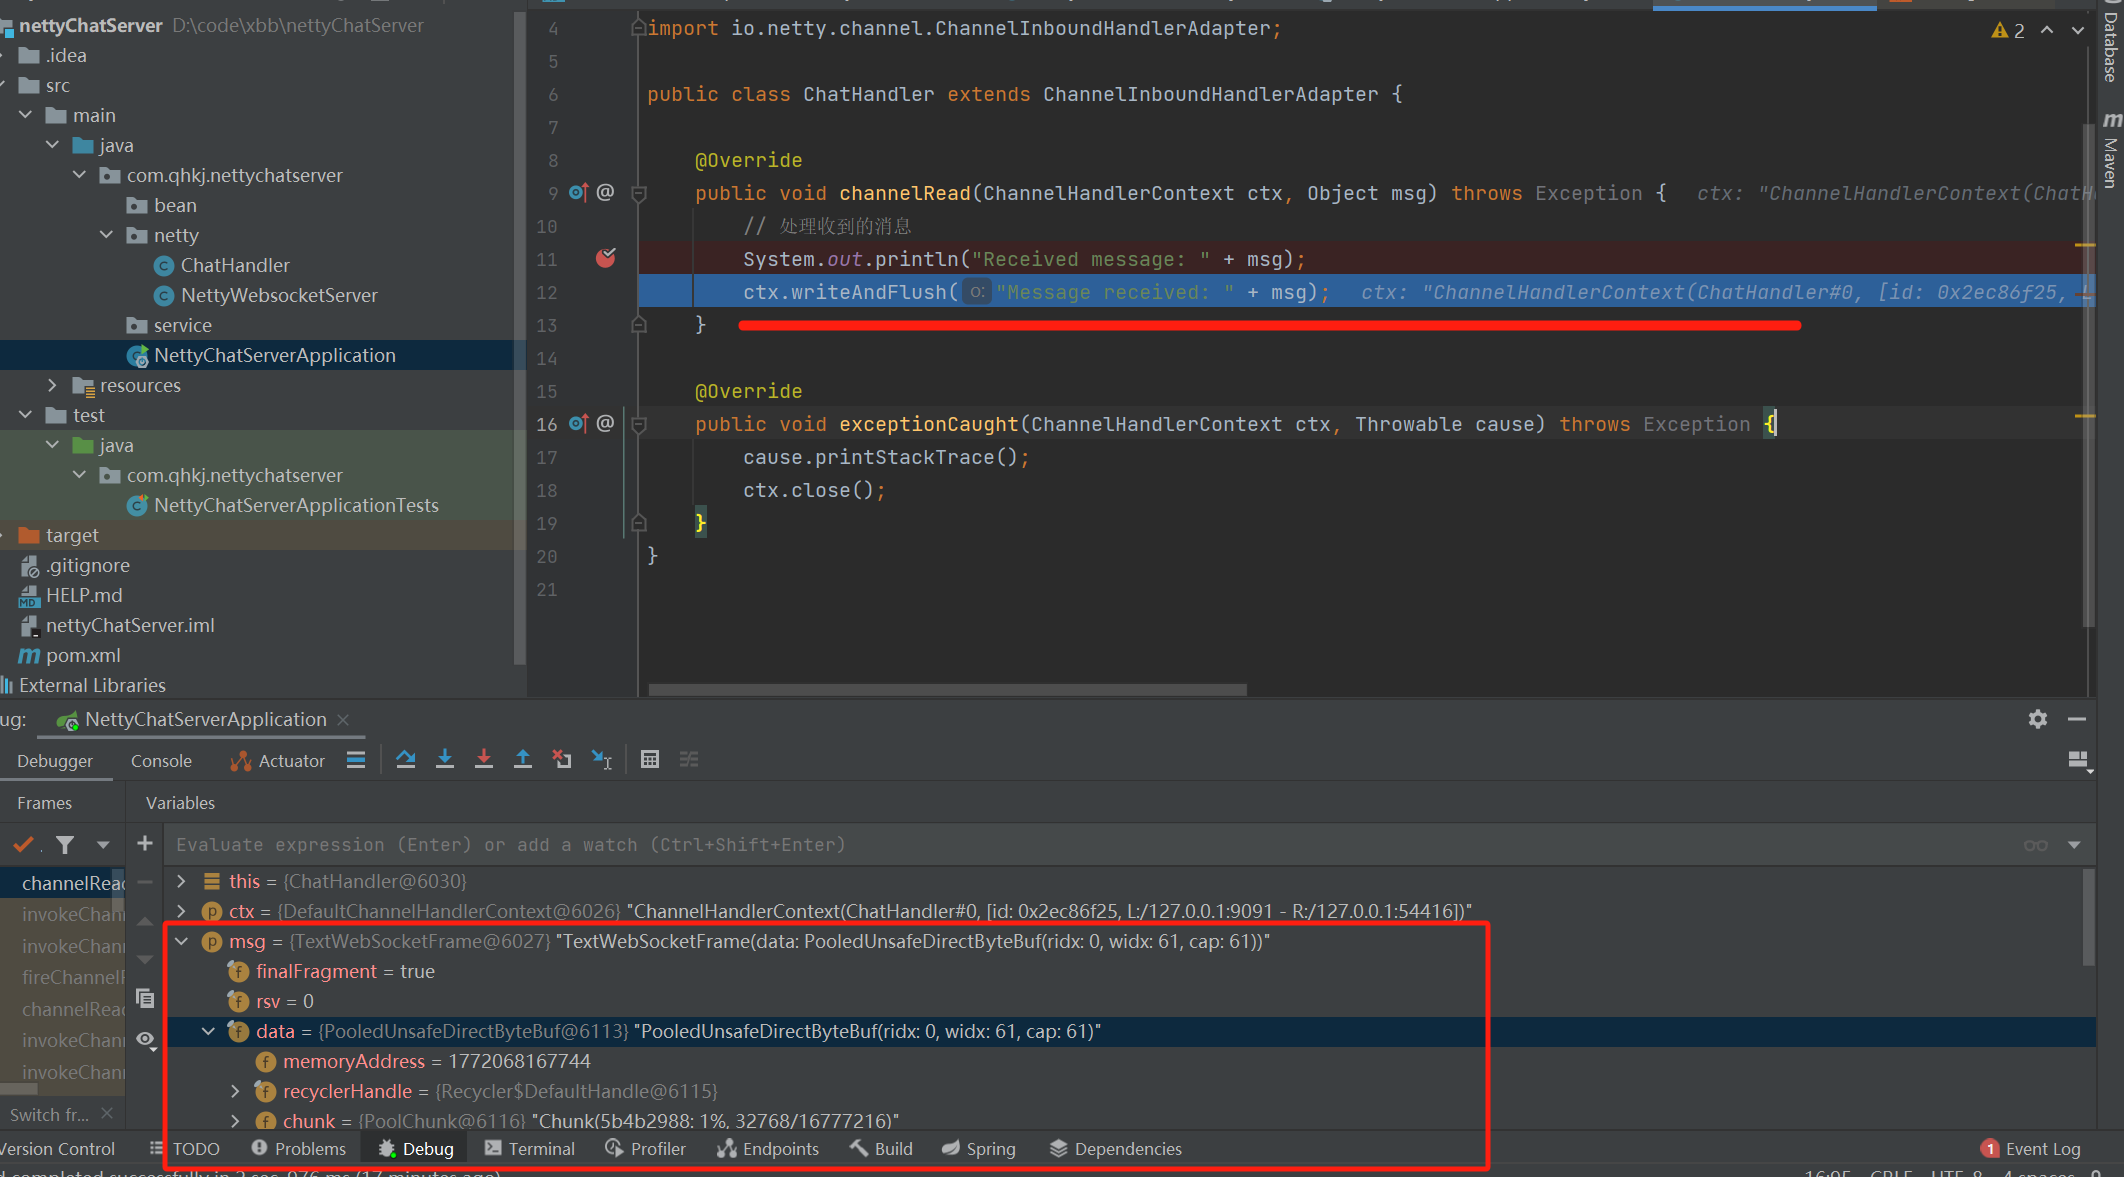
3.4、Debug调试数据
这里可以看到已经接收到数据了。
我们在Debug数据时,可以看到msg的data类型
TextWebSocketFrame(data: PooledUnsafeDirectByteBuf(ridx: 0, widx: 61, cap: 61))
3.5、客户端结果
客户端收不到服务端回复的消息。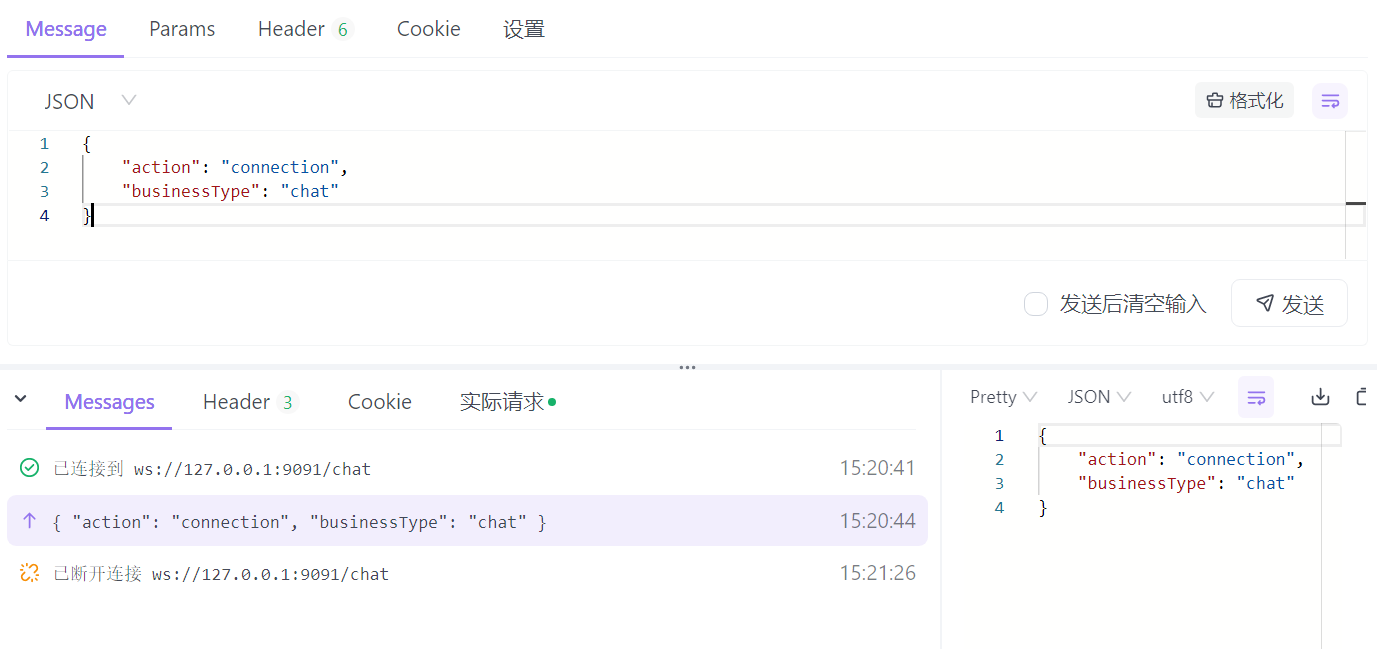
3.6、改造服务端代码
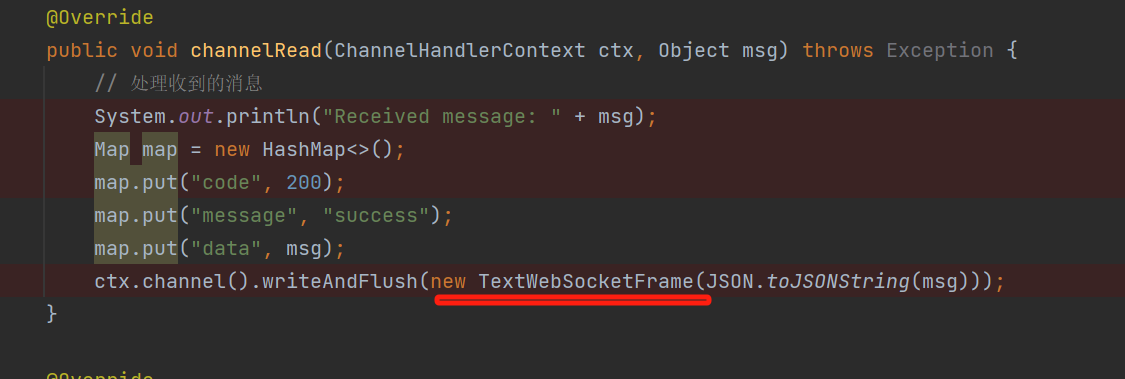
查看数据结果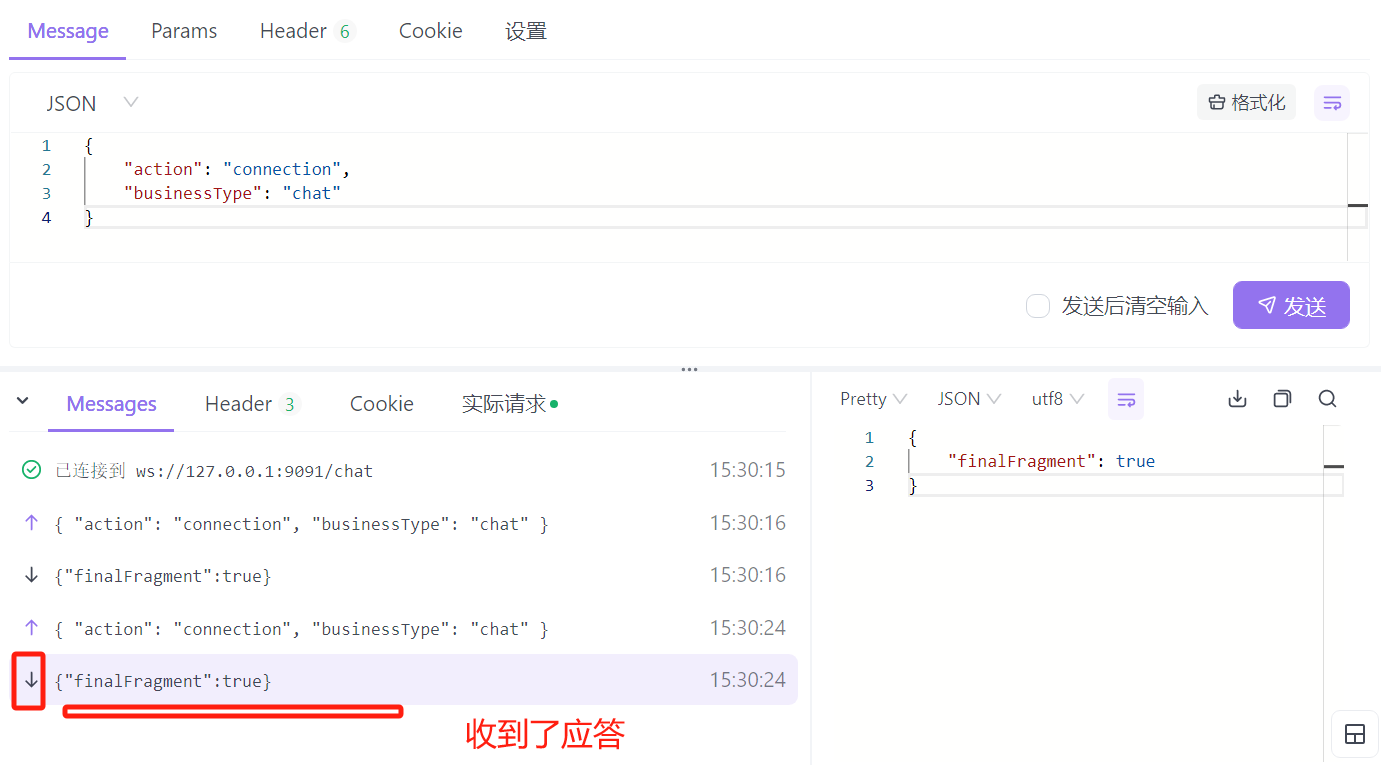
4、总结
在文章里,我们实现了Springboot 集成netty,并使用apiFox客户端发送了消息到netty服务,最终客户端收到服务端的应答。
下一章节,我们讲解解码器的使用,使得我们的数据可以可视化,以及正常的展示。
