阅读量:0
现在教程不少,但是自从谷歌升级验证之后,以前的老教程就失效了,现在写一个新教程以备不时之需。
由于众所周知的特殊原因,开发的时候一定注意网络环境,如果没有梯子是无法进行开发的哦~
clientID的申请方式我就不再进行赘述了,其他的教程上面都有,我这边只提供最重要的东西
1、要在html文件中导入谷歌的js文件
<script src="https://accounts.google.com/gsi/client"></script>
自己创建一个模版html文件扔进去就可以,比如说我就创建了一个template.h5.html文件,如下图所示:
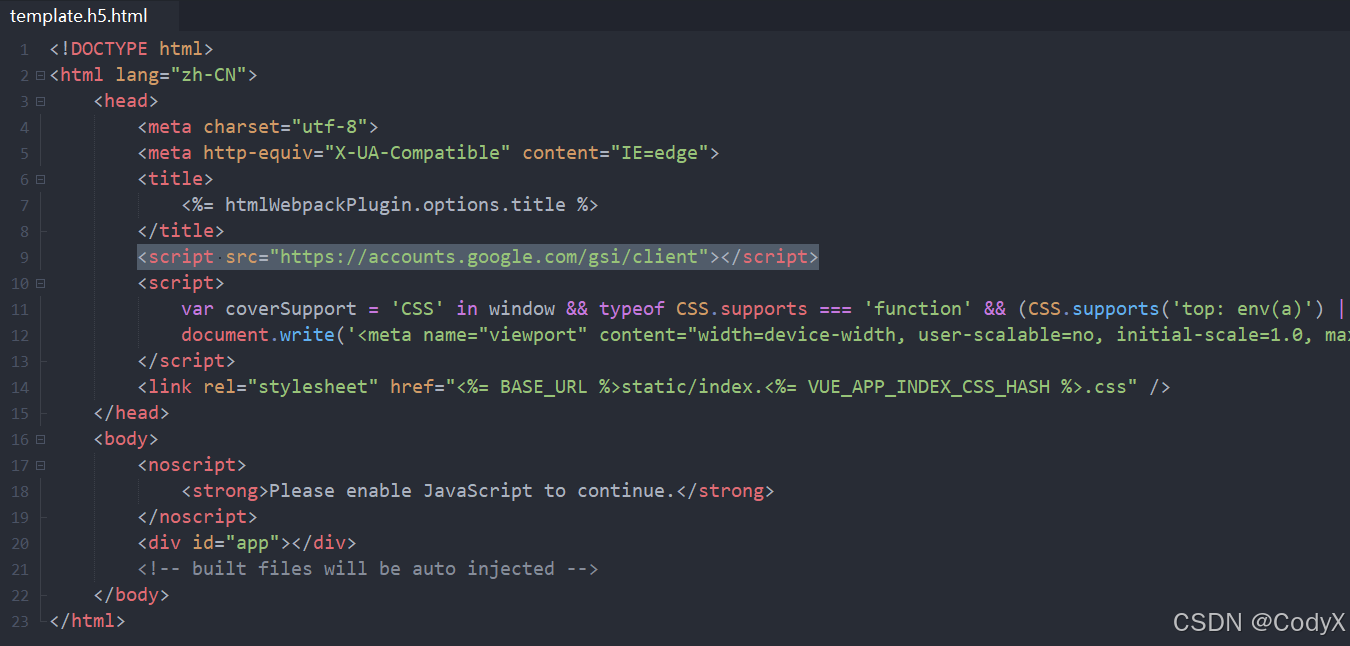
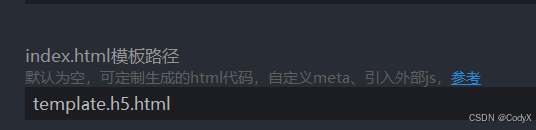
2、将html设置为模板
3、复制以下代码放在合适的位置
<view class="py-5"> <div id="g_id_onload" data-client_id="你的clientID" data-login_uri="http://localhost:8080/" data-auto_prompt="false"> </div> <div class="g_id_signin" data-type="standard" data-size="large" data-theme="outline" data-text="sign_in_with" data-shape="rectangular" data-logo_alignment="left"> </div> </view>这个代码,是一个按钮,效果如下:

你需要将他放到你代码中合适的位置。注意:没有梯子不显示
4、调用谷歌验证的代码
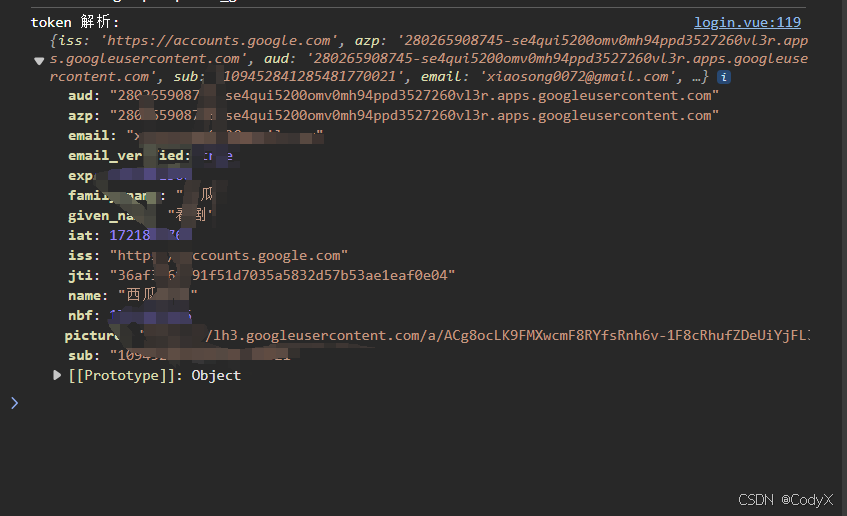
b64DecodeUnicode(str) { return decodeURIComponent(atob(str).replace(/(.)/g, (m, p) => { let code = p.charCodeAt(0).toString(16).toUpperCase(); if (code.length < 2) { code = "0" + code; } return "%" + code; })); }, base64UrlDecode(str) { let output = str.replace(/-/g, "+").replace(/_/g, "/"); switch (output.length % 4) { case 0: break; case 2: output += "=="; break; case 3: output += "="; break; default: throw new Error("base64 string is not of the correct length"); } try { return this.b64DecodeUnicode(output); } catch (err) { return atob(output); } }, handleCredentialResponse(response) { console.log("Encoded JWT ID token: " + response.credential); // 发送ID Token到服务器进行验证 this.OnGoogleAuthSuccess(response.credential); }, OnGoogleAuthSuccess(idToken) { const payload = idToken.split('.')[1]; // 获取JWT的负载部分 const decodedPayload = JSON.parse(this.base64UrlDecode(payload)); console.log("token 解析:", decodedPayload); // Receive the idToken and make your magic with the backend }, OnGoogleAuthFail(error) { console.log("error") console.log(error) },5、以下代码放到onReady中
var that = this; if (google) { google.accounts.id.initialize({ client_id: '你的ClientID', callback: that.handleCredentialResponse, }); google.accounts.id.renderButton( document.querySelector('.g_id_signin'), // 按钮容器 { theme: 'outline', size: 'large' } // 按钮配置 ); //google.accounts.id.prompt(); // 显示登录提示 } else { // 如果库尚未加载完成,设置定时器等待 const checkGoogleLibrary = setInterval(() => { if (google) { clearInterval(checkGoogleLibrary); google.accounts.id.initialize({ client_id: '你申请到的ClientID', callback: that.handleCredentialResponse }); google.accounts.id.renderButton( document.querySelector('.g_id_signin'), // 按钮容器 { theme: 'outline', size: 'large' } // 按钮配置 ); //google.accounts.id.prompt(); // 显示登录提示 } }, 100); }现在已经完成了,点击登录,控制台就会输出以下信息(OnGoogleAuthSuccess这个函数输出的):
################################ 方法二(推荐)###############################
要在html文件中导入谷歌的js文件
<script src="https://accounts.google.com/gsi/client"></script>
自己创建一个模版html文件扔进去就可以,比如说我就创建了一个template.h5.html文件,如下图所示:
将html设置为模板
在项目中创建一个文件夹common,然后创建文件googleOperation.js,如下图所示
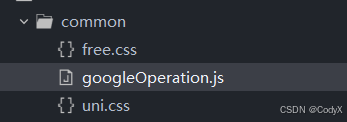
在googleOperation.js添加以下内容:
const b64DecodeUnicode = function(str) { return decodeURIComponent(atob(str).replace(/(.)/g, (m, p) => { let code = p.charCodeAt(0).toString(16).toUpperCase(); if (code.length < 2) { code = "0" + code; } return "%" + code; })); } const base64UrlDecode = function(str) { let output = str.replace(/-/g, "+").replace(/_/g, "/"); switch (output.length % 4) { case 0: break; case 2: output += "=="; break; case 3: output += "="; break; default: throw new Error("base64 string is not of the correct length"); } try { return b64DecodeUnicode(output); } catch (err) { return atob(output); } } const OnGoogleAuthSuccess = function(response) { console.log("check") const payload = response.credential.split('.')[1]; // 获取JWT的负载部分 const decodedPayload = JSON.parse(base64UrlDecode(payload)); console.log("token 解析:", decodedPayload); uni.setStorageSync('openid', decodedPayload.sub); uni.setStorageSync('name', decodedPayload.name); uni.setStorageSync('header', decodedPayload.picture); location.reload(); // Receive the idToken and make your magic with the backend } export default{ OnGoogleAuthSuccess }然后,在main.js里面添加,这边是为了在网页加载的时候就可以直接加载谷歌登录
import gle from './common/googleOperation.js' google.accounts.id.initialize({ client_id: '这里填写申请到的client_id', callback: gle.OnGoogleAuthSuccess, });然后,在页面文件,比如index.vue中,所需要的地方添加以下代码调用谷歌登录
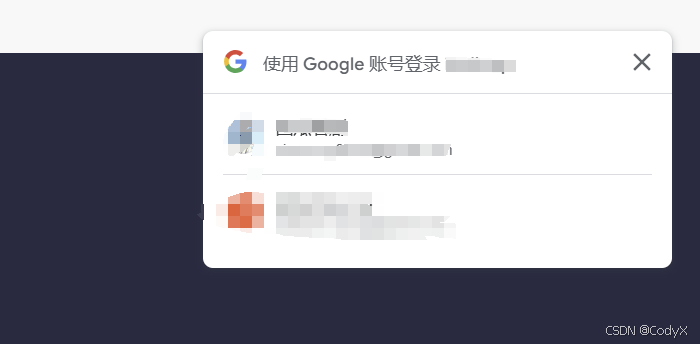
google.accounts.id.prompt();例如
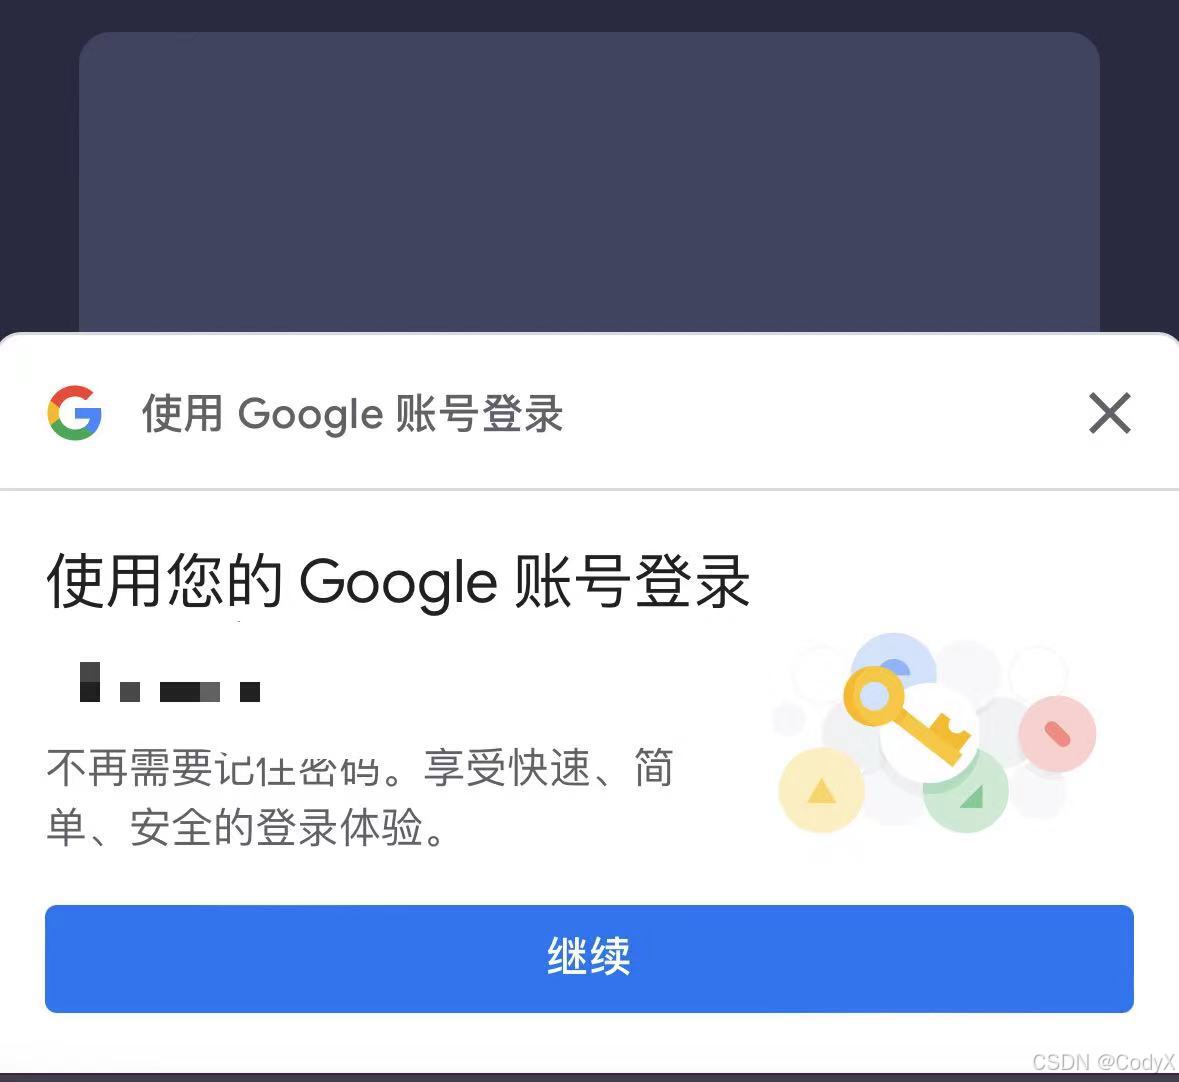
if (uni.getStorageSync('openid') == "") { google.accounts.id.prompt(); uni.hideLoading(); uni.showToast({ title:"请先登录", icon:"error" }) return; }调用后效果如下图所示(桌面版本网站)
(手机端网站)