
阅读量:0
服务器Ubuntu22.04系统下的Stale diffusion+Webui部署安装
一、FinalShell的下载及使用:
FinalShell是一款服务器管理工具,支持SSH和远程桌面,提供多标签管理、命令自动提示、SFTP、性能监控等功能,适用于开发运维,界面友好,在很大程度上可以免费替代XShell。
FinalShell的下载:https://www.hostbuf.com/t/988.html
FinalShell的基本使用
- 连接Linux服务器
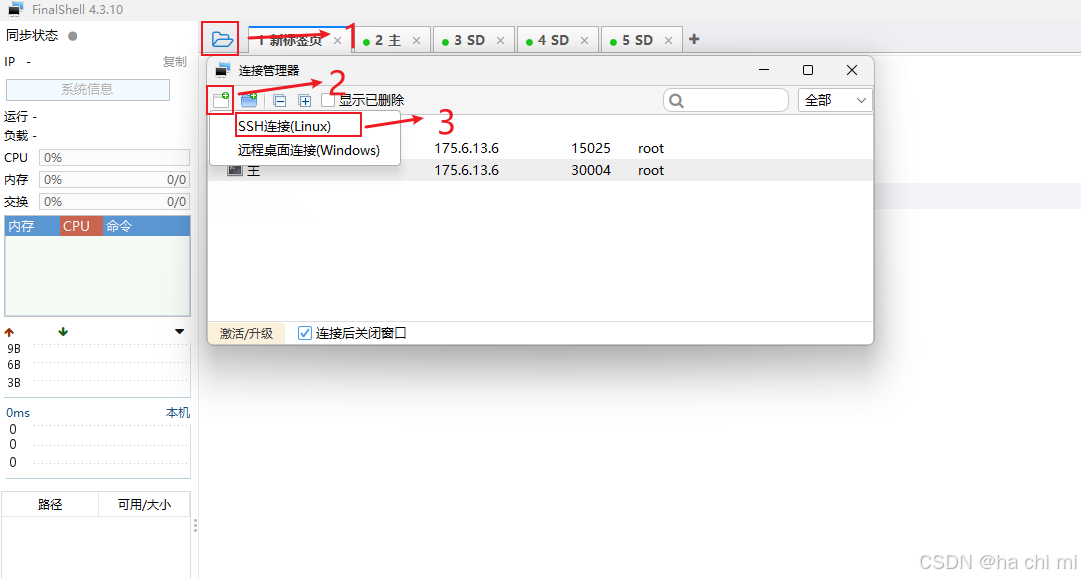
- 进行如下设置:
名称: 自定义 主机: 填写你的服务器的公网IP 端口: 填写服务器端口 备注: 自定义 方法: 密码 用户名:默认是root 密码: 填写服务器的登录密码 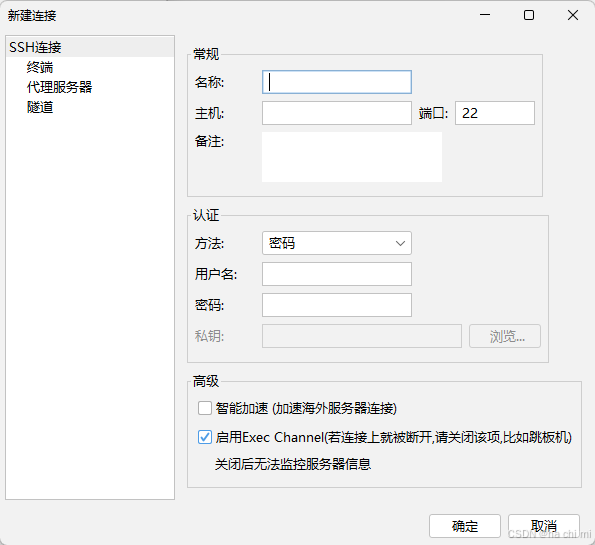
新建完后双击或者右键点击连接

二、ubuntu基本环境配置
1.更新包列表:
- 打开终端,输入以下命令:
sudo apt-get update sudo apt upgrade 过程中需要输入 y 或者按 Enter 键确认安装
2. 安装英伟达显卡驱动
2.1 使用wget在命令行下载驱动包
wget https://cn.download.nvidia.com/XFree86/Linux-x86_64/550.100/NVIDIA-Linux-x86_64-550.100.run 4090对应的驱动版本为550.100,不同型号的显卡请到英伟达官网查找下载链接:https://www.nvidia.cn/Download/Find.aspx?lang=cn&QNF=1
2.2 更新软件列表和安装必要软件、依赖
sudo apt-get update sudo apt-get install g++ sudo apt-get install gcc sudo apt-get install make 2.3 卸载原有驱动
sudo apt-get remove --purge nvidia* - 使用vim修改配置文件
sudo vim /etc/modprobe.d/blacklist.conf 按 i 键进入编辑模式,在文件尾增加两行:
blacklist nouveau options nouveau modeset=0 按 Esc 键退出编辑模式,输入 :wq 保存并退出
- 检查有没有写入成功
sudo cat /etc/modprobe.d/blacklist.conf 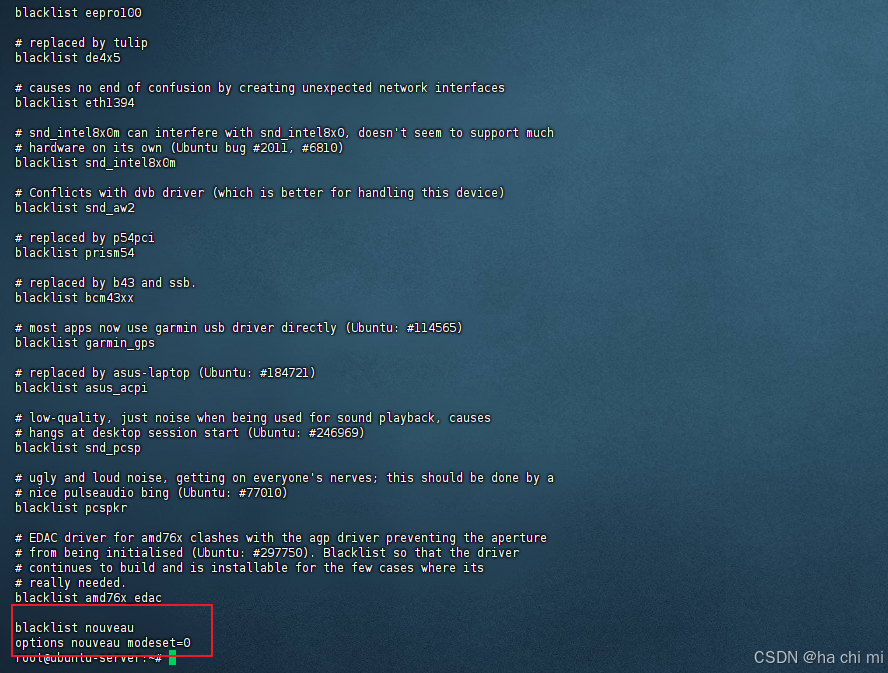
- 更新文件
sudo update-initramfs -u - 重启电脑:
sudo reboot 有时候重启时间较长,请耐心等待,重启后再次连接
2.4 安装驱动
- 授予执行权限
sudo chmod 777 NVIDIA-Linux-x86_64-550.100.run - 执行安装命令
sudo ./NVIDIA-Linux-x86_64-550.100.run 安装过程中需按 Enter 键确认安装
- 检测显卡驱动是否安装成功
nvidia-smi 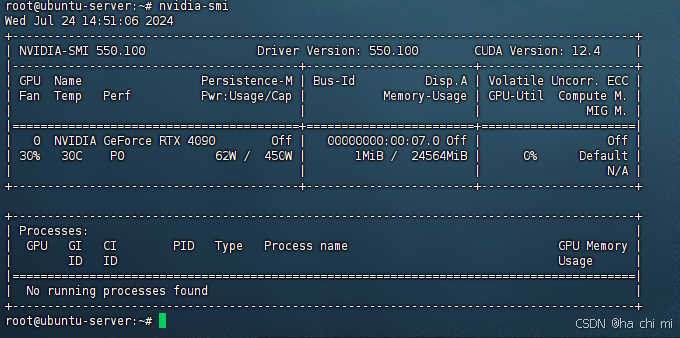
2.4 安装CUDA
- 使用wget在命令行下载安装包
wget https://developer.download.nvidia.com/compute/cuda/12.4.0/local_installers/cuda_12.4.0_550.54.14_linux.run 安装的显卡驱动版本是550.100,可以安装CUDA 12版本。可根据自己显卡版本选择合适的CUDA版本,查询链接:https://docs.nvidia.com/cuda/cuda-toolkit-release-notes/index.html
- 授予执行权限
sudo chmod 777 cuda_12.4.0_550.54.14_linux.run - 执行安装命令
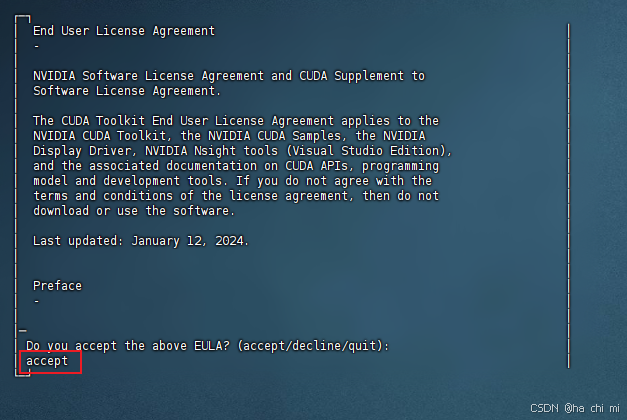
sudo ./cuda_12.4.0_550.54.14_linux.run 输入 accept 开始安装
注意这里要按 Enter 取消勾选第一个选项,因为之前已经安装了驱动
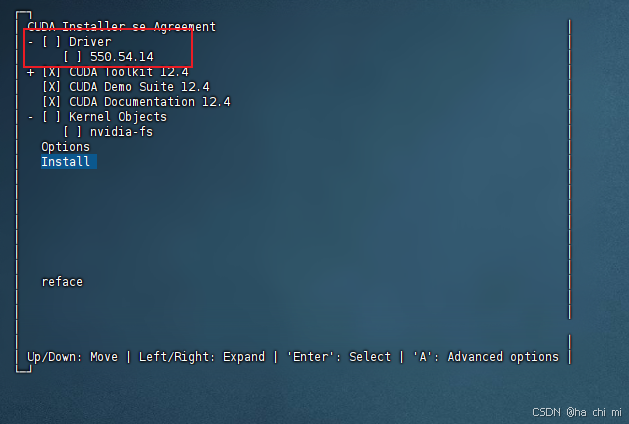
然后选择 Install 开始安装
2.5 环境变量配置
- 以vim方式打开配置文件
sudo vim ~/.bashrc 按 i 键进入编辑模式,在文件尾增加两行:
在文件尾中加入以下两行:
export PATH="/usr/local/cuda-12.4/bin:$PATH" export LD_LIBRARY_PATH="/usr/local/cuda-12.4/lib64:$LD_LIBRARY_PATH" 按 Esc 键退出编辑模式,输入 :wq 保存并退出
- 更新环境变量
source ~/.bashrc - 检测CUDA是否安装成功
nvcc -V 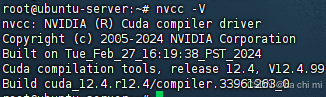
3. 安装conda
3.1 软件下载
wget -c https://repo.anaconda.com/archive/Anaconda3-2023.03-1-Linux-x86_64.sh - 执行安装命令
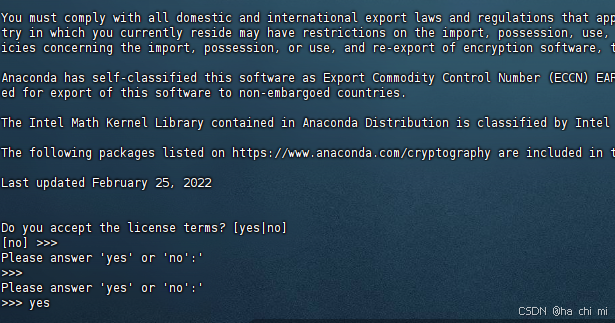
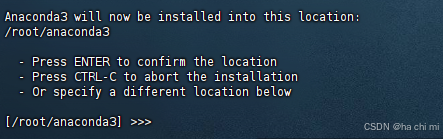
bash Anaconda3-2023.03-1-Linux-x86_64.sh 一直按 Enter 之后输入 yes 确认
注意这里要按 Enter 确认安装位置 /root/anaconda3
如有更改,后续环境变量配置路径均需更改
3.2 设置环境变量
vim /etc/profile 按 i 键进入编辑模式,在末尾添加环境变量
export PATH="~/anaconda3/bin:$PATH" 按 Esc 键退出编辑模式,输入 :wq 保存并退出
vim ~/.bashrc 按 i 键进入编辑模式,在末尾添加环境变量
export PATH="~/anaconda3/bin:$PATH" 按 Esc 键退出编辑模式,输入 :wq 保存并退出
- 刷新环境变量
source /etc/profile source ~/.bashrc - 测试是否安装成功
conda -V 
3.3 conda配置
- 配置清华镜像源
conda config --add channels https://mirrors.tuna.tsinghua.edu.cn/anaconda/pkgs/free/ conda config --add channels https://mirrors.tuna.tsinghua.edu.cn/anaconda/pkgs/main/ conda config --add channels https://mirrors.tuna.tsinghua.edu.cn/anaconda/cloud/conda-forge/ - 设置搜索时显示通道地址
conda config --set show_channel_urls yes - 配置pip 镜像源
pip config set global.index-url https://pypi.tuna.tsinghua.edu.cn/simple 三、Stable Diffusion+WebUI下载安装
1. Stable Diffusion+WebUI 下载与环境配置
1.1 环境准备
- 安装 libgoogle-perftools4 和 libtcmalloc-minimal4 库。这两个库是 Google 开源的性能分析工具库,可以帮助优化程序性能
sudo apt-get install libgoogle-perftools4 libtcmalloc-minimal4 -y - 创建虚拟环境
conda create -n sd python=3.10.6 1.2 源码修改及配置
- 使用git克隆
git clone https://github.com/AUTOMATIC1111/stable-diffusion-webui.git - 如果下载速度较慢可添加
https://mirror.ghproxy.com/镜像源
git clone https://mirror.ghproxy.com/https://github.com/AUTOMATIC1111/stable-diffusion-webui.git 进入到 stable-diffusion-webui 文件夹内
cd stable-diffusion-webui 这时候直接./webui.sh启动脚本通常会出现各种各种的问题,主要原因是国内网络问题,以下是解决方法:
- 解决安装依赖库速度慢报错问题:
使用Finalshell的文件管理功能
在/root/stable-diffusion-webui/modules文件夹中找到 launch_utils.py 下的prepare_environment()函数,将其中涉及到 github 仓库的依赖,全部添加 https://mirror.ghproxy.com/镜像
按Ctrl+F查找https://github.com/全部替换成https://mirror.ghproxy.com/https://github.com/如下图
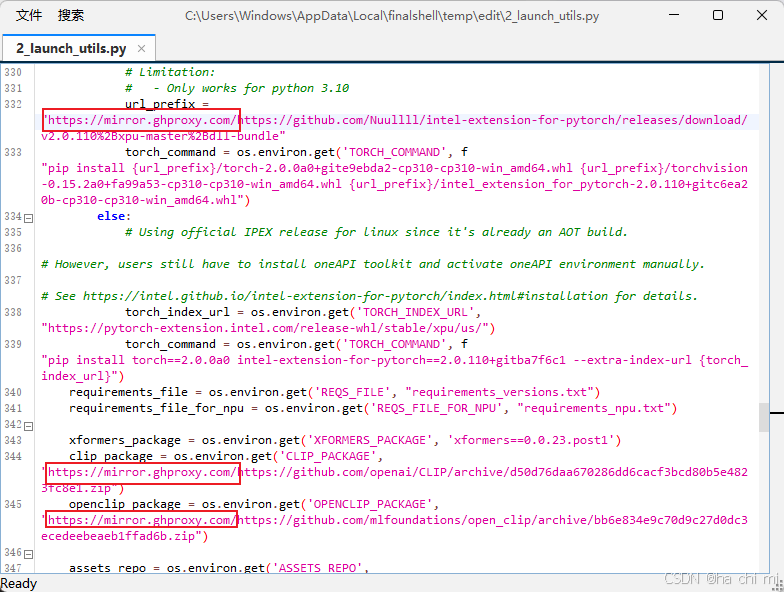
Ctrl+S进行保存
- 模型下载下载慢不成功问题:
引入镜像地址
export HF_ENDPOINT=https://hf-mirror.com 写入到~/.bashrc中:
echo 'export HF_ENDPOINT="https://hf-mirror.com"' >> ~/.bashrc 刷新环境变量
source ~/.bashrc - 修改
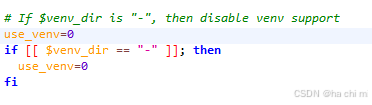
/root/stable-diffusion-webui/weiui.sh文件,将use_venv变量值改为0,意为使用当前环境进行安装
- 如果是root用户还要将can_run_as_root变量值改为1

2.Stable Diffusion+WebUI 安装
- 进入虚拟环境
conda activate sd - 安装pytorch
pip3 install torch==2.1.2 torchvision torchaudio --extra-index-url https://pypi.tuna.tsinghua.edu.cn/simple - 安装环境
pip install -r requirements.txt - 启动脚本,会默认配置好项目环境,并安装好项目依赖包:
./webui.sh --port 15026 --listen --enable-insecure-extension-access --xformers --port 15026: 设置服务器监听的端口为业务端口,默认端口是7860,这里设置为15026。 --listen: 让服务器监听网络连接。这样设置后,局域网内的其他计算机可以访问UI,如果配置了端口转发,互联网上的计算机也可以访问。 --enable-insecure-extension-access: 启用扩展标签,不考虑其他选项。 更多详细的命令行参数和设置请参考https://profaneservitor.github.io/sdwui-docs/cli/
启动成功后,访问http://主机IP:端口
四、模型下载(huggingface 的国内镜像)
这里介绍一种下载方法,其余方法请参考:https://hf-mirror.com/
1. 下载hfd
hfd 是huggingface 专用下载工具,基于成熟工具 git+aria2,可以做到稳定下载不断线。
wget https://hf-mirror.com/hfd/hfd.sh chmod a+x hfd.sh 2. 下载模型(例子: gpt2)
apt install aria2 apt install git-lfs 开始下载
./hfd.sh gpt2 --tool aria2c -x 4 有些模型下载需要token,参数如下
--hf_username YOUR_HF_USERNAME --hf_token hf_*** token的获取:https://huggingface.co/settings/tokens(需要VPN)
下载完后将模型移动到
