阅读量:13
文章目录
Springboot集成websocket
1. WebSocket概述
我们再日常的web应用开发过程中,常见的是前端向后端发起请求,但有的时候需要后端主动给前端发送消息,这个时候全双工的websocket即时通讯就闪亮登场了。
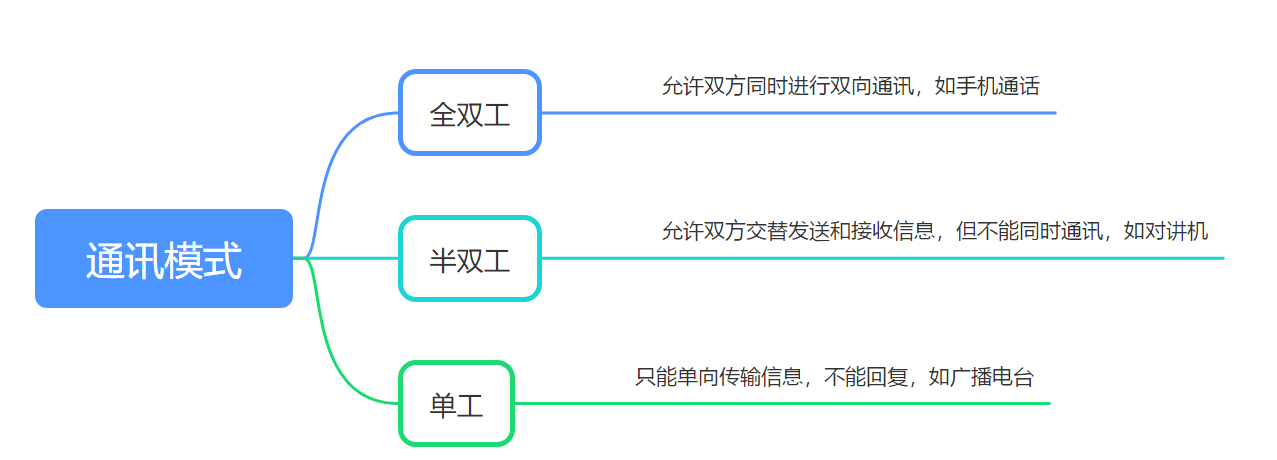
- 全双工通讯模式允许双方同时进行双向通讯,如手机通话。
- 半双工通讯模式允许双方交替发送和接收信息,但不能同时通讯,如对讲机。
- 单工通讯模式只能单向传输信息,不能回复,如广播电台。
2. WebSocket原理
WebSocket是一种在单个TCP连接上进行全双工通信的协议。它通过一个简单的握手过程来建立连接,然后在连接上进行双向数据传输。与传统的HTTP请求不同,WebSocket连接一旦建立,就可以在客户端和服务器之间保持打开状态,直到被任何一方关闭。
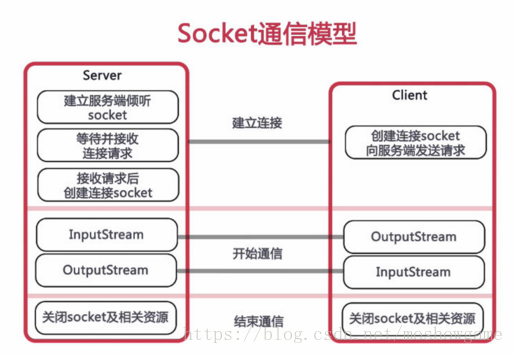
WebSocket协议的核心特点包括:
- 全双工通信:客户端和服务器可以同时发送和接收消息。
- 持久连接:一旦建立连接,就可以持续进行数据交换,无需像HTTP那样频繁地建立新的连接。
- 低延迟:由于连接是持久的,数据可以几乎实时地发送和接收。
- 轻量级协议:WebSocket协议的头部信息非常简单,减少了数据传输的开销。
3. Spring Boot集成WebSocket
在Spring Boot中集成WebSocket非常简单,Spring提供了对WebSocket的原生支持。以下是一个基本的集成步骤:
3.1 添加依赖
在pom.xml中添加Spring Boot的WebSocket依赖:
<dependency> <groupId>org.springframework.boot</groupId> <artifactId>spring-boot-starter-websocket</artifactId> </dependency> 3.2 创建WebSocket配置类
创建一个配置类来启用和配置WebSocket:
package com.jiayuan.common.config; import org.springframework.context.annotation.Bean; import org.springframework.context.annotation.Configuration; import org.springframework.web.socket.server.standard.ServerEndpointExporter; import org.springframework.web.socket.server.standard.ServletServerContainerFactoryBean; /** * @Title: WebSocketConfig * @Package: com.jiayuan.common.config * @Description: websocket配置 * @Author: xmc * @Date: 创建时间 2024-04-24 */ @Configuration public class WebSocketConfig { /** * 自动注册使用了@ServerEndpoint注解声明的Websocket endpoint * * @return */ @Bean public ServerEndpointExporter serverEndpointExporter() { return new ServerEndpointExporter(); } /** * 通信文本消息和二进制缓存区大小 * 避免对接 第三方 报文过大时,Websocket 1009 错误 * * @return */ @Bean public ServletServerContainerFactoryBean createWebSocketContainer() { ServletServerContainerFactoryBean container = new ServletServerContainerFactoryBean(); // 在此处设置bufferSize container.setMaxTextMessageBufferSize(10240000); container.setMaxBinaryMessageBufferSize(10240000); container.setMaxSessionIdleTimeout(15 * 60000L); return container; } } 3.3 创建消息处理器
package com.jiayuan.common.config; import cn.hutool.core.collection.CollectionUtil; import cn.hutool.extra.spring.SpringUtil; import cn.hutool.json.JSONUtil; import com.alibaba.fastjson2.JSON; import com.alibaba.fastjson2.JSONObject; import com.baomidou.mybatisplus.core.toolkit.StringUtils; import com.jiayuan.common.redis.RedisCache; import com.jiayuan.modules.critical.dto.CvRecordExtraDTO; import com.jiayuan.modules.critical.dto.SyncRecordDTO; import com.jiayuan.modules.critical.service.CvRecordService; import lombok.RequiredArgsConstructor; import lombok.extern.slf4j.Slf4j; import org.springframework.beans.factory.annotation.Autowired; import org.springframework.stereotype.Component; import javax.annotation.Resource; import javax.websocket.*; import javax.websocket.server.PathParam; import javax.websocket.server.ServerEndpoint; import java.io.IOException; import java.util.List; import java.util.concurrent.ConcurrentHashMap; /** * @Title: WebSocketServer * @Package: com.jiayuan.common.config * @Description: websocket的服务端 * @Author: xmc * @Date: 创建时间 2024-04-24 */ @Component @Slf4j @ServerEndpoint("/api/pushMessage/{userId}") public class WebSocketServer { /** * 静态变量,用来记录当前在线连接数。应该把它设计成线程安全的。 */ private static int onlineCount = 0; /** * concurrent包的线程安全Set,用来存放每个客户端对应的WebSocket对象。 */ private static ConcurrentHashMap<String, WebSocketServer> webSocketMap = new ConcurrentHashMap<>(); /** * 与某个客户端的连接会话,需要通过它来给客户端发送数据 */ private Session session; /** * 接收userId */ private String userId = ""; /** * 连接建立成 * 功调用的方法 */ @OnOpen public void onOpen(Session session, @PathParam("userId") String userId) { this.session = session; this.userId = userId; if (webSocketMap.containsKey(userId)) { webSocketMap.remove(userId); //加入set中 webSocketMap.put(userId, this); } else { //加入set中 webSocketMap.put(userId, this); //在线数加1 addOnlineCount(); } log.info("用户连接:" + userId + ",当前在线人数为:" + getOnlineCount()); sendMessage("连接成功"); } /** * 连接关闭 * 调用的方法 */ @OnClose public void onClose() { if (webSocketMap.containsKey(userId)) { webSocketMap.remove(userId); //从set中删除 subOnlineCount(); } log.info("用户退出:" + userId + ",当前在线人数为:" + getOnlineCount()); } /** * 收到客户端消 * 息后调用的方法 * * @param message 客户端发送过来的消息 **/ @OnMessage public void onMessage(String message, Session session) { log.info("用户消息:" + userId + ",报文:" + message); //可以群发消息 //消息保存到数据库、redis if (StringUtils.isNotBlank(message)) { try { //解析发送的报文 JSONObject jsonObject = JSON.parseObject(message); //追加发送人(防止串改) jsonObject.put("fromUserId", this.userId); String toUserId = jsonObject.getString("toUserId"); //传送给对应toUserId用户的websocket if (StringUtils.isNotBlank(toUserId) && webSocketMap.containsKey(toUserId)) { webSocketMap.get(toUserId).sendMessage(message); } else { //否则不在这个服务器上,发送到mysql或者redis log.error("请求的userId:" + toUserId + "不在该服务器上"); } } catch (Exception e) { e.printStackTrace(); } } } /** * @param session * @param error */ @OnError public void onError(Session session, Throwable error) { log.error("用户错误:" + this.userId + ",原因:" + error.getMessage()); error.printStackTrace(); } /** * 实现服务 * 器主动推送 */ public void sendMessage(String message) { try { this.session.getBasicRemote().sendText(message); } catch (IOException e) { e.printStackTrace(); } } /** * 发送自定 * 义消息 **/ public static void sendInfo(String message, String userId) { log.info("发送消息到:" + userId + ",报文:" + message); if (StringUtils.isNotBlank(userId) && webSocketMap.containsKey(userId)) { webSocketMap.get(userId).sendMessage(message); } else { log.error("用户" + userId + ",不在线!"); } } /** * 获得此时的 * 在线人数 * * @return */ public static synchronized int getOnlineCount() { return onlineCount; } /** * 在线人 * 数加1 */ public static synchronized void addOnlineCount() { WebSocketServer.onlineCount++; } /** * 在线人 * 数减1 */ public static synchronized void subOnlineCount() { WebSocketServer.onlineCount--; } } 上述代码可能会有疑问:session和userId两个字段是不是安全的?多人连接,后面的会不会覆盖掉前面session和userId。
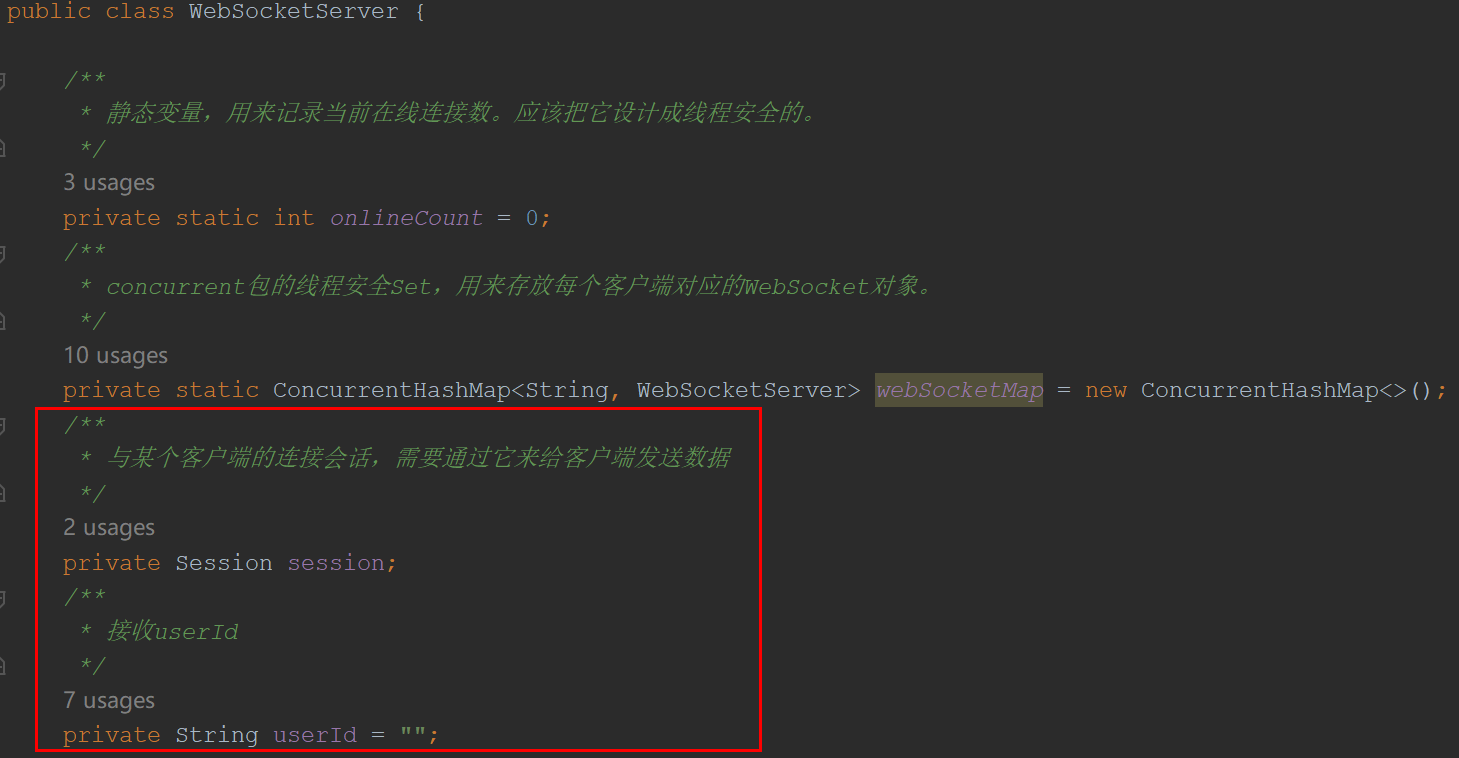
答案是不会的,关于处理器WebSocketServer我们要明确以下几点:
websocket是原型模式,@ServerEndpoint每次建立双向通信的时候都会创建一个实例- 为什么每次都
@OnOpen都要检查webSocketMap.containsKey(userId),实际使用的时候发现偶尔会出现重连失败或者其他原因导致之前的session还存在,这时候就需要一个清除动作
3.4 服务器主动给客户端发送消息
WebSocketServer.sendInfo("服务器主动给客户端发送消息test", "zhangsan"); 4. 使用ApiPost测试WebSocket
以下是如何使用ApiPost进行测试的步骤:
- 新建一个websocket测试
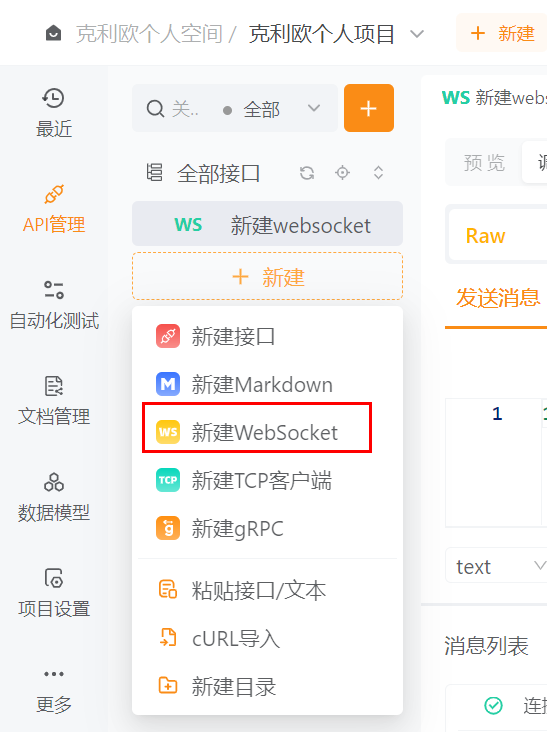
- 填写URL
ws://localhost:8080/cvms-api/api/pushMessage/3
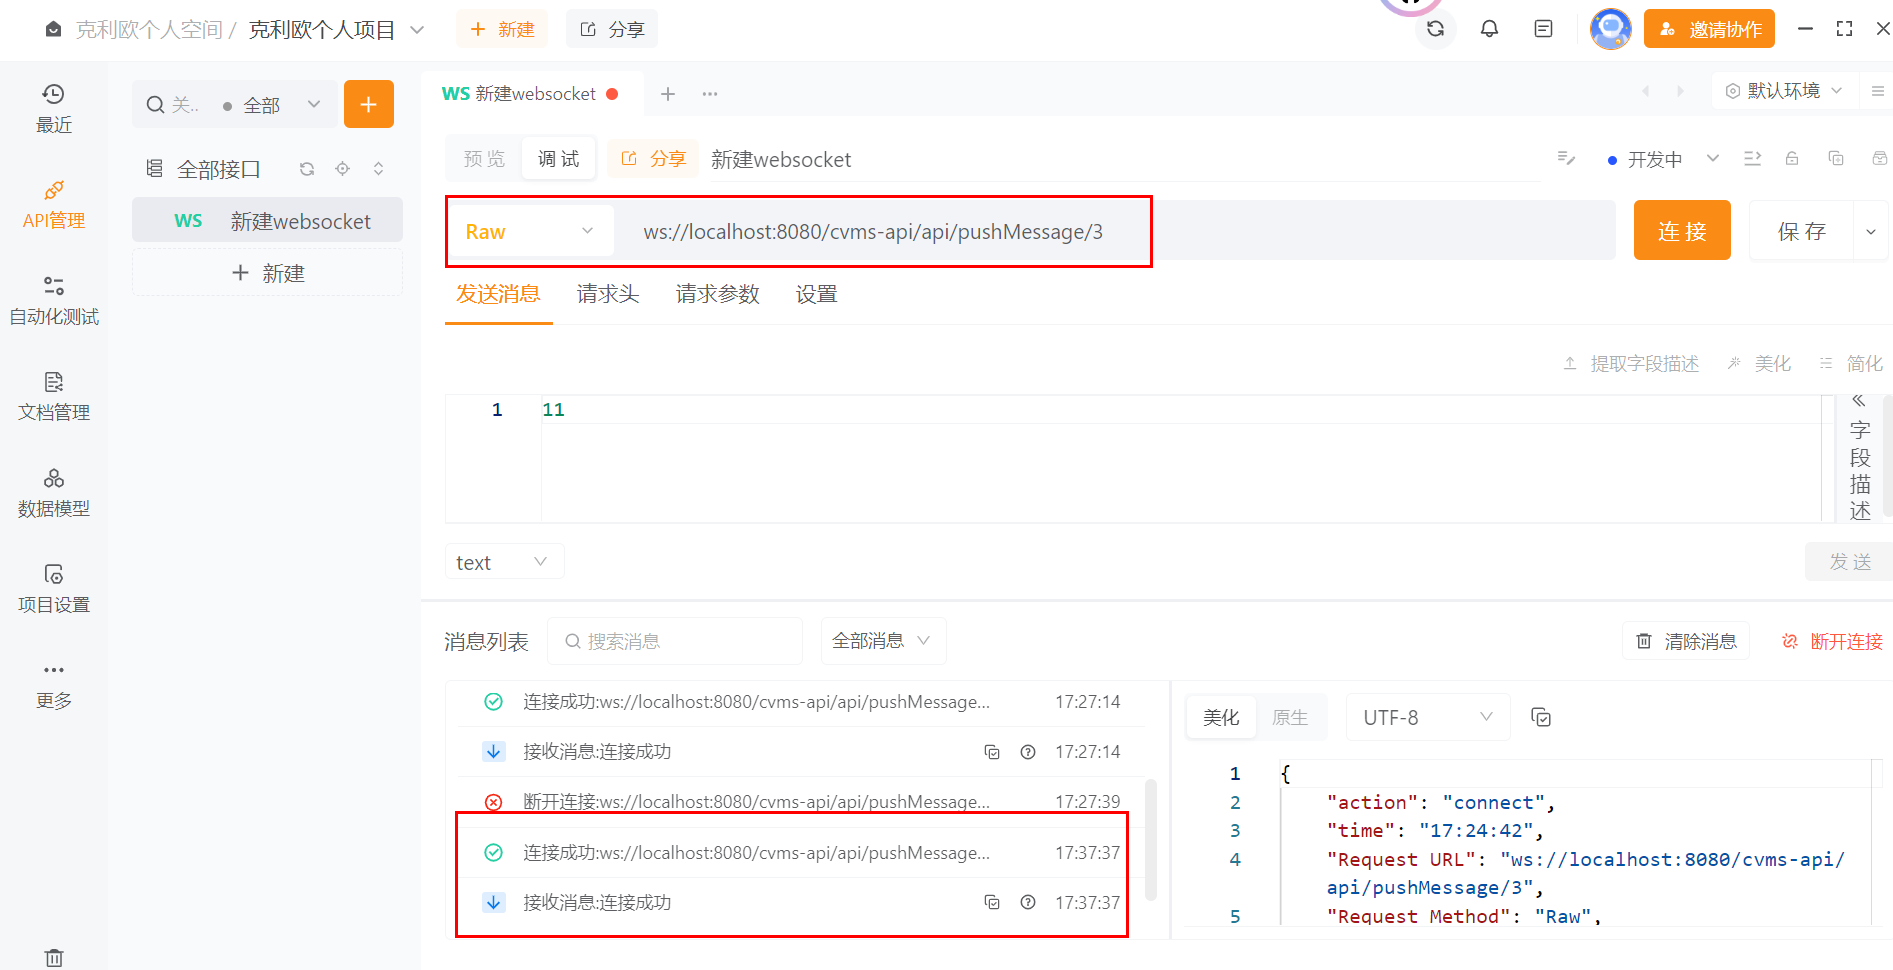

注意以下几点:
- 协议是
ws,加密方式请选择wss - 选择
Raw - URL的拼接公式如下
# servlet.context-path 这个是application.yml中的配置 ws://ip:port//${servlet.context-path}/注解@ServerEndpoint的值 - 有权限验证的,比如说
shiro权限验证,URL就需要加入白名单
filterMap.put("/api/pushMessage/*", "anon"); 