阅读量:1
该文章用于记录怎么进行邮箱验证码开发。
总所周知,我们在某些网站进行注册的适合总是会遇到什么填写邮箱,邮箱接收验证码,验证通过后才可以继续注册,那么这个功能是怎么实现的呢?
一,准备工作
1.1 邮箱设置
要进行邮箱验证码验证,首先我们得要有一个邮箱。同时我们要在邮箱里面打开对应服务,我以QQ邮箱为例:
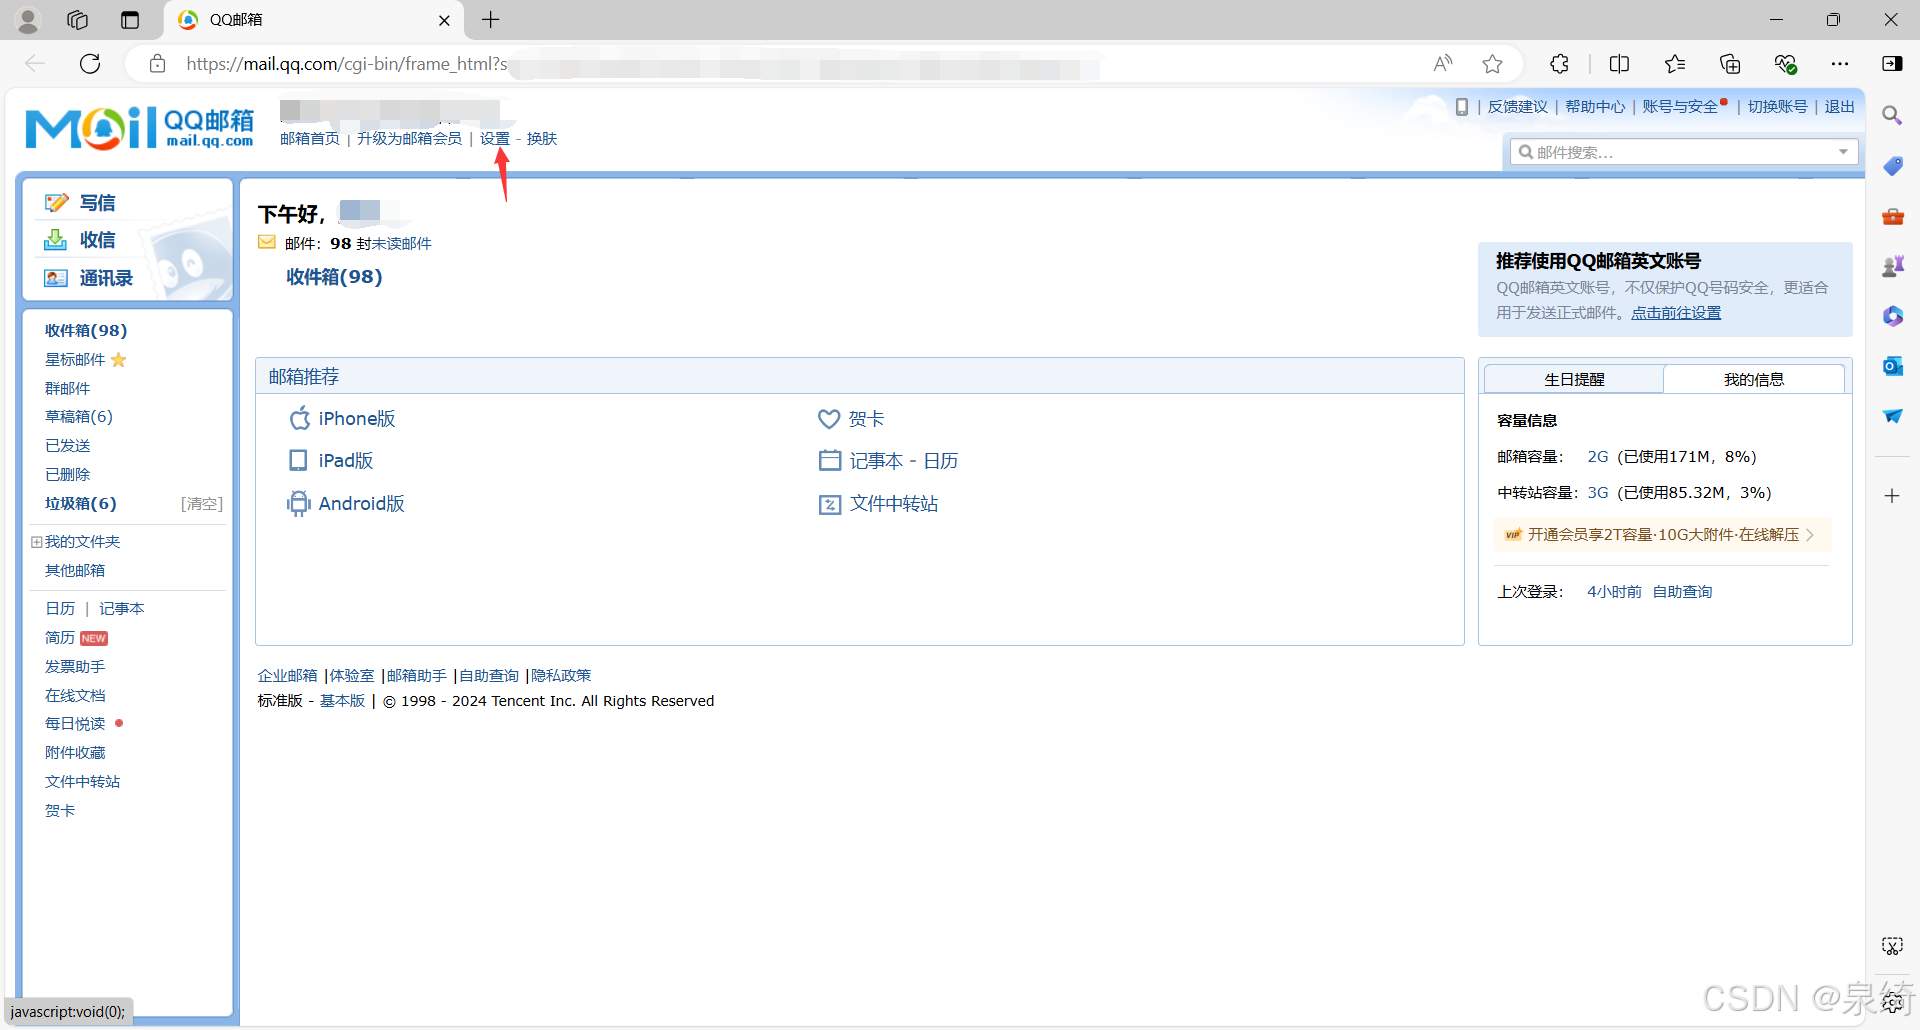
先点击设置
在设置中点击账号:
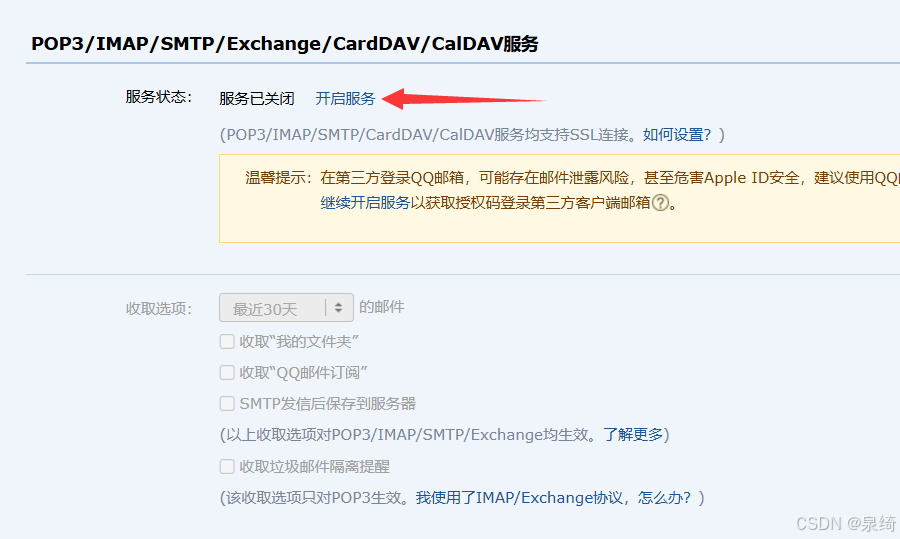
往下滑,在这里,点击开启服务:
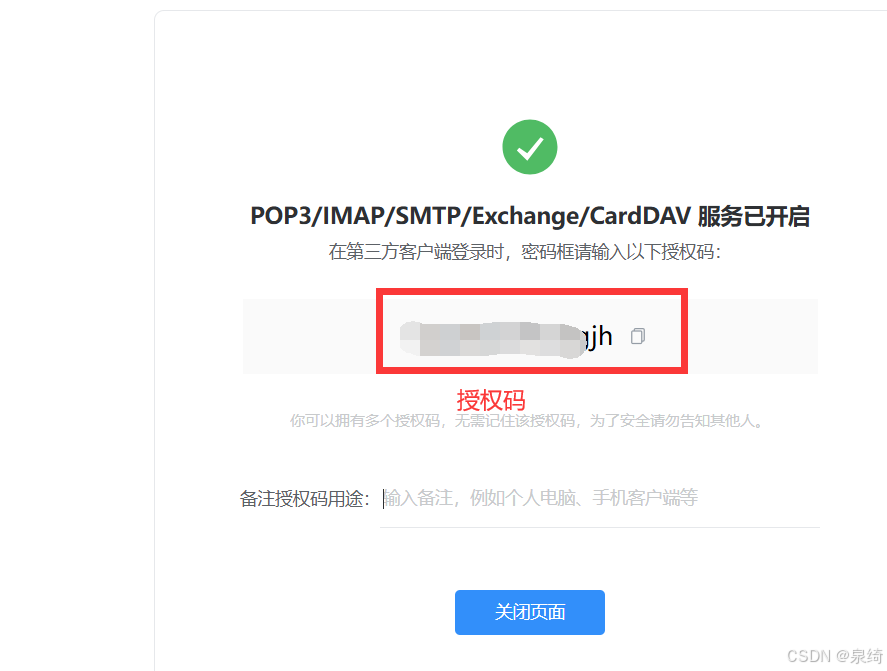
然后就是按指示进行操作,最后就好了,可以得到授权码:
1.2 后端环境配置:
至于数据库什么的配置那就不详细赘述了,你的后端里面要有redis,这很关键。
在对应模块的pom.xml文件里导入如下依赖:
<dependency> <groupId>org.springframework.boot</groupId> <artifactId>spring-boot-starter-mail</artifactId> </dependency> 然后,到application.yml配置文件中进行配置:
spring: mail: # 发送者邮箱 username: 你的邮箱 #申请到的授权码 password: 你的授权码 # 配置 SMTP 服务器地址 host: smtp.qq.com # 端口号465或587 port: 465 protocol: smtps # 默认的邮件编码为UTF-8 default-encoding: UTF-8 # 配置SSL 加密工厂 properties: mail: smtp: socketFactoryClass: javax.net.ssl.SSLSocketFactory #表示开启 DEBUG 模式,这样,邮件发送过程的日志会在控制台打印出来,方便排查错误 debug: true ssl: true 二,代码实现步骤
2.1 随机验证码生成工具:
CodeGeneratorUtil.java:
import java.util.UUID; /** * @author Administrator * @date 2024/7/13 15:47 * @description CodeGeneratorUtil */ public class CodeGeneratorUtil { /** * 生成指定长度的验证码 * @param length 长度 * @return */ public static String generateCode(int length){ return UUID.randomUUID().toString().substring(0, length); } } 2.2 验证码发送工具:
MailMsg.java:
import lombok.Value; import org.springframework.beans.factory.annotation.Autowired; import org.springframework.data.redis.core.RedisTemplate; import org.springframework.mail.javamail.JavaMailSenderImpl; import org.springframework.mail.javamail.MimeMessageHelper; import org.springframework.stereotype.Component; import javax.annotation.Resource; import javax.mail.MessagingException; import javax.mail.internet.MimeMessage; import java.time.Duration; /** * @author Administrator * @date 2024/7/13 15:36 * @description MailMsg */ @Component public class MailMsg { @Resource private JavaMailSenderImpl mailSender; @Autowired private RedisTemplate<String,String> redisTemplate; public boolean mail(String email) throws MessagingException { MimeMessage mimeMessage = mailSender.createMimeMessage(); //生成随机验证码 String code = CodeGeneratorUtil.generateCode(6); MimeMessageHelper helper = new MimeMessageHelper(mimeMessage, true); //设置一个html邮件信息 helper.setText("<p style='color: blue'>你的验证码为:\n" + code + "\n(有效期为五分钟)</p>", true); //设置邮件主题名 helper.setSubject("验证码"); //发给谁-》邮箱地址 helper.setTo(email); //谁发的-》发送人邮箱 helper.setFrom(你的邮箱); //将邮箱验证码以邮件地址为key存入redis,5分钟过期 redisTemplate.opsForValue().set(email, code, Duration.ofMinutes(5)); mailSender.send(mimeMessage); return true; } } 这里就不得不提到redis的优点–过期删除策略了。在redis中,我们可以给一个字段设置过期时间,到时间就会自动删除字段,这个用来存验证码就太合适不过了。
大概是这样设置:redisTemplate.opsForValue().set(key,value,time)
第一个参数是键,第二个参数是值,第三个参数是时间。
2.3 验证码发送接口:
在你的某个controller里面写这个就行了。
@ApiOperation(value = "发送邮箱验证码") @GetMapping(value = "/sendEmail/{email}") public Result<Object> sendCode(@PathVariable String email) throws MessagingException { log.info("邮箱码:{}",email); //从redis中取出验证码信息 String code = redisTemplate.opsForValue().get(email); if (!StringUtils.isEmpty(code)) { return Result.error(email + ":" + code + "已存在,还未过期"); } boolean b = mailMsg.mail(email); if (b) { return Result.success(" 验证码已发送至邮箱,请注意查收!"); } return Result.error("邮箱不正确或为空!"); } 2.4 注册功能
这里就属于是抛砖引玉,大伙们还有什么更好的想法和扩展呢?
@PostMapping("/register") @ApiOperation("注册接口") public Result register(@RequestBody RegisterDTO registerDTO){ log.info("用户注册:{}", registerDTO); String code = registerDTO.getCode(); log.info("前端输入的验证码{}", code); String eml = registerDTO.getEmail(); log.info("前端的对象为{},邮箱=》{}",registerDTO,eml); String s = redisTemplate.opsForValue().get(eml); log.info("从redis中获取code->{}",s); if (Objects.equals(s, code)) { log.info("验证码正确{}", code); userService.register(registerDTO); return Result.success(MessageConstant.Register_SUCCESS); }else{ return Result.error("验证码错误"); } } 验证码功能大概就是这样了。
