
阅读量:2
1、前往RabbitMQ官网下载往RabbitMQ添加延迟消息的插件
RabbitMQ官网下载插件的网址:https://www.rabbitmq.com/community-plugins.html
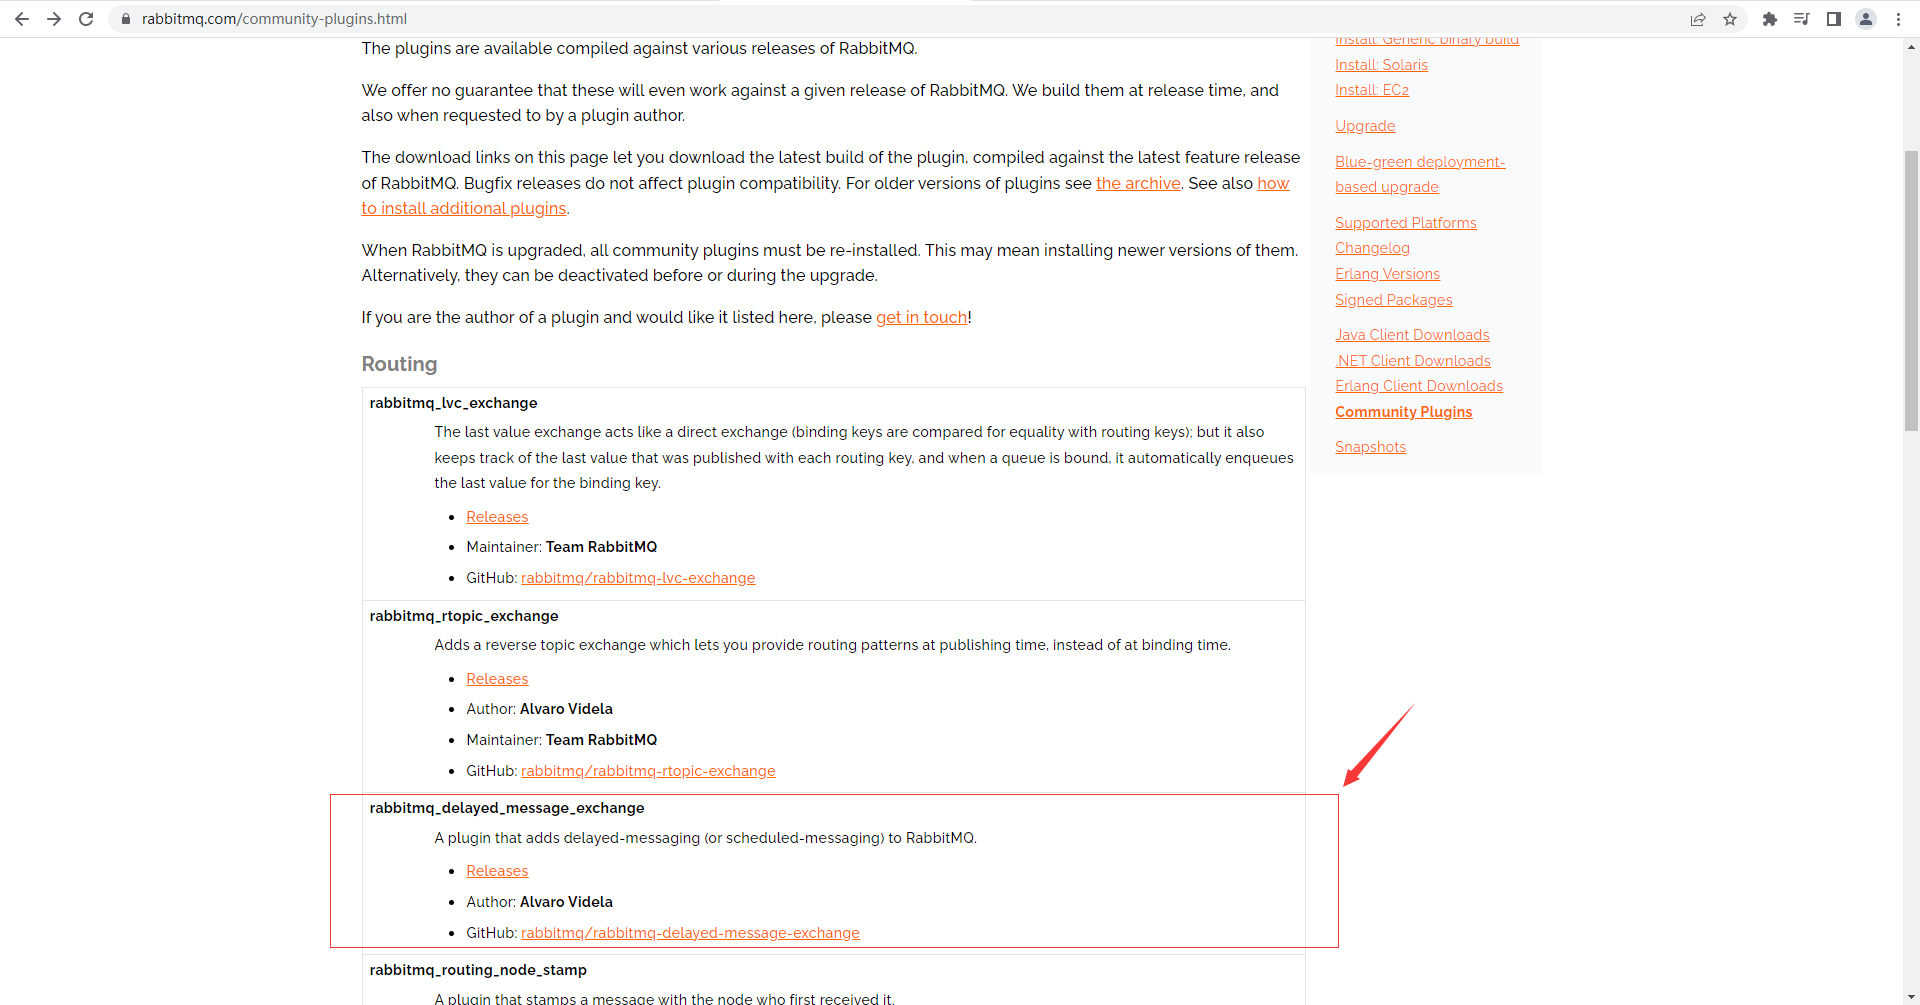
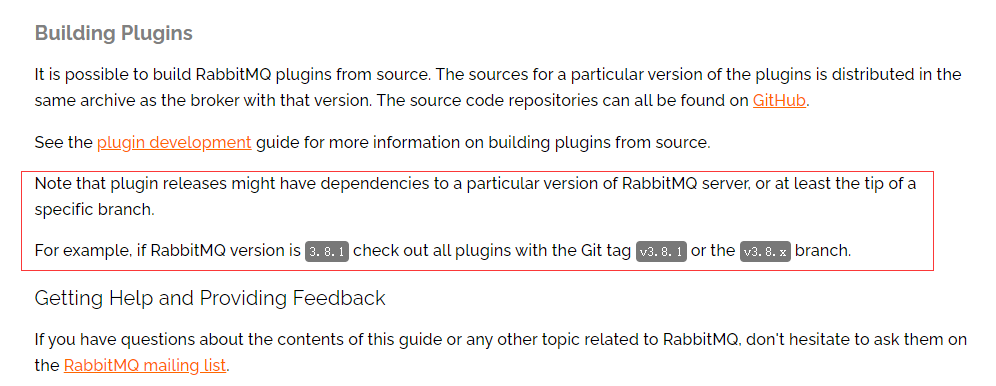
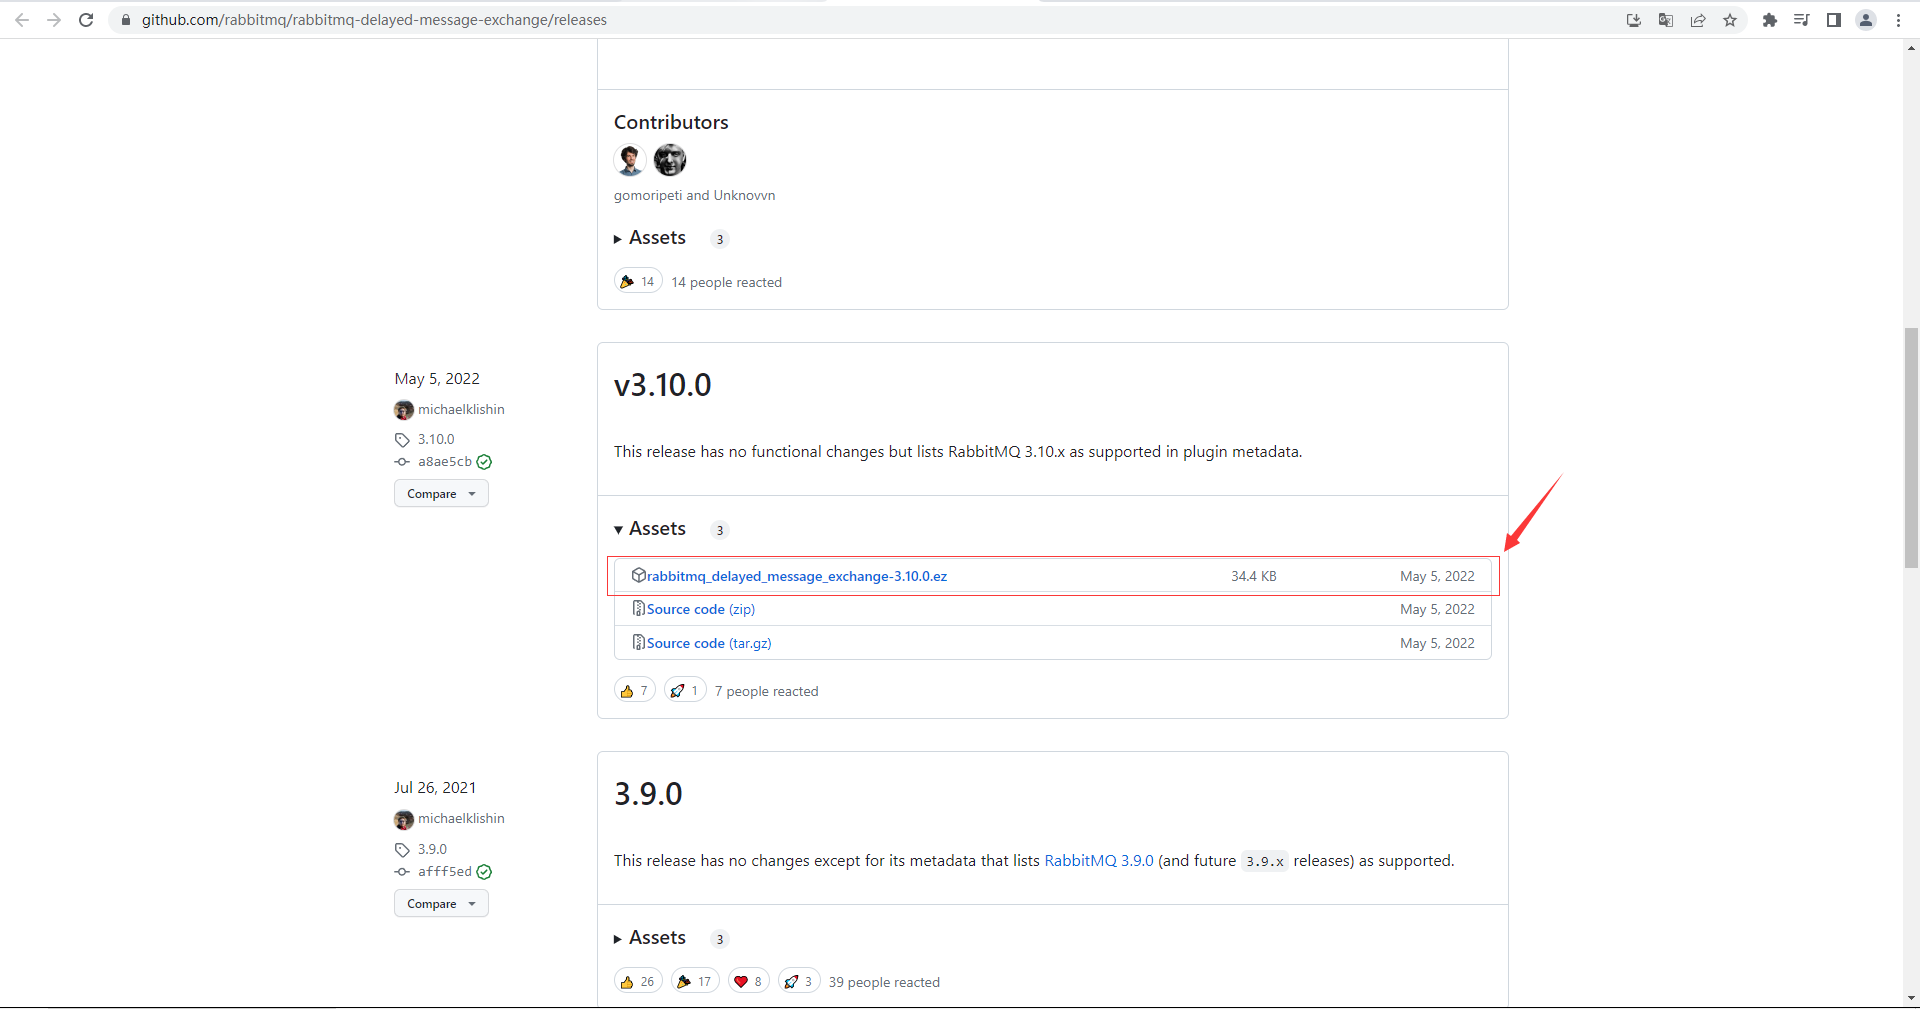
2、下载rabbitmq_delayer_message_exchange插件(注:RabbitMQ是什么版本的,下载的插件就得是什么版本的,得对应上,以下截图为官方文档的对插件版本的要求说明)
![]()
3、把这个插件传输到服务器上

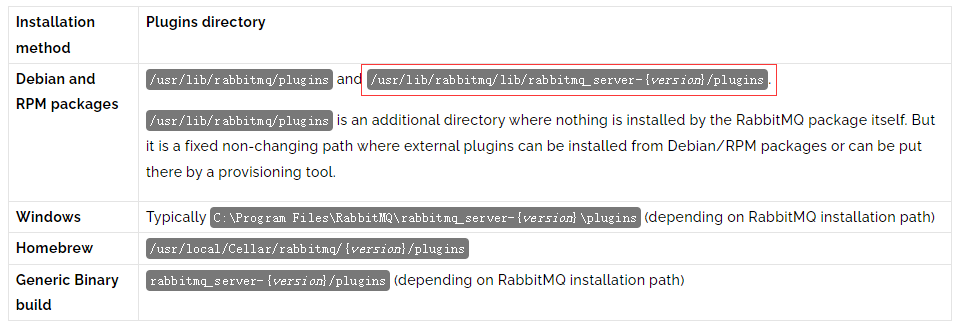
4、根据官网的指示把插件放到RabbitMQ指定的文件夹下
RabbitMQ官网指示安装插件步骤的网址:https://www.rabbitmq.com/installing-plugins.html
我这里安装RabbitMQ的系统是CentOS,所以放在/usr/lib/rabbitmq/lib/rabbitmq_server-3.10.0/plugins这个目录下
5、拷贝插件到指定的目录下
例:
cp rabbitmq_delayed_message_exchange-3.10.0.ez /usr/lib/rabbitmq/lib/rabbitmq_server-3.10.0/plugins/效果图:
![]()

6、安装延迟队列插件
输入以下命令安装延迟队列插件
rabbitmq-plugins enable rabbitmq_delayed_message_exchange效果图:
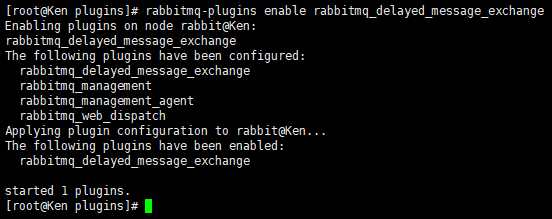
7、重启RabbitMQ
输入以下命令重启RabbitMQ
systemctl restart rabbitmq-server.service效果图:
![]()
8、查看插件是否安装成功
进入RabbitMQ的管理页面,进入Exchange的管理页面,新增Exchange,在Type里面可以看到x-delayed-message的选项,证明延迟队列插件安装成功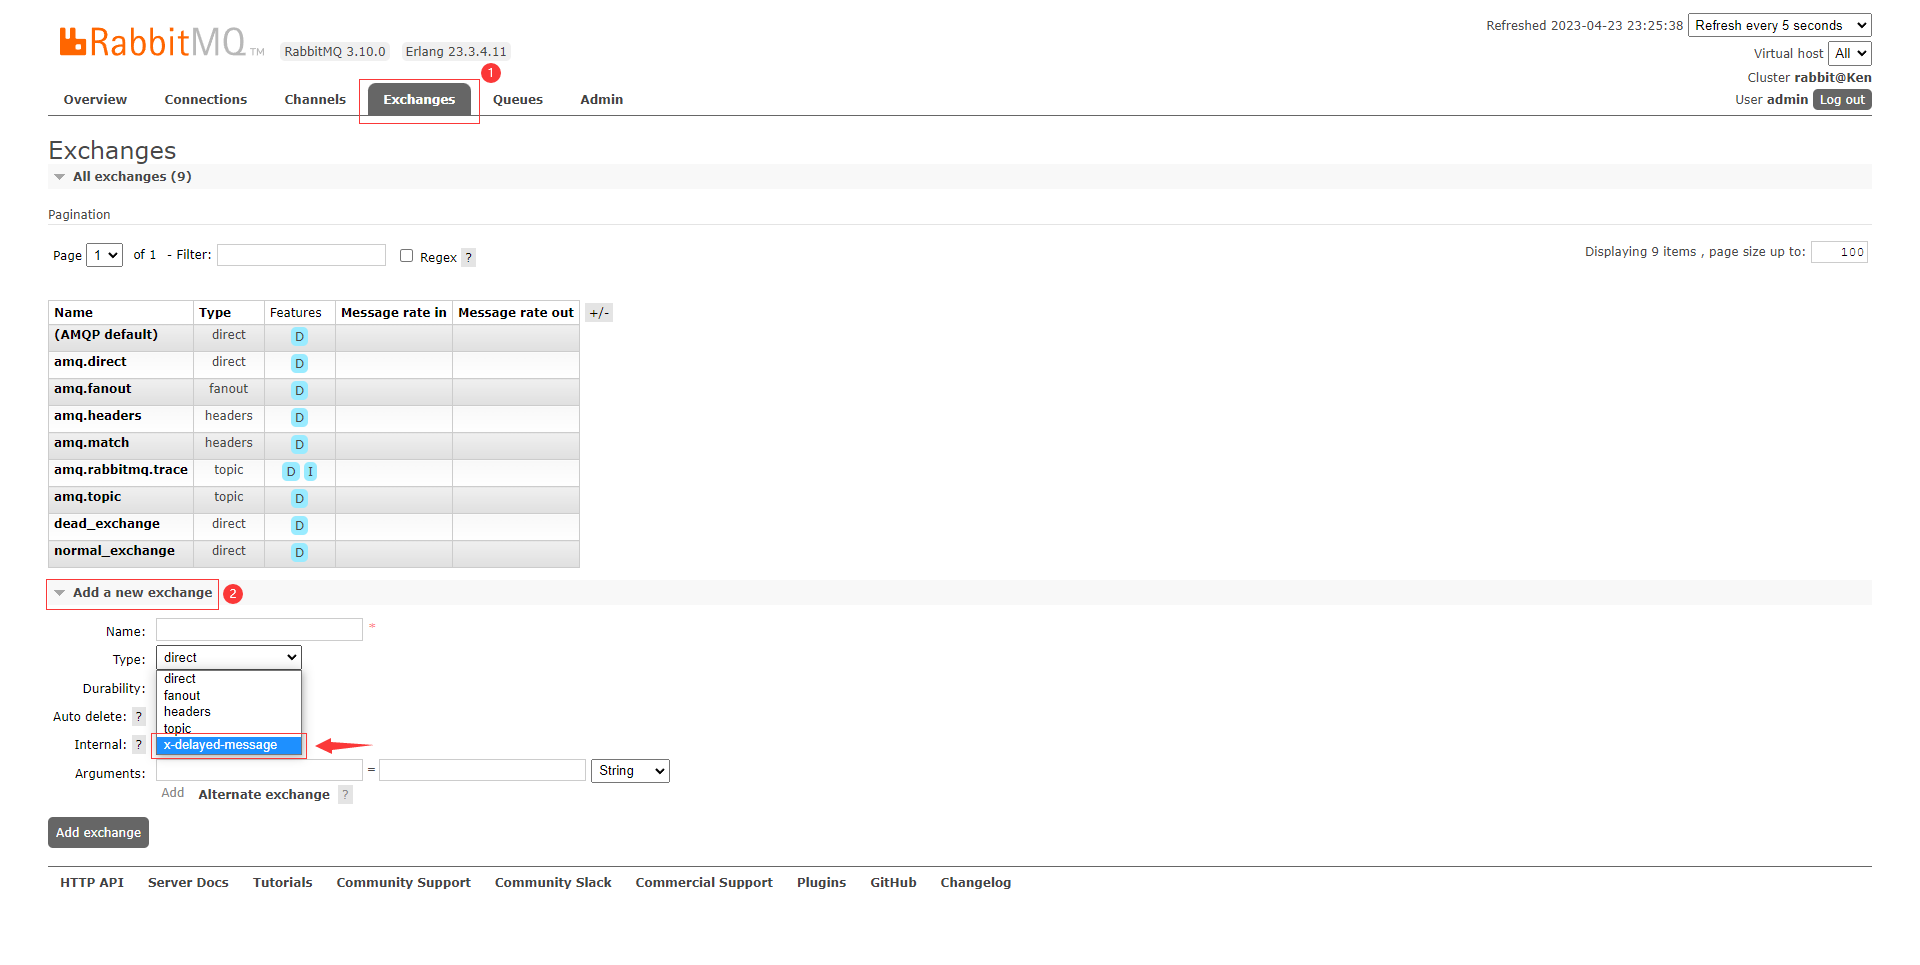
9、基于插件实现延迟队列的原理示意图
原先我们没下插件之前实现延迟队列是基于图下这种方式实现的
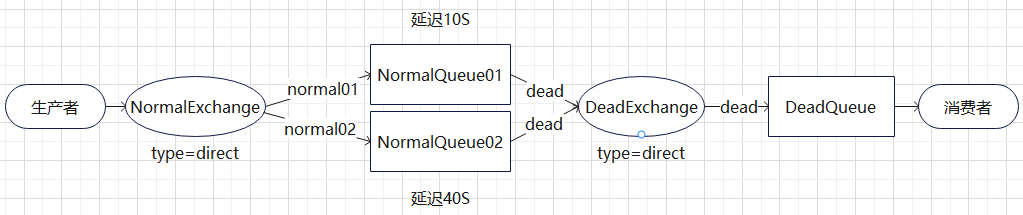
但我们下载插件后就能通过交换机延迟消息的方式来实现消息的延迟了(由步骤8可见,我们验证插件是否安装成功是从Exchange进去的,而不是从Queues进去的)

10、基于插件延迟队列的代码实现
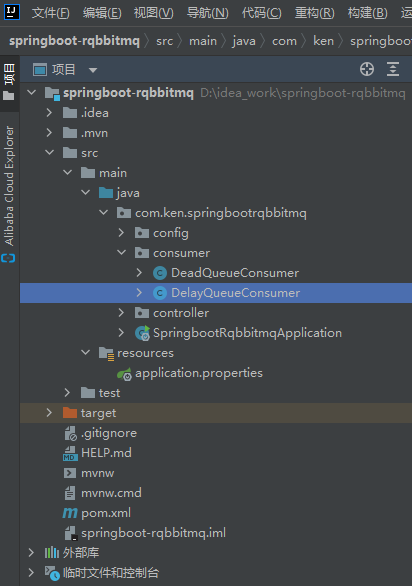
(1)在config包里新建一个名为DelayedQueueConfig的类用于编写配置队列延迟的代码
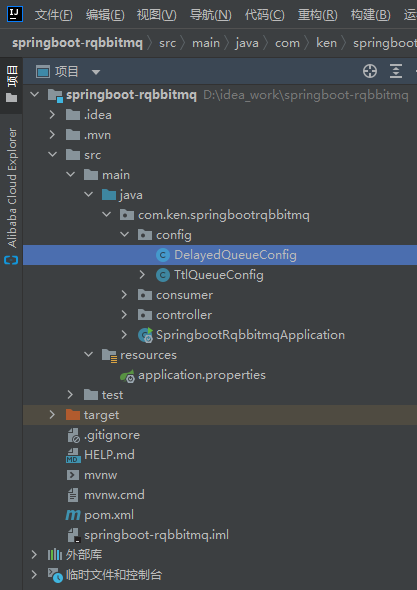
代码如下:
package com.ken.springbootrqbbitmq.config; import org.springframework.amqp.core.*; import org.springframework.beans.factory.annotation.Qualifier; import org.springframework.context.annotation.Bean; import org.springframework.context.annotation.Configuration; import java.util.HashMap; import java.util.Map; @Configuration public class DelayedQueueConfig { //队列 public static final String DELAYED_QUEUE_NAME = "delayed_queue"; //交换机 public static final String DELAYED_EXCHANGE_NAME = "DELAYED_EXCHANGE"; //交换机 public static final String DELAYED_ROUTING_KEY = "delayed"; //声明延迟队列 @Bean public Queue delayedQueue() { return new Queue(DELAYED_QUEUE_NAME); } //声明延迟交换机 @Bean public CustomExchange delayedExchange() { Map<String, Object> arguments = new HashMap<>(3); //设置延迟类型 arguments.put("x-delayed-type","direct"); /** * 声明自定义交换机 * 第一个参数:交换机的名称 * 第二个参数:交换机的类型 * 第三个参数:是否需要持久化 * 第四个参数:是否自动删除 * 第五个参数:其他参数 */ return new CustomExchange(DELAYED_QUEUE_NAME,"x-delayed-message",true,false,arguments); } //绑定队列和延迟交换机 @Bean public Binding delayedQueueBindingDelayedExchange(@Qualifier("delayedQueue") Queue delayedQueue, @Qualifier("delayedExchange") Exchange delayedExchange) { return BindingBuilder.bind(delayedQueue).to(delayedExchange).with(DELAYED_ROUTING_KEY).noargs(); } }(2)在SendMsgController类里写一个接口,让其能往延迟队列里发送消息
代码如下:
package com.ken.springbootrqbbitmq.controller; import com.ken.springbootrqbbitmq.config.DelayedQueueConfig; import lombok.extern.slf4j.Slf4j; import org.springframework.amqp.core.Message; import org.springframework.amqp.rabbit.core.RabbitTemplate; import org.springframework.beans.factory.annotation.Autowired; import org.springframework.web.bind.annotation.GetMapping; import org.springframework.web.bind.annotation.PathVariable; import org.springframework.web.bind.annotation.RequestMapping; import org.springframework.web.bind.annotation.RestController; import java.util.Date; /** * 发送延迟消息 */ @Slf4j @RequestMapping("ttl") @RestController public class SendMsgController { @Autowired(required = false) private RabbitTemplate rabbitTemplate; @GetMapping("/sendMsg/{message}") public void sendMsg(@PathVariable String message) { log.info("当前时间:{},发送一条消息给两个TTL队列:{}",new Date(),message); rabbitTemplate.convertAndSend("normal_exchange","normal01","消息来着ttl为10s的队列:" + message); rabbitTemplate.convertAndSend("normal_exchange","normal02","消息来着ttl为40s的队列:" + message); } @GetMapping("/sendExpirationMsg/{message}/{ttlTime}") public void sendMsg(@PathVariable String message,@PathVariable String ttlTime) { log.info("当前时间:{},发送一条时长{}毫秒的TTL消息给normal03队列:{}", new Date(),ttlTime,message); rabbitTemplate.convertAndSend("normal_exchange","normal03",message,msg -> { //发送消息的时候延迟时长 msg.getMessageProperties().setExpiration(ttlTime); return msg; }); } /** * 给延迟队列发送消息 * @param message * @param delayTime */ @GetMapping("/sendDelayMsg/{message}/{delayTime}") public void sendMsg(@PathVariable String message,@PathVariable Integer delayTime) { log.info("当前时间:{},发送一条时长{}毫秒的消息给延迟队列:{}", new Date(),delayTime,message); rabbitTemplate.convertAndSend(DelayedQueueConfig.DELAYED_QUEUE_NAME,DelayedQueueConfig.DELAYED_ROUTING_KEY,message, msg -> { //发送消息的时候延迟时长 msg.getMessageProperties().setDelay(delayTime); return msg; }); } }(3)在consumer包里新建一个名为DelayQueueConsumer的类用于编写消费延迟队列的消费者代码
效果图:
代码如下:
package com.ken.springbootrqbbitmq.consumer; import com.ken.springbootrqbbitmq.config.DelayedQueueConfig; import lombok.extern.slf4j.Slf4j; import org.springframework.amqp.core.Message; import org.springframework.amqp.rabbit.annotation.RabbitListener; import org.springframework.stereotype.Component; import java.util.Date; /** * 延迟队列消费者 */ @Slf4j @Component public class DelayQueueConsumer { @RabbitListener(queues = DelayedQueueConfig.DELAYED_QUEUE_NAME) private void receiveDelayQueue(Message message) { String msg = new String(message.getBody()); log.info("当前时间{},收到延迟队列的消息",new Date(),msg); } } (4)启动项目,往浏览器输入接口地址和参数,从而调用接口
[1]第一条消息
http://localhost:8080/ttl/sendDelayMsg/我是第一条消息/20000
[2]第二条消息
http://localhost:8080/ttl/sendDelayMsg/我是第二条消息/2000
效果图:
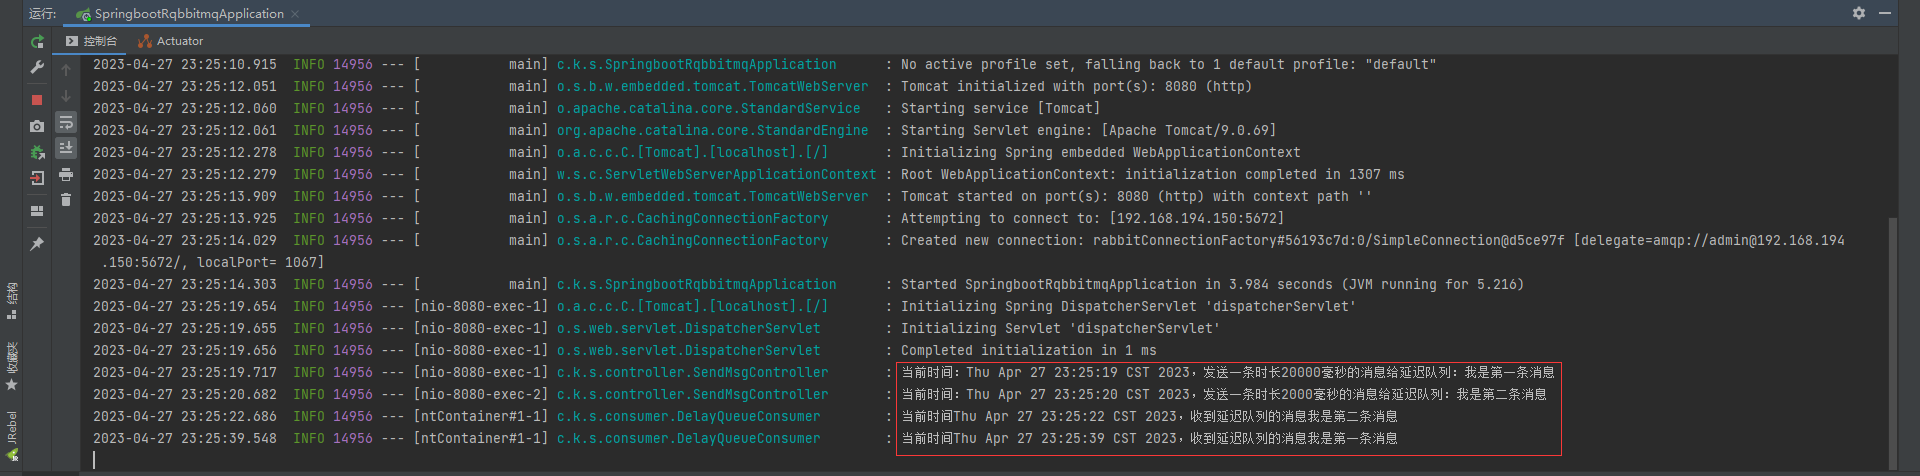
结论:基于测试发现在使用延迟插件的情况下,延迟时间短的消息会被先消费,这证明基于插件的延迟消息达到预期效果
