
阅读量:3
目录
三、把拦截器添加到配置中,相当于SpringMVC时的配置文件干的事儿:
项目配置类
项目中配置的相关代码
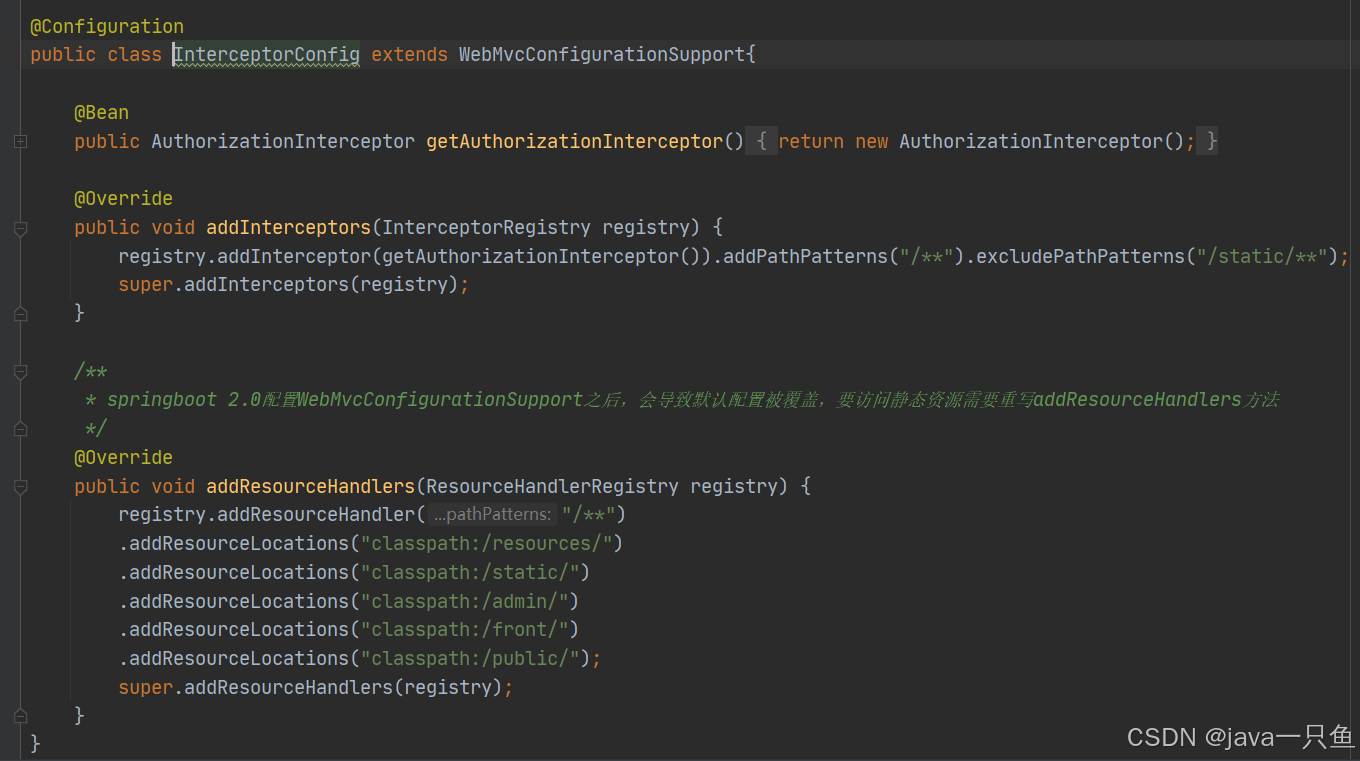
首先定义项目认证授权拦截器 AuthorizationInterceptor 把这个类注册为 bean 使用的是 @Bean注解
其次是重写 addInterceptors方法 将然后将注册的认证授权bean 添加到拦截器的链条当中,设置是所有请求都要过拦截器,出了static下面的静态资源不拦截
然后是重写 addResourceHandlers 这里是对项目的静态资源做定向解析,addResourceHandlers是请求路径.addResourceLocations 是资源的路径
spring Boot 拦截器相关知识
其实spring boot拦截器的配置方式和springMVC差不多,只有一些小的改变需要注意下就ok了。
下面主要介绍两种常用的拦截器:
一、基于URL实现的拦截器:
public class LoginInterceptor extends HandlerInterceptorAdapter{ @Override public boolean preHandle(HttpServletRequest request, HttpServletResponse response, Object handler) throws Exception { String path = request.getServletPath(); if (path.matches(Const.NO_INTERCEPTOR_PATH)) { //不需要的拦截直接过 return true; } else { // 这写你拦截需要干的事儿,比如取缓存,SESSION,权限判断等 System.out.println("===================================="); return true; } } }
关键代码:path.matches(Const.NO_INTERCEPTOR_PATH 就是基于正则匹配的url。
public class Const { public static final String SUCCESS = "SUCCESS"; public static final String ERROR = "ERROR"; public static final String FIALL = "FIALL"; /**********************对象和个体****************************/ public static final String SESSION_USER = "loginedAgent"; // 用户对象 public static final String SESSION_LOGINID = "sessionLoginID"; // 登录ID public static final String SESSION_USERID = "sessionUserID"; // 当前用户对象ID编号 public static final String SESSION_USERNAME = "sessionUserName"; // 当前用户对象ID编号 public static final Integer PAGE = 10; // 默认分页数 public static final String SESSION_URL = "sessionUrl"; // 被记录的url public static final String SESSION_SECURITY_CODE = "sessionVerifyCode"; // 登录页验证码 // 时间 缓存时间 public static final int TIMEOUT = 1800;// 秒 public static final String ON_LOGIN = "/logout.htm"; public static final String LOGIN_OUT = "/toLogout"; // 不验证URL anon:不验证/authc:受控制的 public static final String NO_INTERCEPTOR_PATH =".*/((.css)|(.js)|(images)|(login)|(anon)).*"; }
二、基于注解的拦截器
①创建注解:
/** * 在需要登录验证的Controller的方法上使用此注解 */ @Target({ElementType.METHOD})// 可用在方法名上 @Retention(RetentionPolicy.RUNTIME)// 运行时有效 public @interface LoginRequired { }
②创建拦截器:
public class AuthorityInterceptor extends HandlerInterceptorAdapter{ @Override public boolean preHandle(HttpServletRequest request, HttpServletResponse response, Object handler) throws Exception { // 如果不是映射到方法直接通过 if (!(handler instanceof HandlerMethod)) { return true; } // ①:START 方法注解级拦截器 HandlerMethod handlerMethod = (HandlerMethod) handler; Method method = handlerMethod.getMethod(); // 判断接口是否需要登录 LoginRequired methodmethodAnnotation = method.getAnnotation(LoginRequired.class); // 有 @LoginRequired 注解,需要认证 if (methodAnnotation != null) { // 这写你拦截需要干的事儿,比如取缓存,SESSION,权限判断等 System.out.println("===================================="); return true; } return true; } } 三、把拦截器添加到配置中,相当于SpringMVC时的配置文件干的事儿:
/** * 和springmvc的webmvc拦截配置一样 * @author BIANP */ @Configuration public class WebConfigurer implements WebMvcConfigurer { @Override public void addInterceptors(InterceptorRegistry registry) { // 拦截所有请求,通过判断是否有 @LoginRequired 注解 决定是否需要登录 registry.addInterceptor(LoginInterceptor()).addPathPatterns("/**"); registry.addInterceptor(AuthorityInterceptor()).addPathPatterns("/**"); } @Bean public LoginInterceptor LoginInterceptor() { return new LoginInterceptor(); } @Bean public AuthorityInterceptor AuthorityInterceptor() { return new AuthorityInterceptor(); } } 1、一定要加@Configuration 这个注解,在启动的时候在会被加载。
2、有一些教程是用的“WebMvcConfigurerAdapter”,不过在spring5.0版本后这个类被丢弃了 WebMvcConfigurerAdapter ,虽然还可以用,但是看起来不好。
3、也有一些教程使用的WebMvcConfigurationSupport,我使用后发现,classpath:/META/resources/,classpath:/resources/,classpath:/static/,classpath:/public/不生效。具体可以原因,大家可以看下源码因为:WebMvcAutoConfiguration上有个条件注解:
@ConditionalOnMissingBean(WebMvcConfigurationSupport.class)
所以还是建议使用WebMvcConfigurer, 其实springMVC很多东西,都可以搬到springboot中来使用,只需要把配置文件的模式,改成 对应@Configuration 类就好了。
