目录
Comparable接口
我们像写一个Dog类,类中包含成员变量年龄和名字。来方便以下讲解。
public class Dog { public int age; public String name; @Override public String toString() { return "Dog{" + "age=" + age + ", name='" + name + '\'' + '}'; } } 当我们要对自己的自定义类进行直接比较时会发现不能比较,这是因为这些操作符只能比较基本数据类型。

public static void main(String[] args) { Dog dog1 = new Dog(6,"xiaohei"); Dog dog2 = new Dog(7,"xiaobai"); System.out.println(dog1 > dog2); } 单个比较
如果要实现比较功能,我们就要实现Comparable接口,并将其中的compareTo方法重写,在“继承”时将泛型写为当前类:
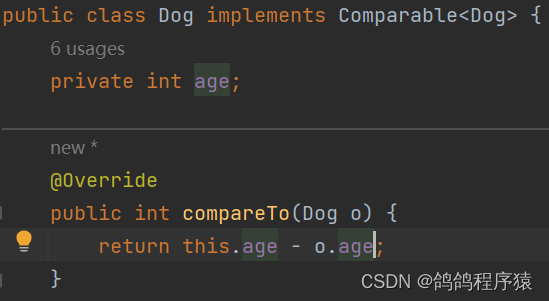
public class Dog implements Comparable<Dog> { private int age; public int compareTo(Dog o) { return this.age - o.age; } } 在实现后就可以在main函数中调用compareTo方法来比较:
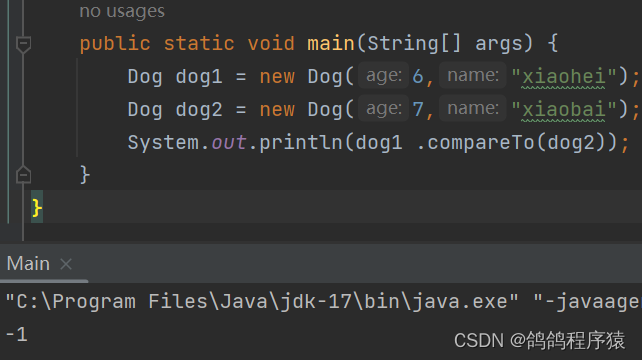
public static void main(String[] args) { Dog dog1 = new Dog(6,"xiaohei"); Dog dog2 = new Dog(7,"xiaobai"); System.out.println(dog1 .compareTo(dog2)); } 从这我们可以看见这个比较方法是通过对象的引用来实现,如果要进行多个对象比较酒不行呢。
多个比较
我们多个比较就可以通过数组来实现,将对象放入数组中进行排序,因为我们实现了Comparable接口,我们调用Arrays.sort()方法就行:
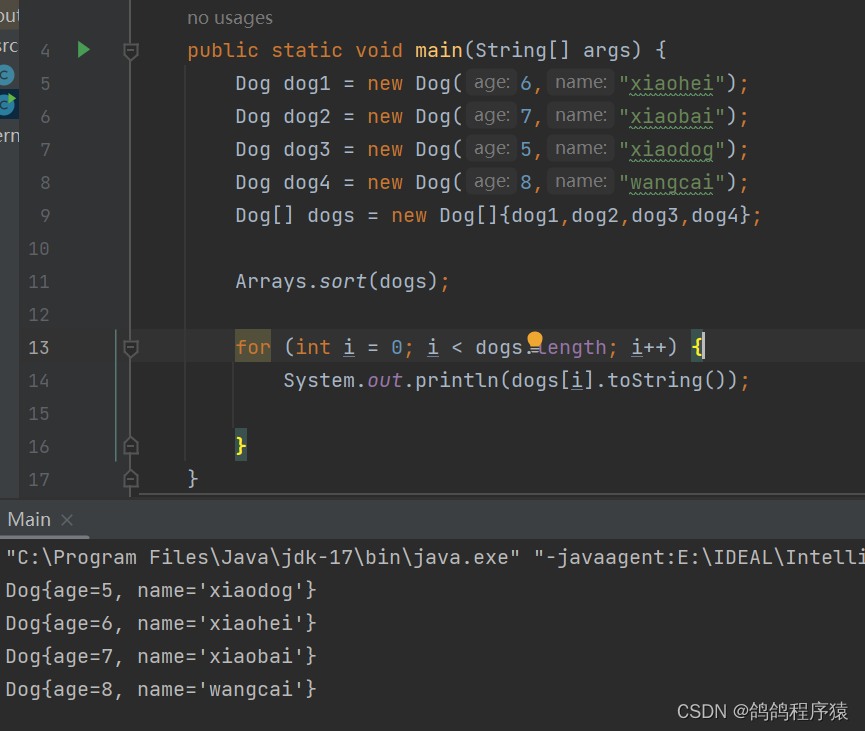
public static void main(String[] args) { Dog dog1 = new Dog(6,"xiaohei"); Dog dog2 = new Dog(7,"xiaobai"); Dog dog3 = new Dog(5,"xiaodog"); Dog dog4 = new Dog(8,"wangcai"); Dog[] dogs = new Dog[]{dog1,dog2,dog3,dog4}; Arrays.sort(dogs); for (int i = 0; i < dogs.length; i++) { System.out.println(dogs[i].toString()); } } Comparator接口
在实现了Compareable接口后我们就直接将比较方法定死了,不能进行比较条件的修改。如果要解决这个问题就可以使用Comparator接口。
我们就在重新写个类来用于Dog类的名字比较,将compare方法重写:
import java.util.Comparator; public class NameComparator implements Comparator<Dog> { @Override public int compare(Dog o1, Dog o2) { return o1.getName().compareTo(o2.getName()); } } 然后再主函数中实例化该对象,再在调用Arrays.sort()的时候将该对象一起传入就可以实现以名字排序,如果是要用年龄排序就按同样方法写出年龄排序的类,然后Arrays.sort()调用的时候传该类就行。
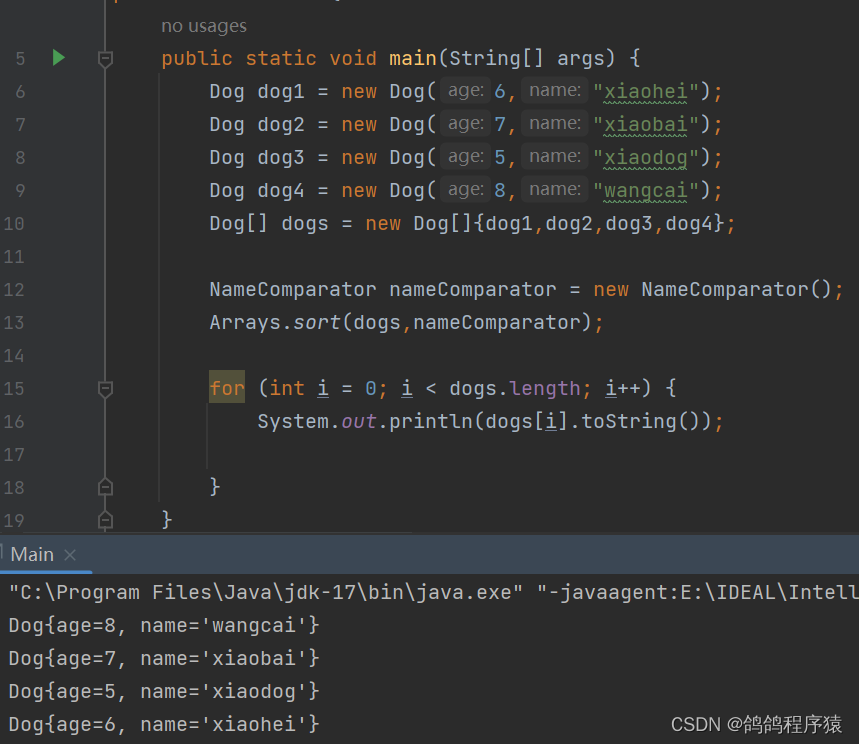
public static void main(String[] args) { Dog dog1 = new Dog(6,"xiaohei"); Dog dog2 = new Dog(7,"xiaobai"); Dog dog3 = new Dog(5,"xiaodog"); Dog dog4 = new Dog(8,"wangcai"); Dog[] dogs = new Dog[]{dog1,dog2,dog3,dog4}; NameComparator nameComparator = new NameComparator(); Arrays.sort(dogs,nameComparator); for (int i = 0; i < dogs.length; i++) { System.out.println(dogs[i].toString()); } } Compareable接口,Comparetor接口,equals方法对比
因为所有类都有一个共同父类Object,Object类中有equals方法,我们将该方法重写也可以比较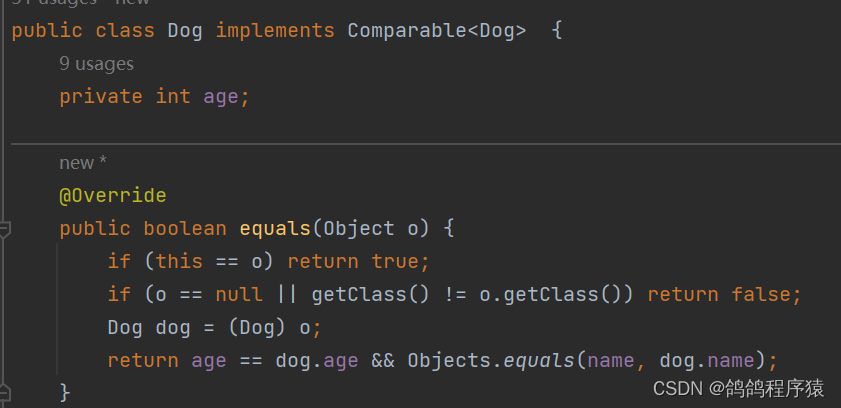
public boolean equals(Object o) { if (this == o) return true; if (o == null || getClass() != o.getClass()) return false; Dog dog = (Dog) o; return age == dog.age && Objects.equals(name, dog.name); } Compareable接口实现的比较会导致比较方法定死了,Comparetor实现的比较器就可以改变比较的方法,两个都返回int数字,而equals方法只是单纯比较是否相等并且返回值是boolean类型
深拷贝与浅拷贝
拷贝
我们要直接将我们的一个对象给到新对象,像基本数据类型那样用=肯定是不行的,这就需要用到clone方法了:
步骤如下
1.在类中重写clone方法,因为clone方法是Object类的,直接重写就行
2.实现Cloneable接口,该接口是一个空接口,但是必须实现该接口来表示当前类可以克隆。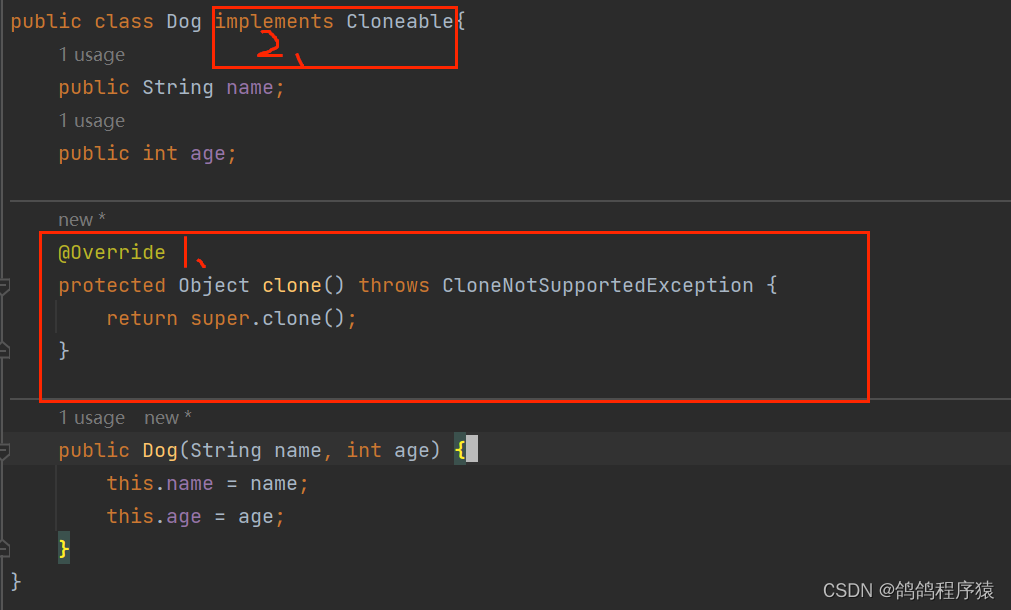
public class Dog implements Cloneable { public String name; public int age; protected Object clone() throws CloneNotSupportedException { return super.clone(); } public Dog(String name, int age) { this.age = age; this.name = name; } } 3.在调用克隆的方法还要实现异常throws CloneNotSupportedException
4.调用clone还用向下转型

public static void main(String[] args) throws CloneNotSupportedException { Dog dog1 = new Dog("xiaohei",6); Dog dog2 = (Dog)dog1.clone(); } 深拷贝浅拷贝区别
二者区别就在与如果当前类还有其他类的对象时,该拷贝是否将该对象一起拷贝。
如果重新开辟了空间拷贝过去了,那就是深拷贝,
如果没有还是指向原来的空间,那就是浅拷贝。
如果要实现深拷贝就在我们类中重写的clone方法中将类中对象也clone,并且类中对象所在类也实现了克隆: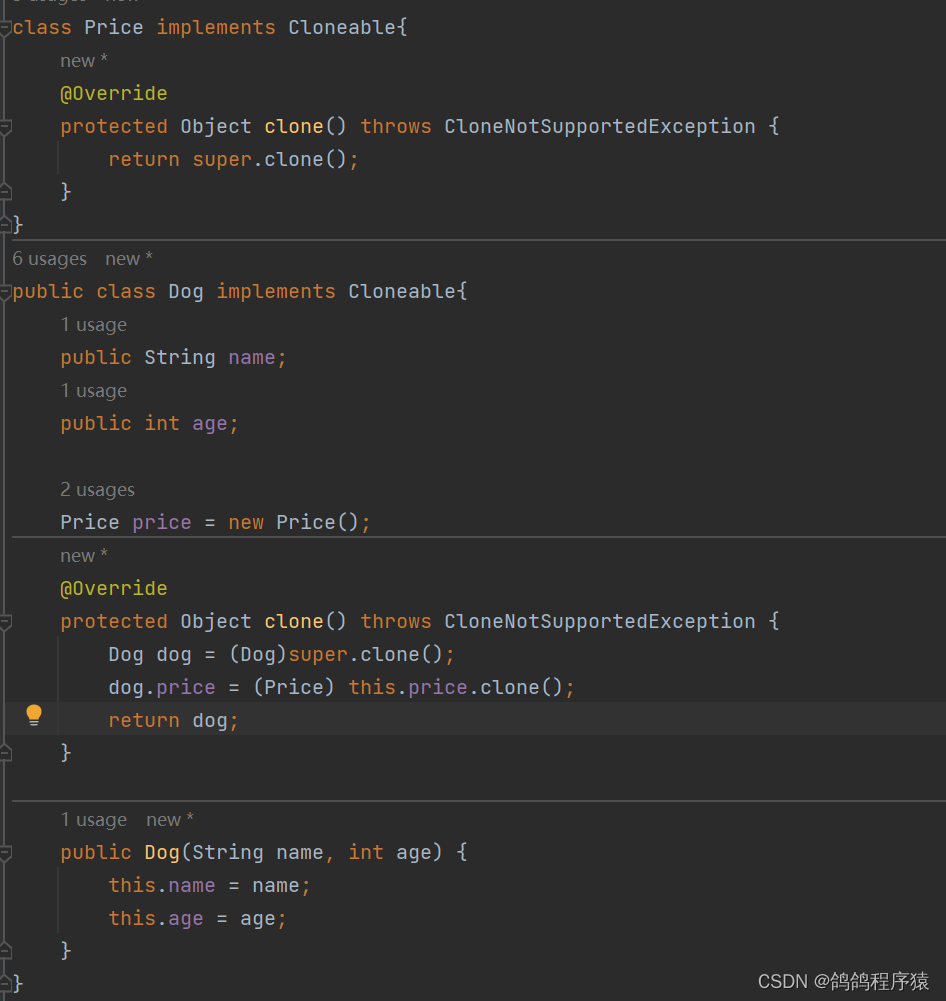
class Price implements Cloneable { protected Object clone() throws CloneNotSupportedException { return super.clone(); } } public class Dog implements Cloneable { public String name; public int age; Price price = new Price(); protected Object clone() throws CloneNotSupportedException { return super.clone(); } public Dog(String name, int age) { this.age = age; this.name = name; } } 