
阅读量:0
NFS共享要求如下:
(1)共享“/mnt/自已姓名的完整汉语拼音”目录,允许XXX网段的计算机访问该共享目录,可进行读写操作。(说明:XXX网段,请根据你的规划,再具体指定)
(2)配置NFS客户端。
注意:本文中省略了虚拟机的创建和克隆,同时运用了外接软件finalshell来进行远程操作,可通过点击链接来进行finalshell远程连接。
1.根据需要在服务端创建相应目录和测试文件,以及设置权限。
服务端(第一台虚拟机):
yum install nfs-utils rpbind -y systemctl start nfs-server systemctl start rpcbind systemctl enable nfs-server systemctl enable rpcbind 

2.编辑exports文件,配置共享目录和相应权限等参数。
mkdir /mnt/pengyuyi vim /etc/exports 
/mnt/pengyuyi 192.168.85.0/24(rw,sync,no_root_squash) 
systemctl restart rpcbind systemctl restart nfs-server systemctl stop firewalld setenforce 0 showmount -e 
3.客户端挂载NFS。
客户端(第二台虚拟机):
yum install nfs-utils -y showmount -e 192.168.85.149 

mkdir /nfs mount -t nfs 192.168.85.149:/mnt/pengyuyi /nfs df -Th 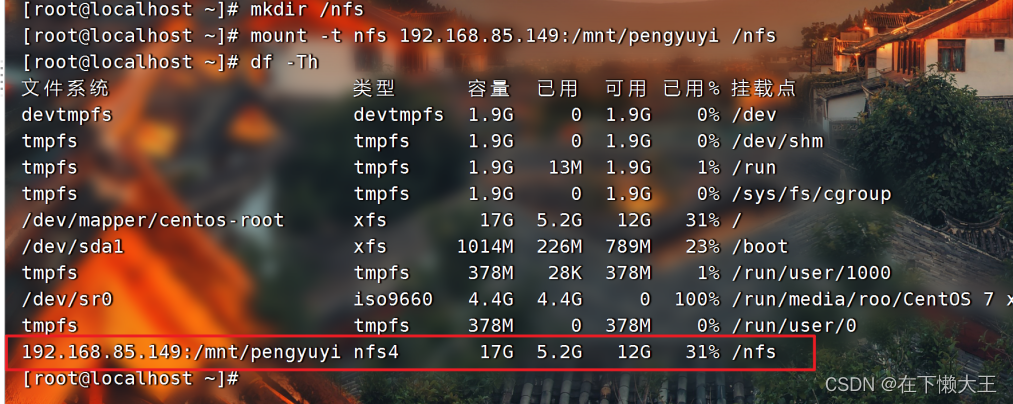
vim /etc/fstab 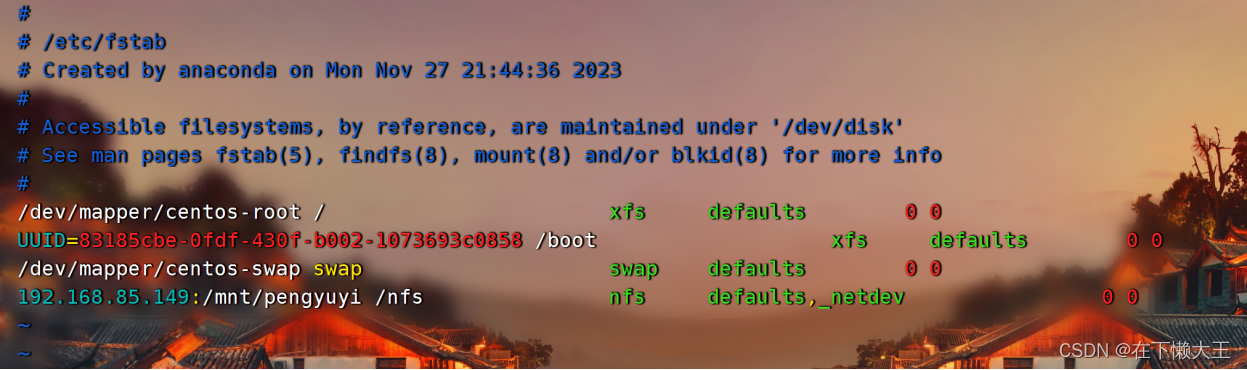
mount -a 
4.完成操作并测试。
在客户端下创建文件,测试服务器是否能共享到:
客户端(第二台虚拟机):
cd /nfs touch test1.txt 
服务端(第一台虚拟机):
cd /mnt/pengyuyi ls 
在客户端下创建文件,测试服务器是否能共享到:
服务端(第一台虚拟机):
vim test1.txt ls cat test.txt 
客户端(第二台虚拟机):
vim test2.txt cat test1.txt 
好了,文章到此就告一段落了,如果本篇博客对您有一定的帮助,麻烦大家记得留言+点赞+收藏喔。创作不易,转载请联系作者!
