阅读量:0
目录
主机规划
| 主机名 | IP | 用途 |
|---|---|---|
| server | 172.16.32.14 | 安装docker服务,OA服务 |
| harbor | 172.16.32.15 | 私有仓库,用于存放私有镜像 |
1.harbor安装(harbor服务器)
1.harbor介绍
Harbor介绍 Docker容器应用的开发和运行离不开可靠的镜像管理,虽然Docker官方也提供了公共的镜像仓库,但是从安全和效率等方面考虑,部署我们私有环境内的Registry也是非常必要的。Harbor是由VMware公司开源的企业级的Docker Registry管理项目,它包括权限管理(RBAC)、LDAP、日志审核、管理界面、自我注册、镜像复制和中文支持等功能。 官网地址:https://github.com/goharbor/harbor 实验环境: 安装harbor的机器,主机名设置成harbor 机器需要的内存至少要2G 2.为harbor生成自签发证书(可选)
[root@192 ~]# hostnamectl set-hostname harbor && bash [root@harbor ~]# mkdir /data/ssl -p [root@harbor ~]# cd /data/ssl/ 生成ca证书: [root@harbor ssl]# openssl genrsa -out ca.key 3072 #生成一个3072位的key,也就是私钥 [root@harbor ssl]# openssl req -new -x509 -days 3650 -key ca.key -out ca.pem You are about to be asked to enter information that will be incorporated into your certificate request. What you are about to enter is what is called a Distinguished Name or a DN. There are quite a few fields but you can leave some blank For some fields there will be a default value, If you enter '.', the field will be left blank. ----- Country Name (2 letter code) [XX]:CN # 需要填写 State or Province Name (full name) []:YunNan # 需要填写 Locality Name (eg, city) [Default City]:KunMing # 需要填写 Organization Name (eg, company) [Default Company Ltd]: Organizational Unit Name (eg, section) []: Common Name (eg, your name or your server's hostname) []: Email Address []: #生成一个数字证书ca.pem,3650表示证书的有效时间是3年 # 生成域名的证书: [root@harbor ssl]# openssl genrsa -out harbor.key 3072 #生成一个3072位的key,也就是私钥 [root@harbor ssl]# openssl req -new -key harbor.key -out harbor.csr You are about to be asked to enter information that will be incorporated into your certificate request. What you are about to enter is what is called a Distinguished Name or a DN. There are quite a few fields but you can leave some blank For some fields there will be a default value, If you enter '.', the field will be left blank. ----- Country Name (2 letter code) [XX]:CN # 需要填写 State or Province Name (full name) []:YunNan # 需要填写 Locality Name (eg, city) [Default City]:KunMing # 需要填写 Organization Name (eg, company) [Default Company Ltd]: Organizational Unit Name (eg, section) []: Common Name (eg, your name or your server's hostname) []:harbor # 需要填写 Email Address []: Please enter the following 'extra' attributes to be sent with your certificate request A challenge password []: An optional company name []: # 签发证书 [root@harbor ssl]# openssl x509 -req -in harbor.csr -CA ca.pem -CAkey ca.key -CAcreateserial -out harbor.pem -days 3650 Signature ok subject=/C=CN/ST=YunNan/L=KunMing/O=Default Company Ltd/CN=harbor Getting CA Private Key [root@harbor ssl]# ls ca.key ca.pem ca.srl harbor.csr harbor.key harbor.pem 3.安装Harbor
1.防火墙策略及selinux关闭 # 关闭防火墙 [root@ harbor~]# systemctl stop firewalld && systemctl disable firewalld # 关闭iptables防火墙 [root@ harbor~]# yum install iptables-services -y #安装iptables # 禁用iptables root@ harbor~]# service iptables stop && systemctl disable iptables # 清空防火墙规则 [root@ harbor~]# iptables -F # 关闭selinux [root@ harbor~]# setenforce 0 [root@harbor~]# sed -i 's/SELINUX=enforcing/SELINUX=disabled/g' /etc/selinux/config # 注意:修改selinux配置文件之后,重启机器,selinux才能永久生效 2.时间服务器安装及时间同步 #配置时间同步 [root@harbor~]# yum install -y ntp ntpdate [root@xianchaomaster1 ~]# ntpdate cn.pool.ntp.org #编写计划任务 [root@harbor~]# crontab -e * */1 * * * /usr/sbin/ntpdate cn.pool.ntp.org # 重启crond服务使配置生效: [root@xianchaomaster1 ~]# systemctl restart crond 3.安装docker-ce # 安装基础软件包 [root@ harbor~]# yum install -y wget net-tools nfs-utils lrzsz gcc gcc-c++ make cmake libxml2-devel openssl-devel curl curl-devel unzip sudo ntp libaio-devel wget vim ncurses-devel autoconf automake zlib-devel python-devel epel-release openssh-server socat ipvsadm conntrack # 配置docker-ce国内yum源(阿里云) [root@ harbor~]# yum-config-manager --add-repo http://mirrors.aliyun.com/docker-ce/linux/centos/docker-ce.repo # 安装docker依赖包 [root@ harbor~]# yum install -y yum-utils device-mapper-persistent-data lvm2 # 安装docker-ce [root@ harbor~]# yum install docker-ce -y # 启动docker服务 [root@ harbor~]# systemctl start docker && systemctl enable docker # 查看docker运行状态 [root@harbor ~]# systemctl status docker # 查看Docker 版本信息 [root@ harbor~]# docker version 4.内核参数修改 # 开启包转发功能和修改内核参数 内核参数修改:br_netfilter模块用于将桥接流量转发至iptables链,br_netfilter内核参数需要开启转发。 [root@ harbor~]# modprobe br_netfilter [root@ harbor~]# cat > /etc/sysctl.d/docker.conf <<EOF net.bridge.bridge-nf-call-ip6tables = 1 net.bridge.bridge-nf-call-iptables = 1 net.ipv4.ip_forward = 1 EOF # 重新加载配置文件 [root@harbor ~]# sysctl -p /etc/sysctl.d/docker.conf #重启docker [root@harbor ~]# systemctl restart docker # 配置镜像加速器--阿里云镜像加速器地址可登录阿里云-容器镜像服务-镜像工具-镜像加速器获取 [root@docker ~]# vim /etc/docker/daemon.json { "registry-mirrors":["https://axcmsqgw.mirror.aliyun.com","https://registry.docker-cn.com","https://docker.mirrors.ustc.edu.cn","https://dockerhub.azk8s.cn","http://hub-mirror.c.163.com"], "insecure-registries": ["172.16.32.15"] } # 重新加载配置文件,重启docker [root@harbor ~]# systemctl daemon-reload && systemctl restart docker 5.安装harbor # 创建安装目录 [root@harbor ~]# mkdir -p /data/install [root@harbor ~]# cd /data/install/ # 把harbor的离线包harbor-offline-installer-v2.3.0-rc3.tgz上传到该目录 # 下载harbor离线包的地址:https://github.com/goharbor/harbor/releases/download/v2.3.0-rc3/harbor-offline-installer-v2.3.0-rc3.tgz # 解压并修改配置文件: [root@harbor install]# tar -zxvf harbor-offline-installer-v2.3.0-rc3.tgz [root@harbor install]# cd harbor [root@harbor harbor]# cp harbor.yml.tmpl harbor.yml [root@harbor harbor]# vim harbor.yml # 修改配置位置配置: hostname: harbor #修改hostname,跟上面签发的证书域名保持一致 若执行了第二步,则需修改证书文件地址 #协议用https # certificate: /data/ssl/harbor.pem # private_key: /data/ssl/harbor.key # 安装docker-compose # 上传docker-compose-Linux-x86_64文件到harbor机器 # 下载地址:https://github.com/docker/compose/releases/download/v2.20.3/docker-compose-linux-x86_64 [root@harbor harbor]# mv docker-compose-Linux-x86_64 /usr/bin/docker-compose [root@harbor harbor]# chmod +x /usr/bin/docker-compose # 注: docker-compose项目是Docker官方的开源项目,负责实现对Docker容器集群的快速编排。Docker-Compose的工程配置文件默认为docker-compose.yml,Docker-Compose运行目录下的必要有一个docker-compose.yml。docker-compose可以管理多个docker实例。 [root@harbor install]# cd /data/install/harbor [root@harbor harbor]# ./install.sh 看到下面内容,说明安装成功: Harbor has been installed and started successfully. # 注:harbor默认的账号密码:admin/Harbor12345 # 扩展: # 如何停掉harbor: [root@harbor harbor]# cd /data/install/harbor [root@harbor harbor]# docker-compose stop # 如何启动harbor: [root@harbor harbor]# cd /data/install/harbor [root@harbor harbor]# docker-compose start 4.Harbor使用
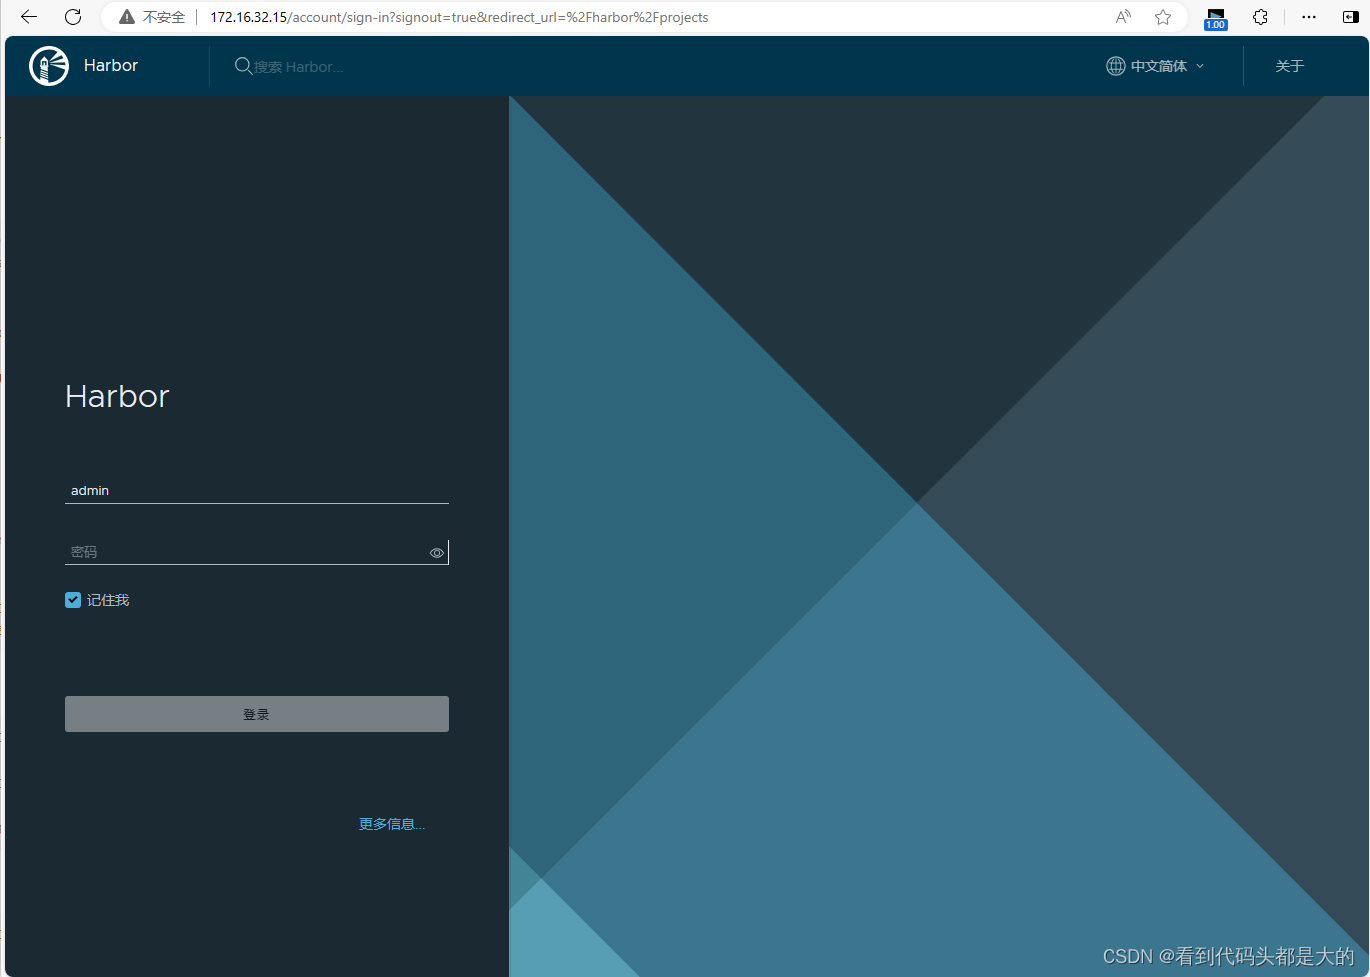
访问地址:http://172.16.32.15/
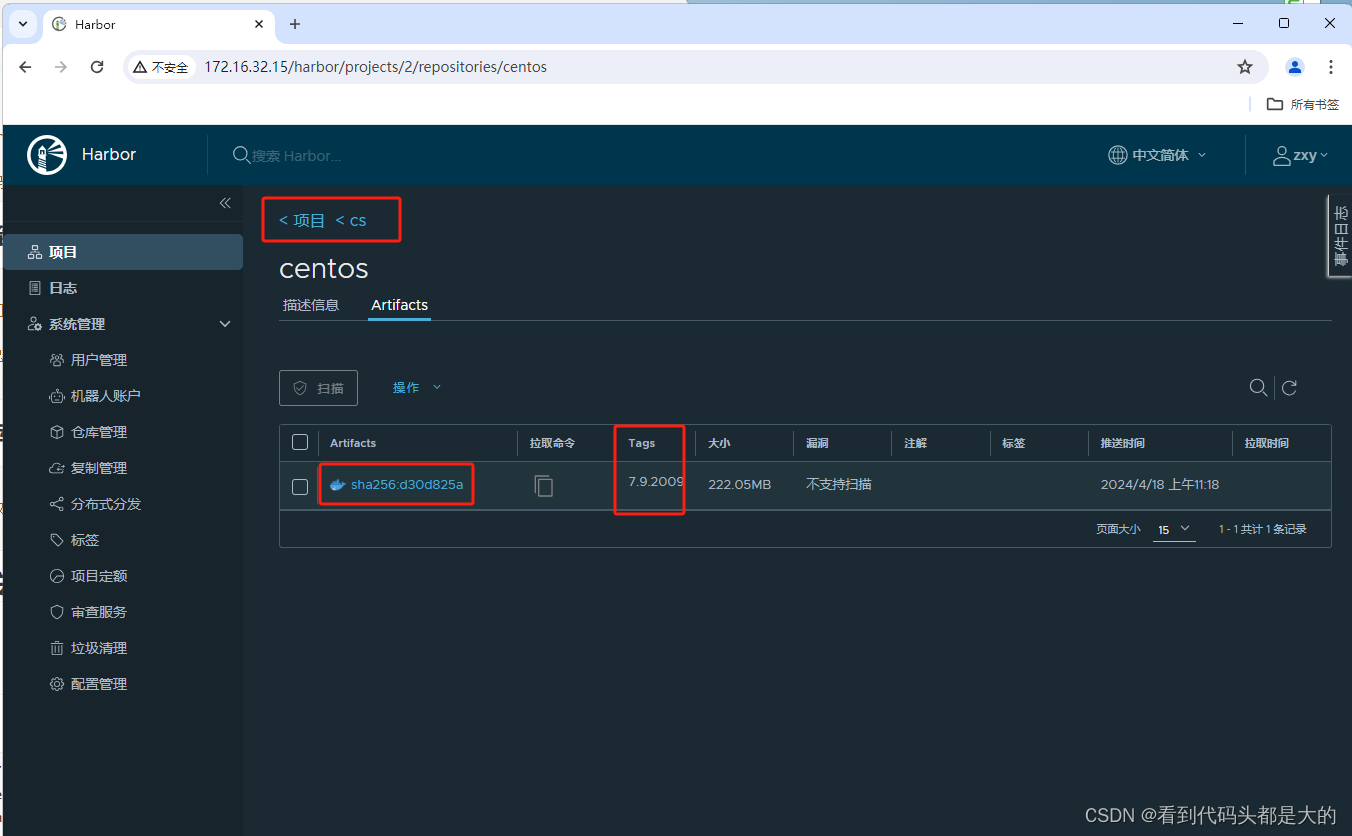
创建项目、用户(将用户设置为管理员)、并将用户添加进项目中
2.宿主机docker安装(server服务器)
1. 设置主机名
# 主机名设置 [root@192 ~]# hostnamectl set-hostname server && bash 2. 安装需要的软件包
yum-util 提供yum-config-manager功能,另外两个是devicemapper驱动依赖的
# 依赖安装 [root@server ~]# yum install -y yum-utils [root@server ~]# yum install -y device-mapper-persistent-data lvm2 3. 设置yum源
# 配置docker-yum源 [root@server ~]# yum-config-manager --add-repo http://mirrors.aliyun.com/docker-ce/linux/centos/docker-ce.repo [root@server ~]# yum clean all [root@server ~]# yum makecache 4. 查看docker版本
所有仓库中所有docker版本,并选择特定版本安装
# 查询是否存在对应版本 [root@server ~]# yum provides docker-ce docker-ce-cli | grep 20.10.14 # 或 [root@server ~]# yum list docker-ce --showduplicates | sort -r 卸载
[root@server ~]# yum remove docker \ docker-client \ docker-client-latest \ docker-common \ docker-latest \ docker-latest-logrotate \ docker-logrotate \ docker-engine 5. 安装Docker
命令:yum install docker-ce-版本号,我选的是20.10.14.ce
# 安装指定版本 [root@server ~]# yum -y install docker-ce-20.10.14 docker-ce-cli-20.10.14 containerd.io # 已经安装的情况下降级安装: [root@server ~]# yum downgrade --setopt=obsoletes=0 -y docker-ce-19.03.5 docker-ce-cli-19.03.5 containerd.io #不带版本安装,默认为最新 [root@server ~]# yum install docker 6. 启动Docker
命令:systemctl start docker,然后加入开机启动
[root@server ~]# systemctl start docker [root@server ~]# systemctl enable docker 7. 验证安装是否成功
有client和service两部分表示docker安装启动都成功了
[root@server ~]# docker version Client: Docker Engine - Community Version: 20.10.14 API version: 1.41 Go version: go1.16.15 Git commit: a224086 Built: Thu Mar 24 01:49:57 2022 OS/Arch: linux/amd64 Context: default Experimental: true Cannot connect to the Docker daemon at unix:///var/run/docker.sock. Is the docker daemon running? [root@server ~]# docker -v Docker version 20.10.14, build a224086 3.宿主机镜像操作(server服务器)
1. 拉取基础镜像
#指定版本拉取 [root@server ~]# docker pull centos:7.9.2009 7.9.2009: Pulling from library/centos 2d473b07cdd5: Pull complete Digest: sha256:be65f488b7764ad3638f236b7b515b3678369a5124c47b8d32916d6487418ea4 Status: Downloaded newer image for centos:7.9.2009 docker.io/library/centos:7.9.2009 # 不指定版本拉取 [root@server ~]# docker pull nginx # 查看拉取的镜像 [root@server ~]# docker images REPOSITORY TAG IMAGE ID CREATED SIZE nginx latest 2ac752d7aeb1 34 hours ago 188MB centos 7.9.2009 eeb6ee3f44bd 2 years ago 204MB 2. 启动基础镜像
# 启动镜像 [root@server ~]# docker run --name centos -itd centos:7.9.2009 /bin/bash 614dfb6b3eaf453a9a1106e4b665fc0d4105a6eb8f237d5f01df2c7cb09094f4 # 显示的结果为容器ID 3. 进入基础镜像
[root@server ~]# docker exec -it 容器ID /bin/bash [root@4665ba0cf761 /]# # 进入之后,显示主机名为容器ID前几位 4. 查询可用的JDK版本
[root@4665ba0cf761 /]# yum search java | grep jdk 5. 根据查询的镜像进行JDK安装
#这里用java-1.8.0-openjdk.x86_64 [root@4665ba0cf761 /]# yum -y install java-1.8.0-openjdk.x86_64 6. 测试jdk是否安装成功
[root@4665ba0cf761 /]# java -version openjdk version "1.8.0_362" OpenJDK Runtime Environment (build 1.8.0_362-b08) OpenJDK 64-Bit Server VM (build 25.362-b08, mixed mode) 7. 退出镜像并生成新镜像
[root@4665ba0cf761 /]# exit [root@server ~]# docker commit 4665ba0cf761 centos:7.9.2009.1 sha256:fdbe61a544353ac49f403e040c7e0d623b5e7d3d8e6ac5e29b24e6858091c99b -- 4665ba0cf761 容器ID 8. 验证镜像情况
[root@server ~]# docker images REPOSITORY TAG IMAGE ID CREATED SIZE centos 7.9.2009.1 fdbe61a54435 18 seconds ago 606MB centos 7.9.2009 eeb6ee3f44bd 18 months ago 204MB 4.宿主机使用harbor(server服务器)
1.宿主机如何使用harbor
# 1.在docker服务器上,修改配置文件daemon.json [root@docker ~]# cat /etc/docker/daemon.json { "registry-mirrors":["https://axcmsqgw.mirror.aliyun.com","https://registry.docker-cn.com","https://docker.mirrors.ustc.edu.cn","https://dockerhub.azk8s.cn","http://hub-mirror.c.163.com"], "insecure-registries": ["172.16.32.15","harbor"] } # "insecure-registries": ["172.16.32.15","harbor"]中配置的信息为harbor的服务器IP和主机名 # 2.使配置生效 [root@docker ~]# systemctl daemon-reload && systemctl restart docker # 3.配置本地域名解析 [root@server ~]# cat /etc/hosts 127.0.0.1 localhost localhost.localdomain localhost4 localhost4.localdomain4 ::1 localhost localhost.localdomain localhost6 localhost6.localdomain6 172.16.32.15 harbor # 4.使用docker login登入私有仓库 [root@server ~]# docker login 172.16.32.15 # 输入用户和密码,显示Login Succeeded表示登录成功 2.上传镜像到私有仓库
[root@docker ~]# docker login 172.16.32.15 #把tomcat镜像打标签 [root@docker ~]# docker tag centos:7.9.2009.1 172.16.32.15/cs/centos:7.9.2009.1 # 把容器上传进私有仓库 [root@docker ~]# docker push 172.16.32.15/cs/centos:7.9.2009.1 3.从私有仓库拉取镜像
[root@docker ~]# docker login 172.16.32.15 # 从私有仓库拉取镜像 # 将本地 [root@docker ~]# docker pull 172.16.32.15/cs/centos:7.9.2009.1 
